2 weeks ago me and Hamza had decided to play Star Wars X-Wing at club night. I brought the whole collection and we would see what we would play then and there. After a bit of pondering we decided to try the ‘point of no return’ missions that comes with the Tantive IV model. Hamza had never played with huge ships before and I had never tried the campaign. First we checked if we had all the required models for this campaign. On the first page of the mission booklet there is a list of models you will need to play the campaign. Check this before starting, nothing is more frustrating than finding out halfway that you can not continue the missions because you miss some of the required models. There is also a campaign progress sheet that you can fill in after each mission. Photocopy that before using so you can use it more than once.
The campaign follows a CR90 (Tantive) ship which has accepted some contraband shipment on board to be taken to the Rebel Alliance. And as could be expected, the Empire starts chasing the damn thing around. There is more narrative than this off course, and better written in the booklet itself. It adds some nice flavor to the battles which makes it a welcome change from the straight head on 100-points squads that face each other.
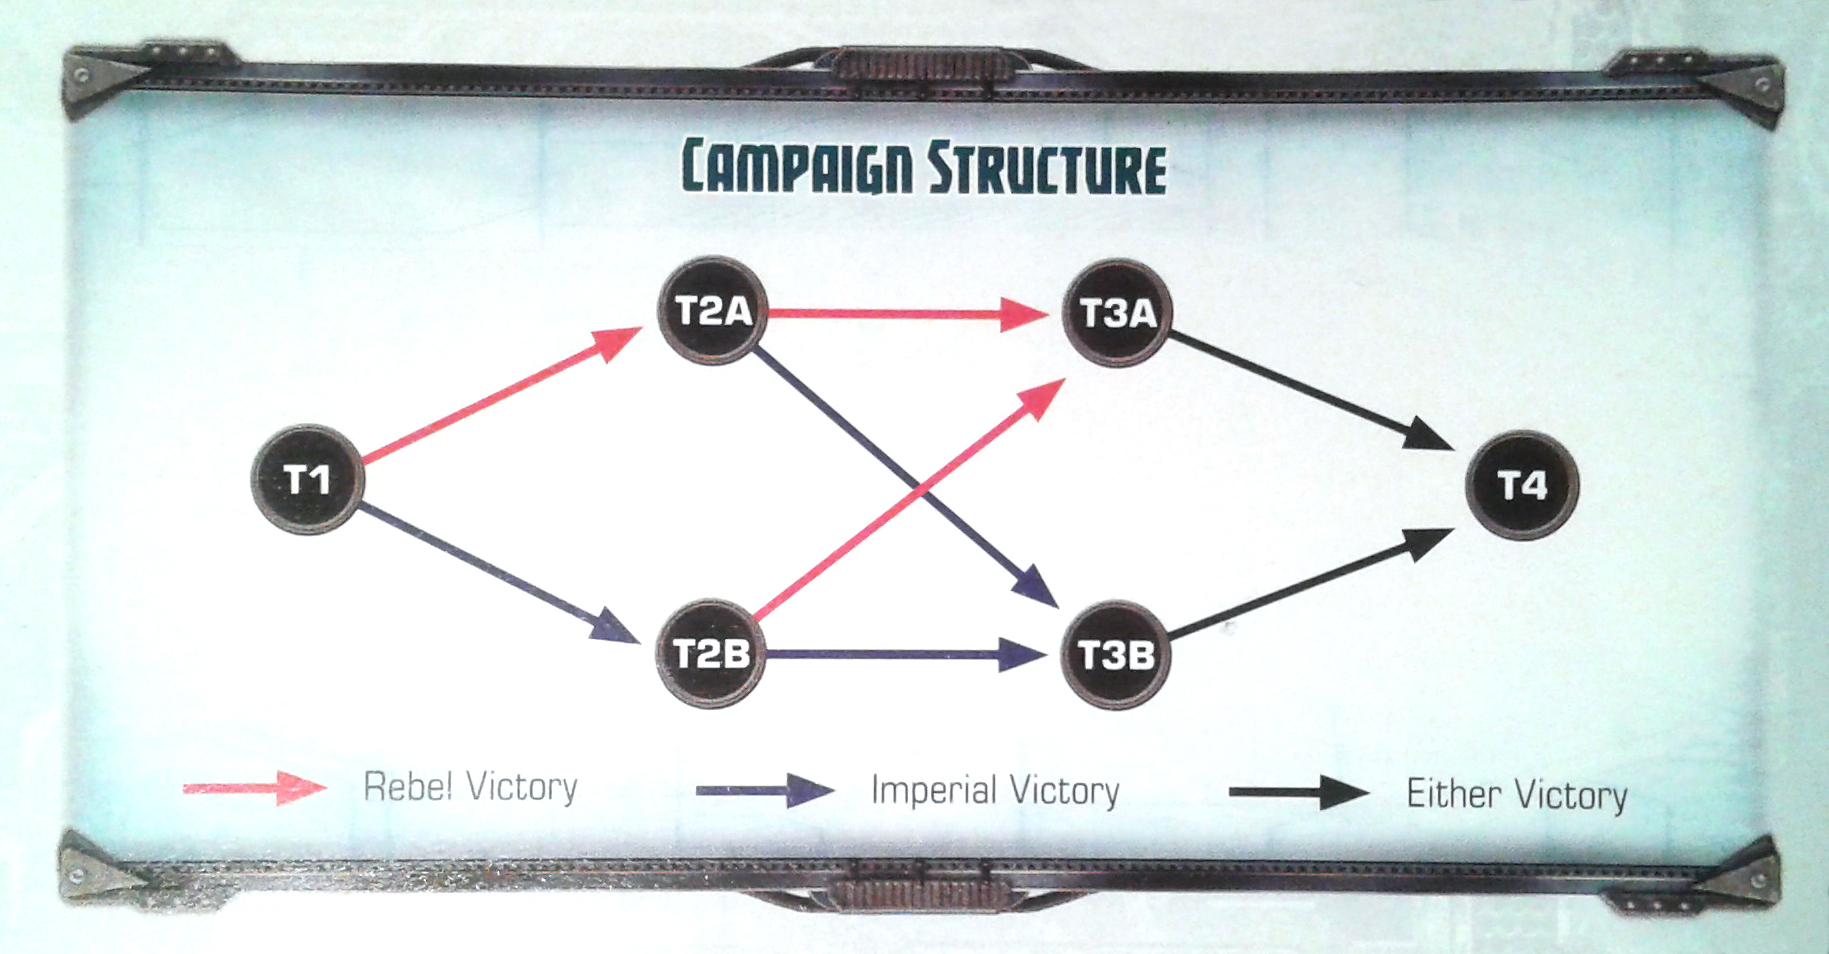
The outcome of each mission determines which scenario will be played next. So the storyline follows a different course when a mission is won by the Rebels or by the Empire.
So Hamza took control of the CR90 and I would play the Empire. Each mission the CR90 has the same upgrade cards. You get 2 ‘single turbo lasers’, 1 ‘gunnery team’ and 1 ‘sensor team’ to the fore section and 1 ‘quad laser laser cannons’, 1 ‘engineering team’ and 1 ’tibana gas supplies’ to the aft section of the ship. There are some unique pilots and upgrade cards that may not be used during the whole campaign and each mission has a list of specific models and cards that must be fielded along side a certain amount of points you can spend as you see fit.
The player who eventually wins mission T4 wins the campaign.
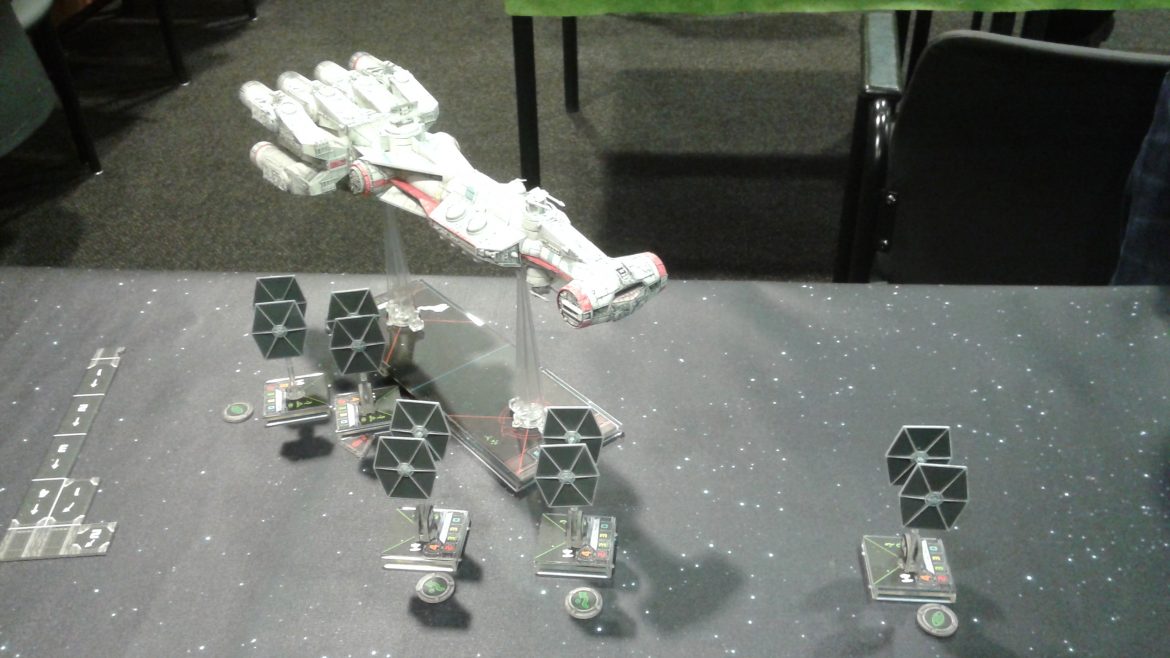
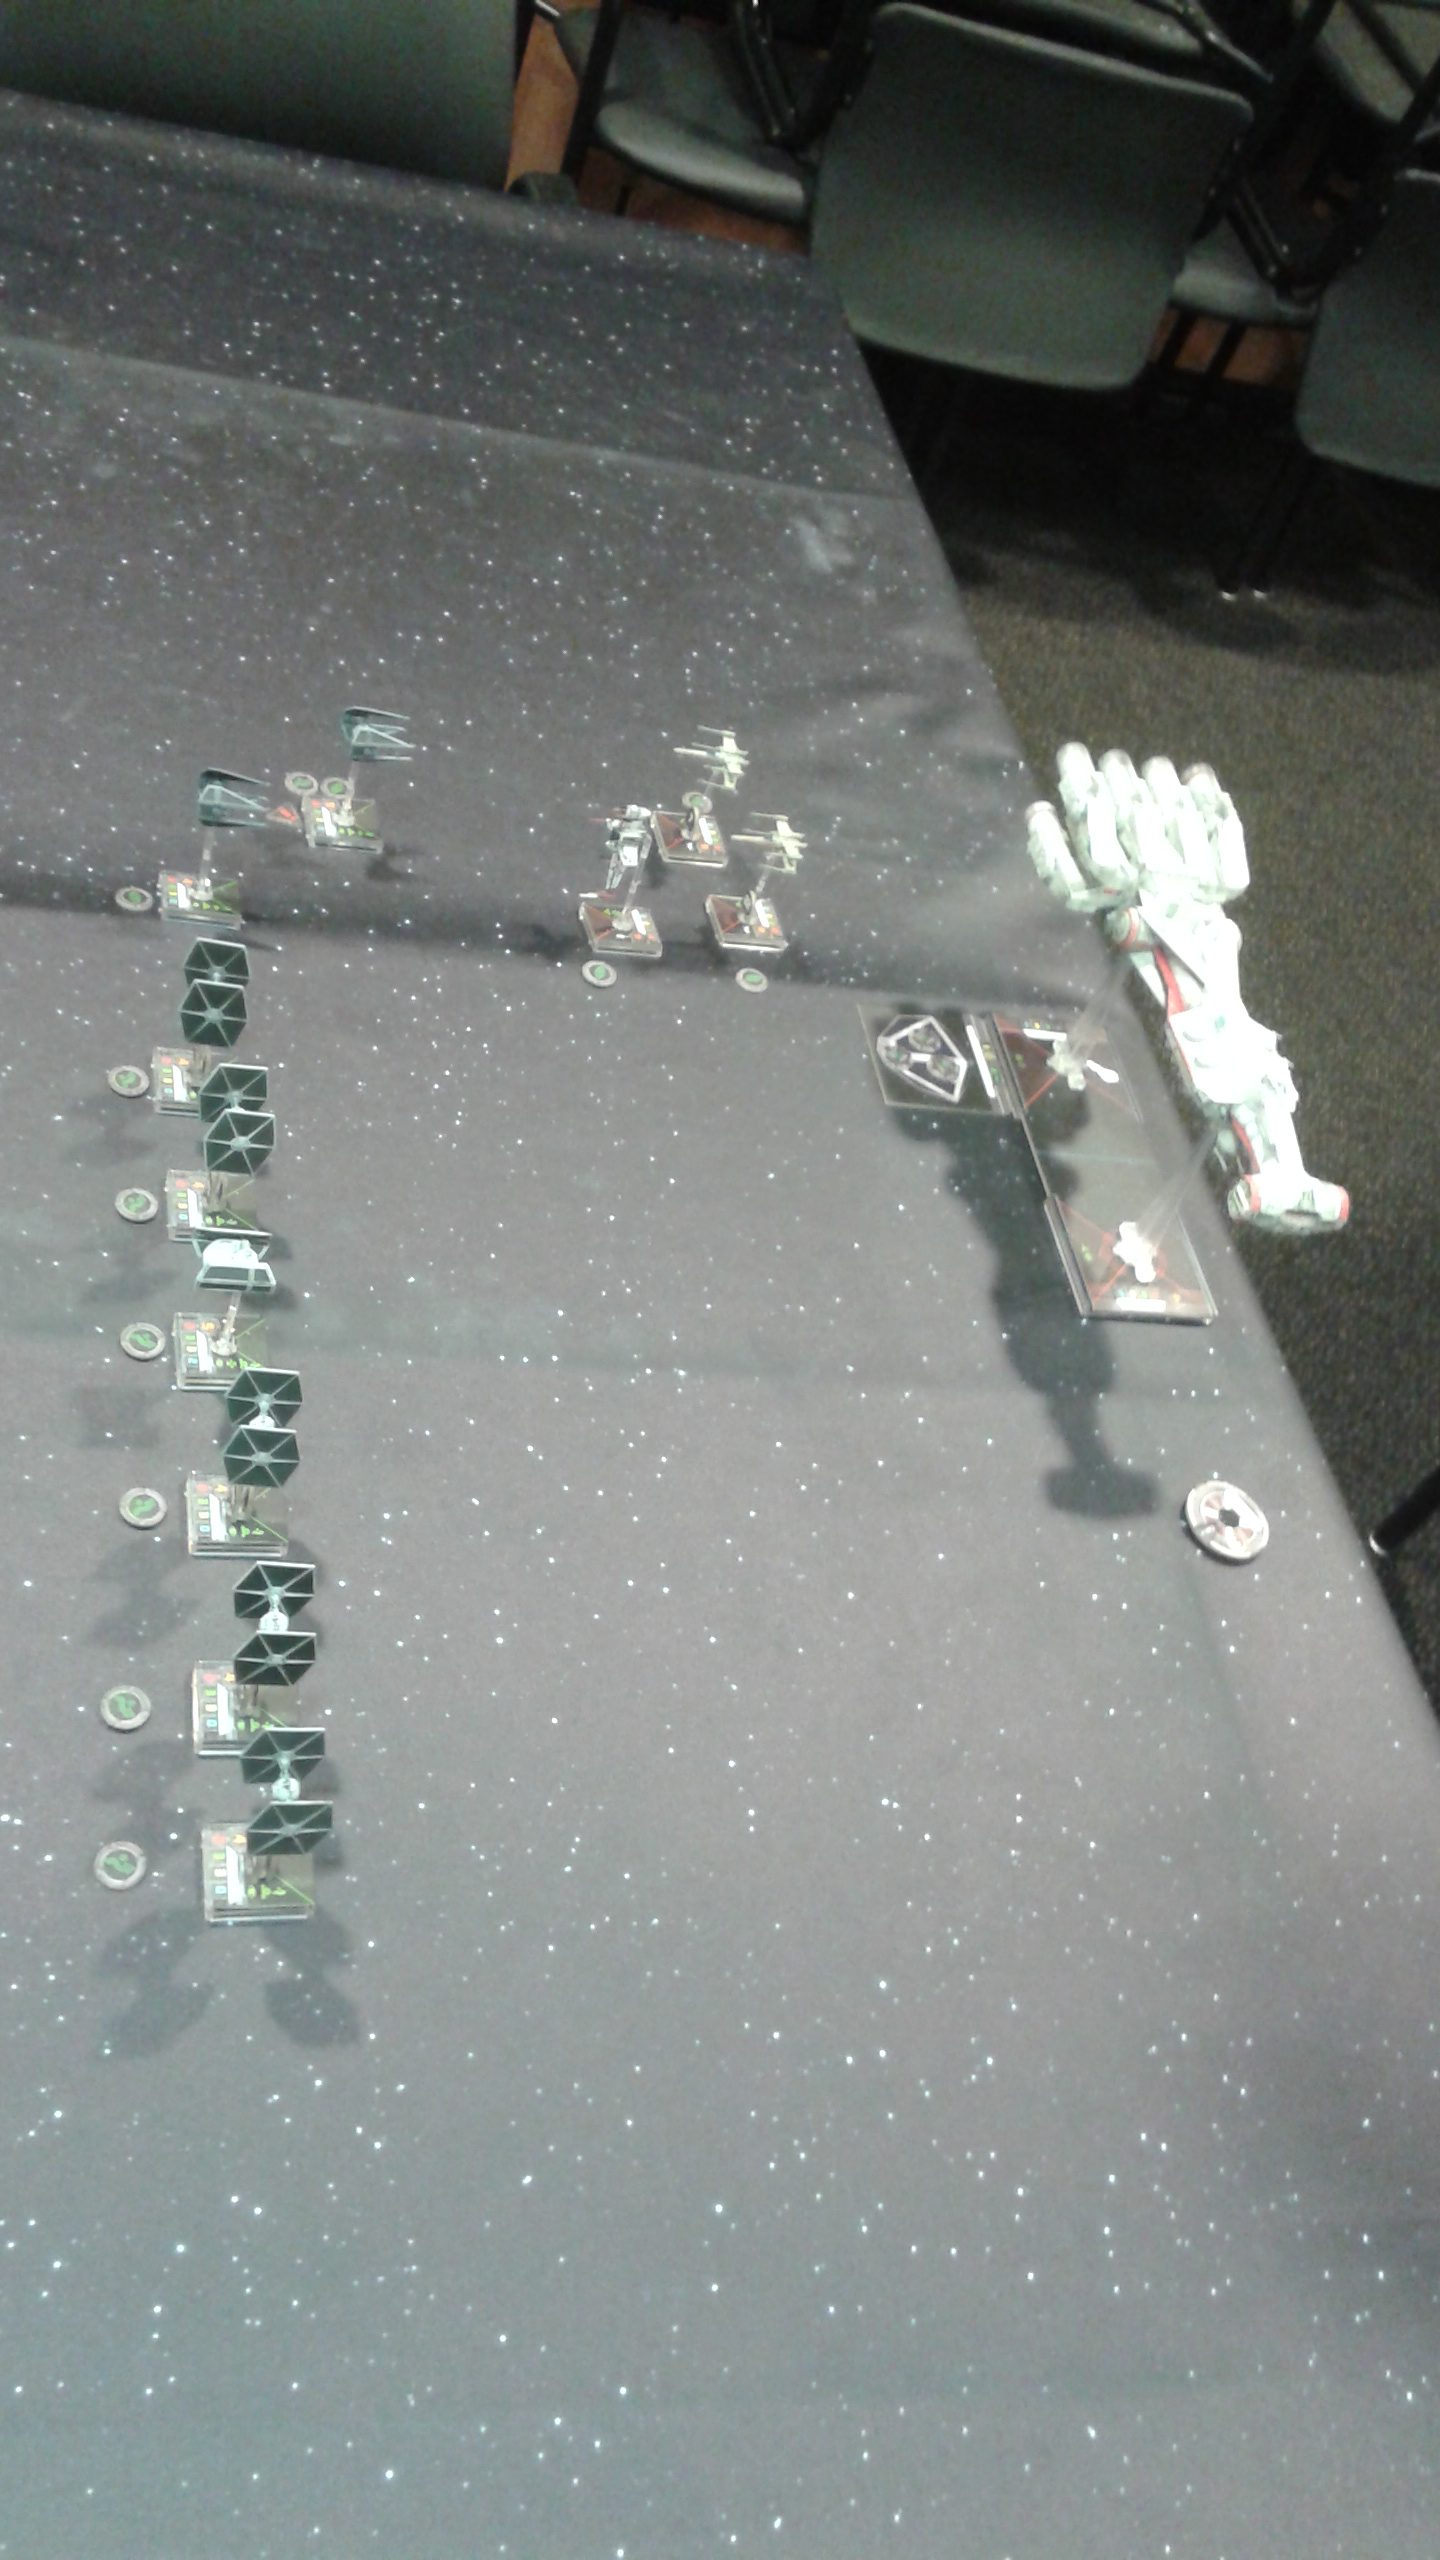
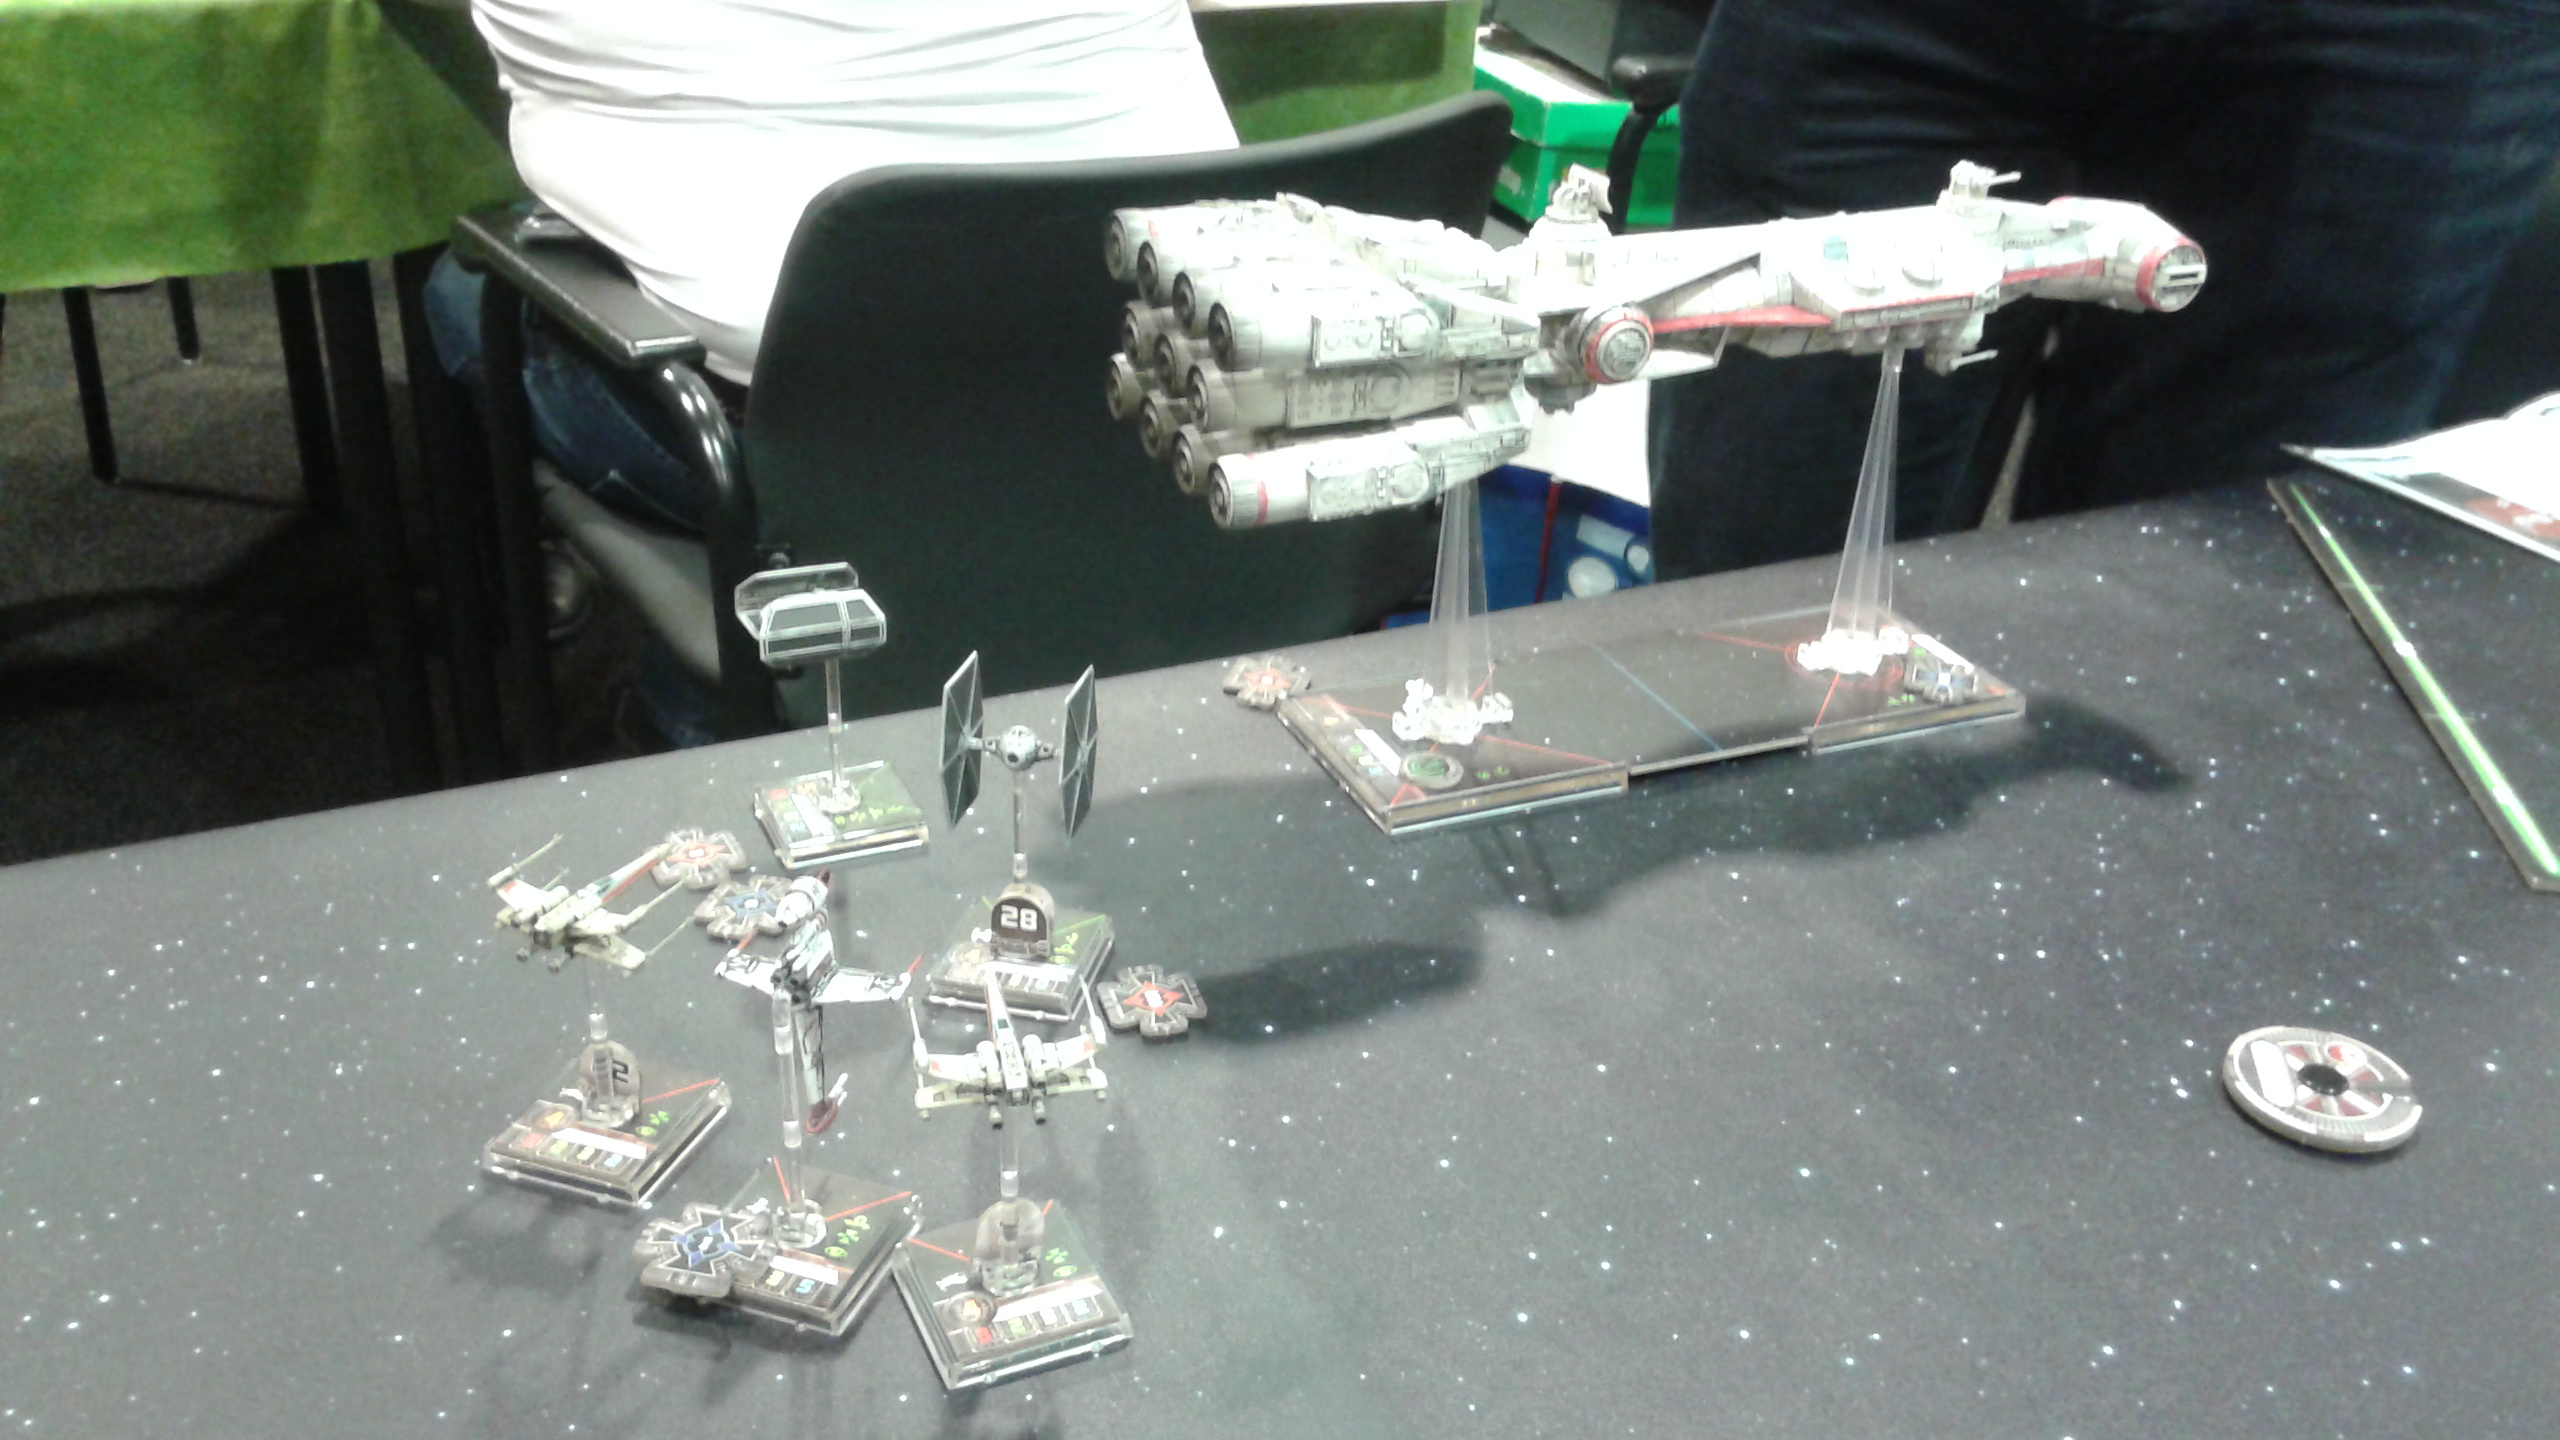
The first mission the CR90 comes out of hyperspace and is suddenly confronted with a squad of Empire fighters who demand the ship to power down and be boarded. The captain of the CR90 tries to talk his way out of this until the TIE Fighters grow tired of this game and engage. The Rebel side consists of the CR90. The Imperial side has ‘Howlrunner’ with ‘determination’ and 5 ‘Black Squadron pilots’. Astroids are placed according to the setup rules and ships are placed in their setup areas. The rules for setup are clear and are accompanied with some example drawings to make things even more easy. The Rebels are victorious when after playing six rounds neither fore or aft section is crippled whereas the Empire claims victory when one of the sections is crippled before the end of the sixth round. There are cards and counters provided with the Tantive model to keep track of the rounds.

With the setup complete we started the first mission. I knew the Tantive has weapons that have a range from 3 – 5. So as long as the Tie’s were keeping their distance the CR90 had more firepower. Closing the distance fast was my idea. In that way only the quad cannons could be used. The aft section of the ship has less shield and hull points so I would try to focus my attacks there. First round I moved my Fighters the maximum distance. The Tantive also moved, but in a slow way in order to gain more energy to be used to fire the secondary guns. Some gunfire was exchanged, but alas I can not recall what damage was done.
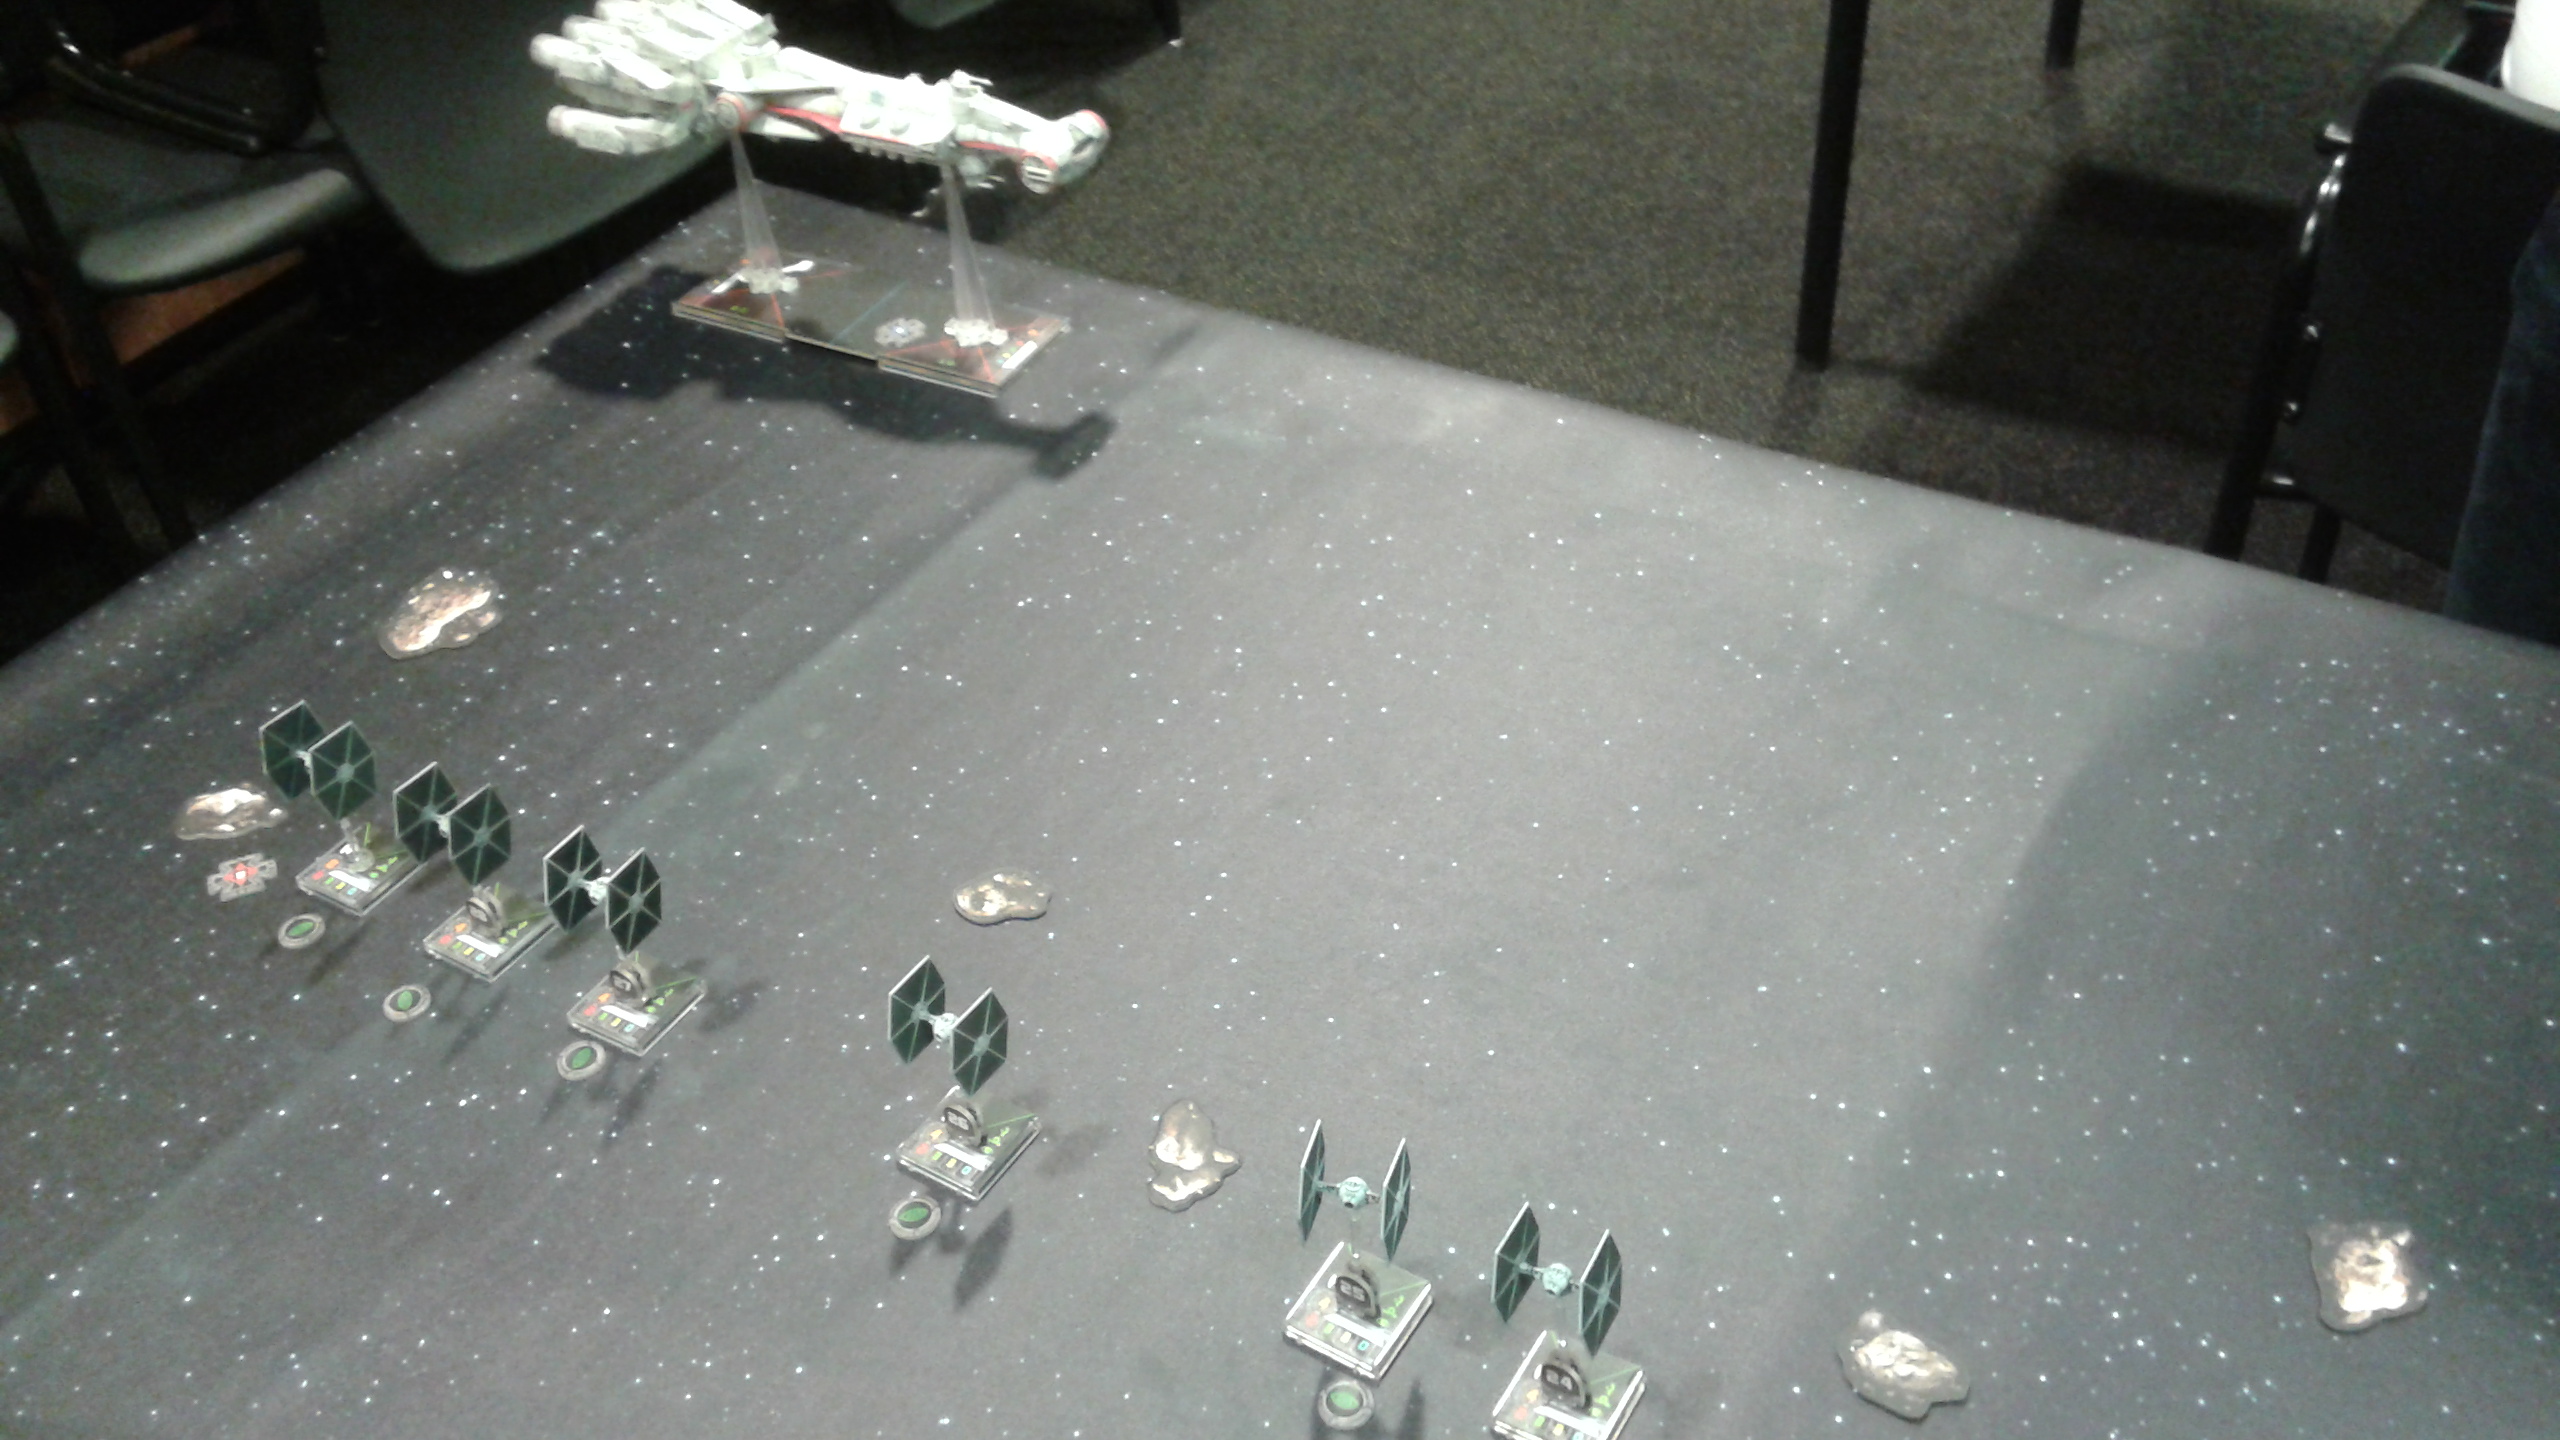

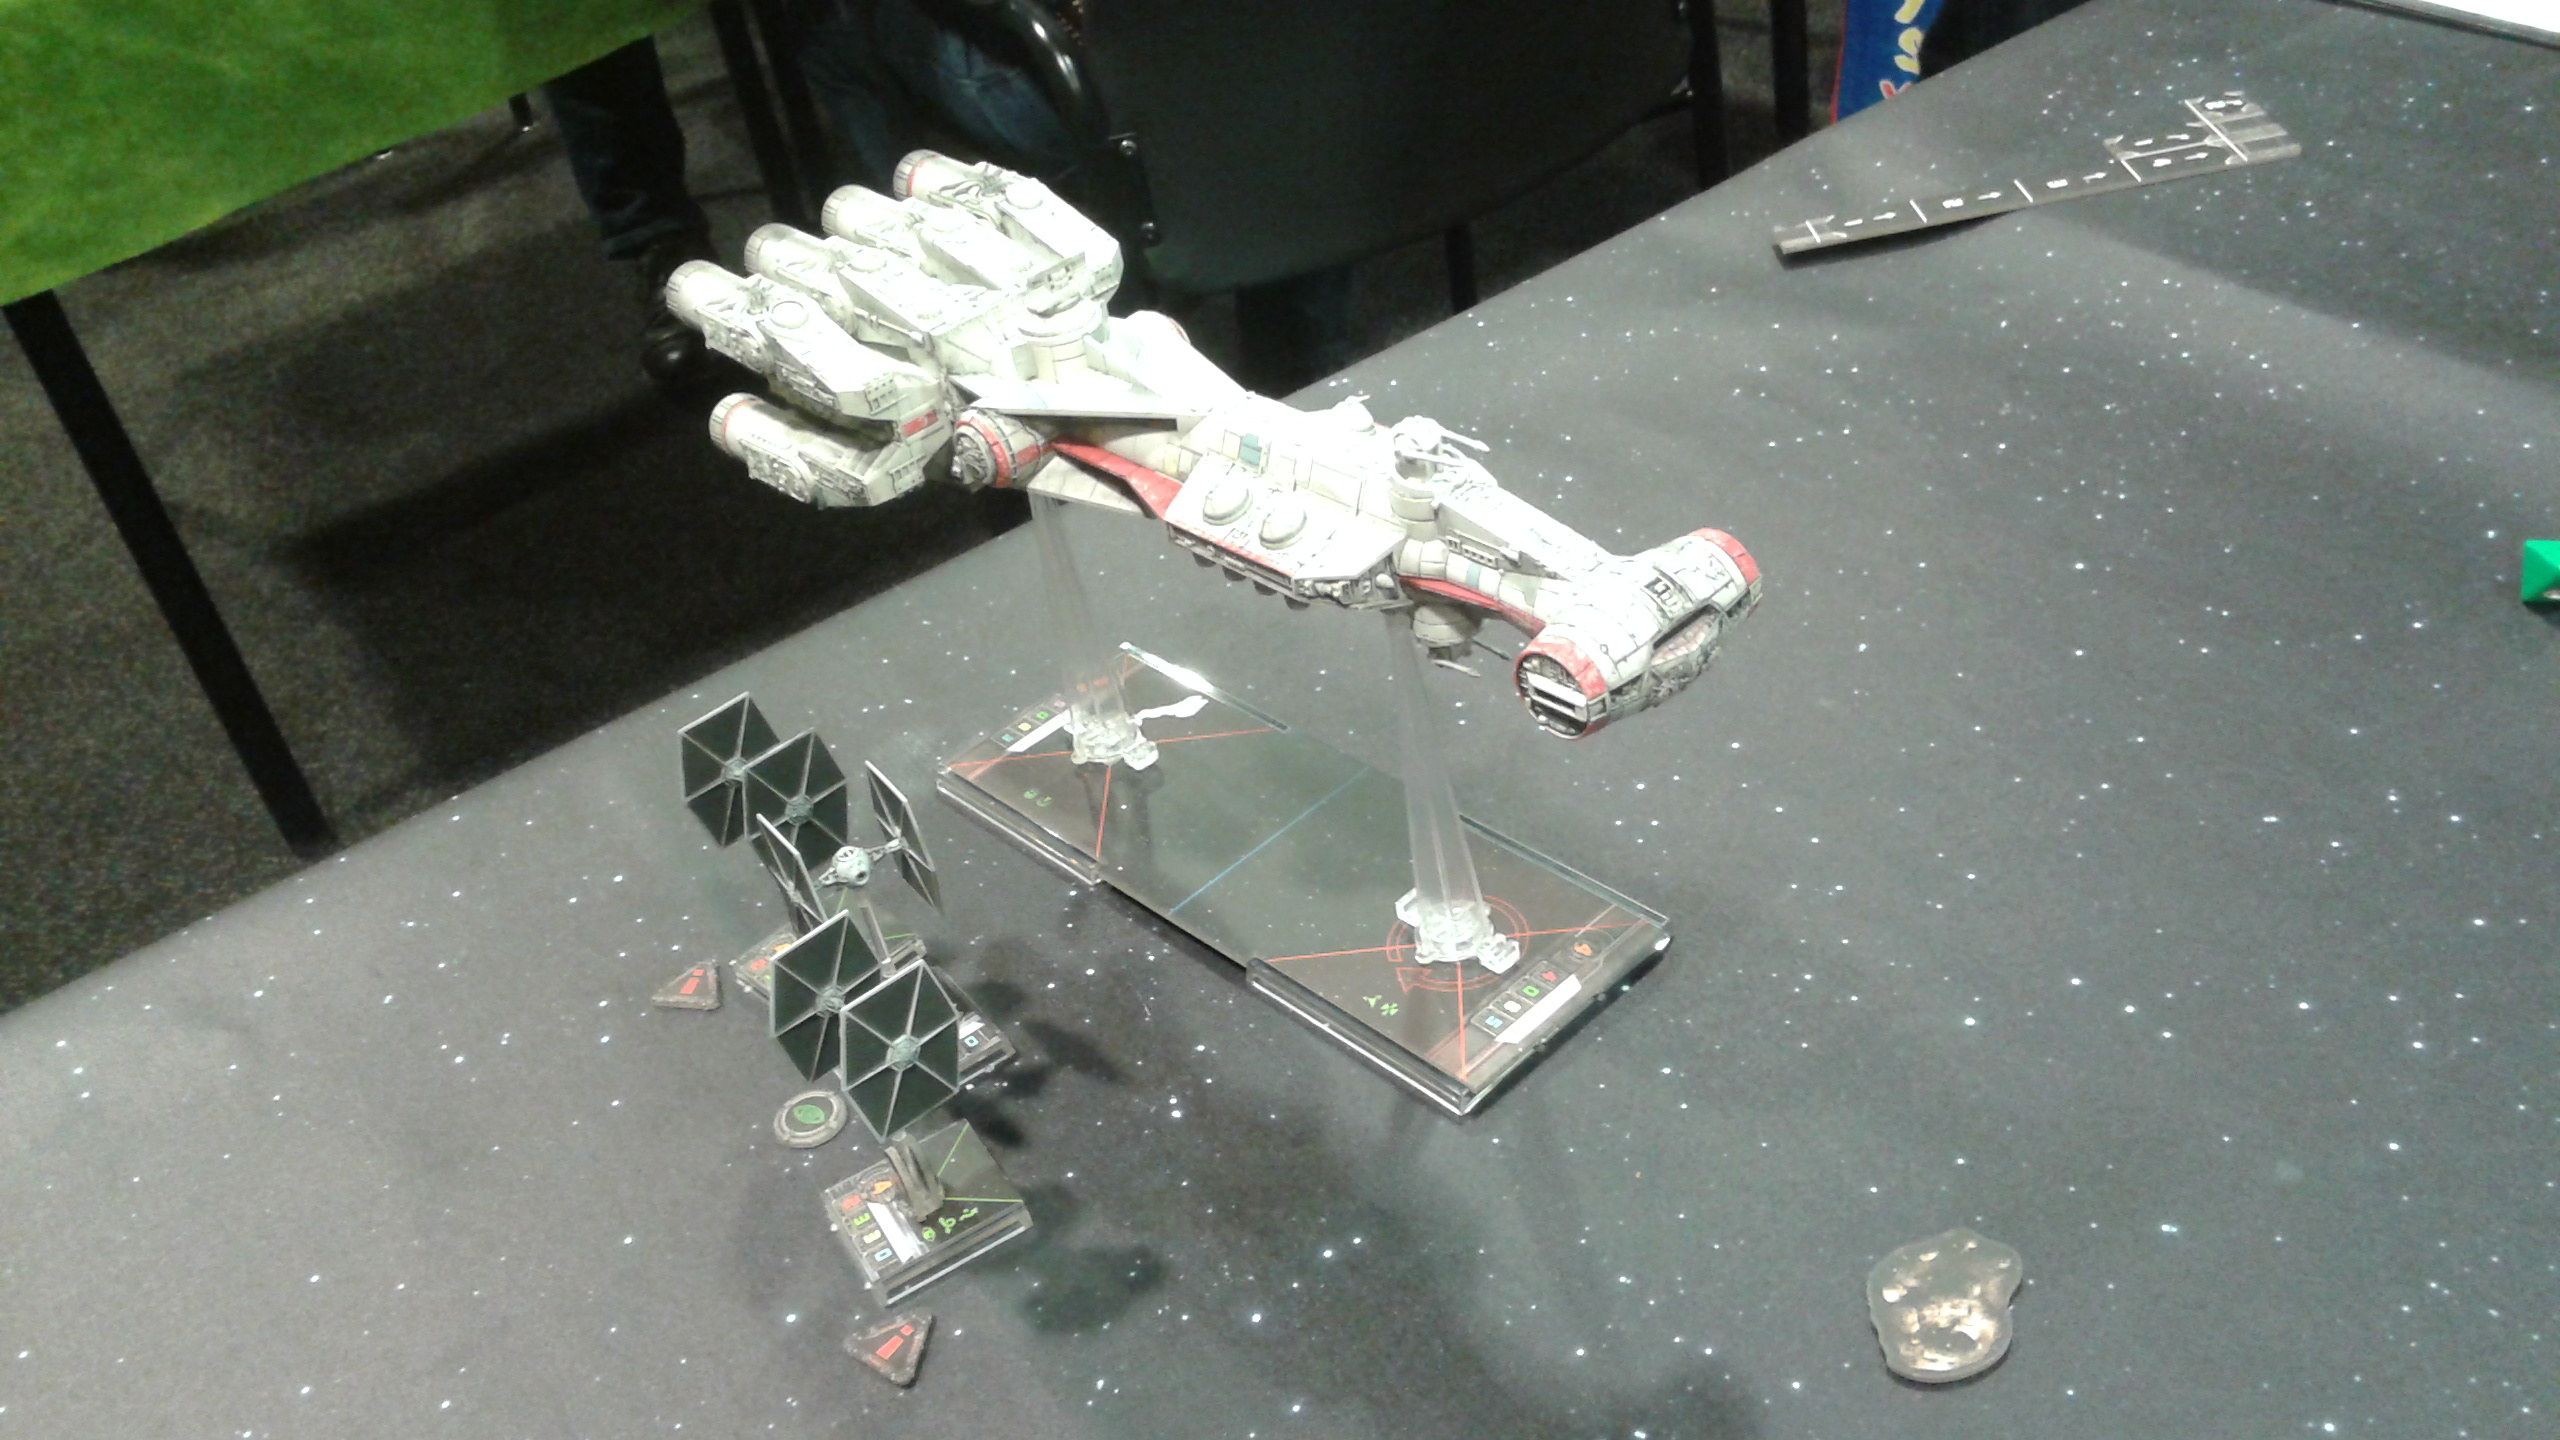
The next round three of the Tie Fighters got real close while the other three made progress ont their attack run. Only the TIE’s further away had some real problems with the gunfire from the CR90. Of the three closer ones only one could be effectively pounded by the quad laser cannons. This gave the other ones more freedom to shoot some of the shields from the aft sections. Being at range one gave them an extra attack die and I made some good progress. One of the TIE’s was shot to pieces (I think it was Howlrunner).

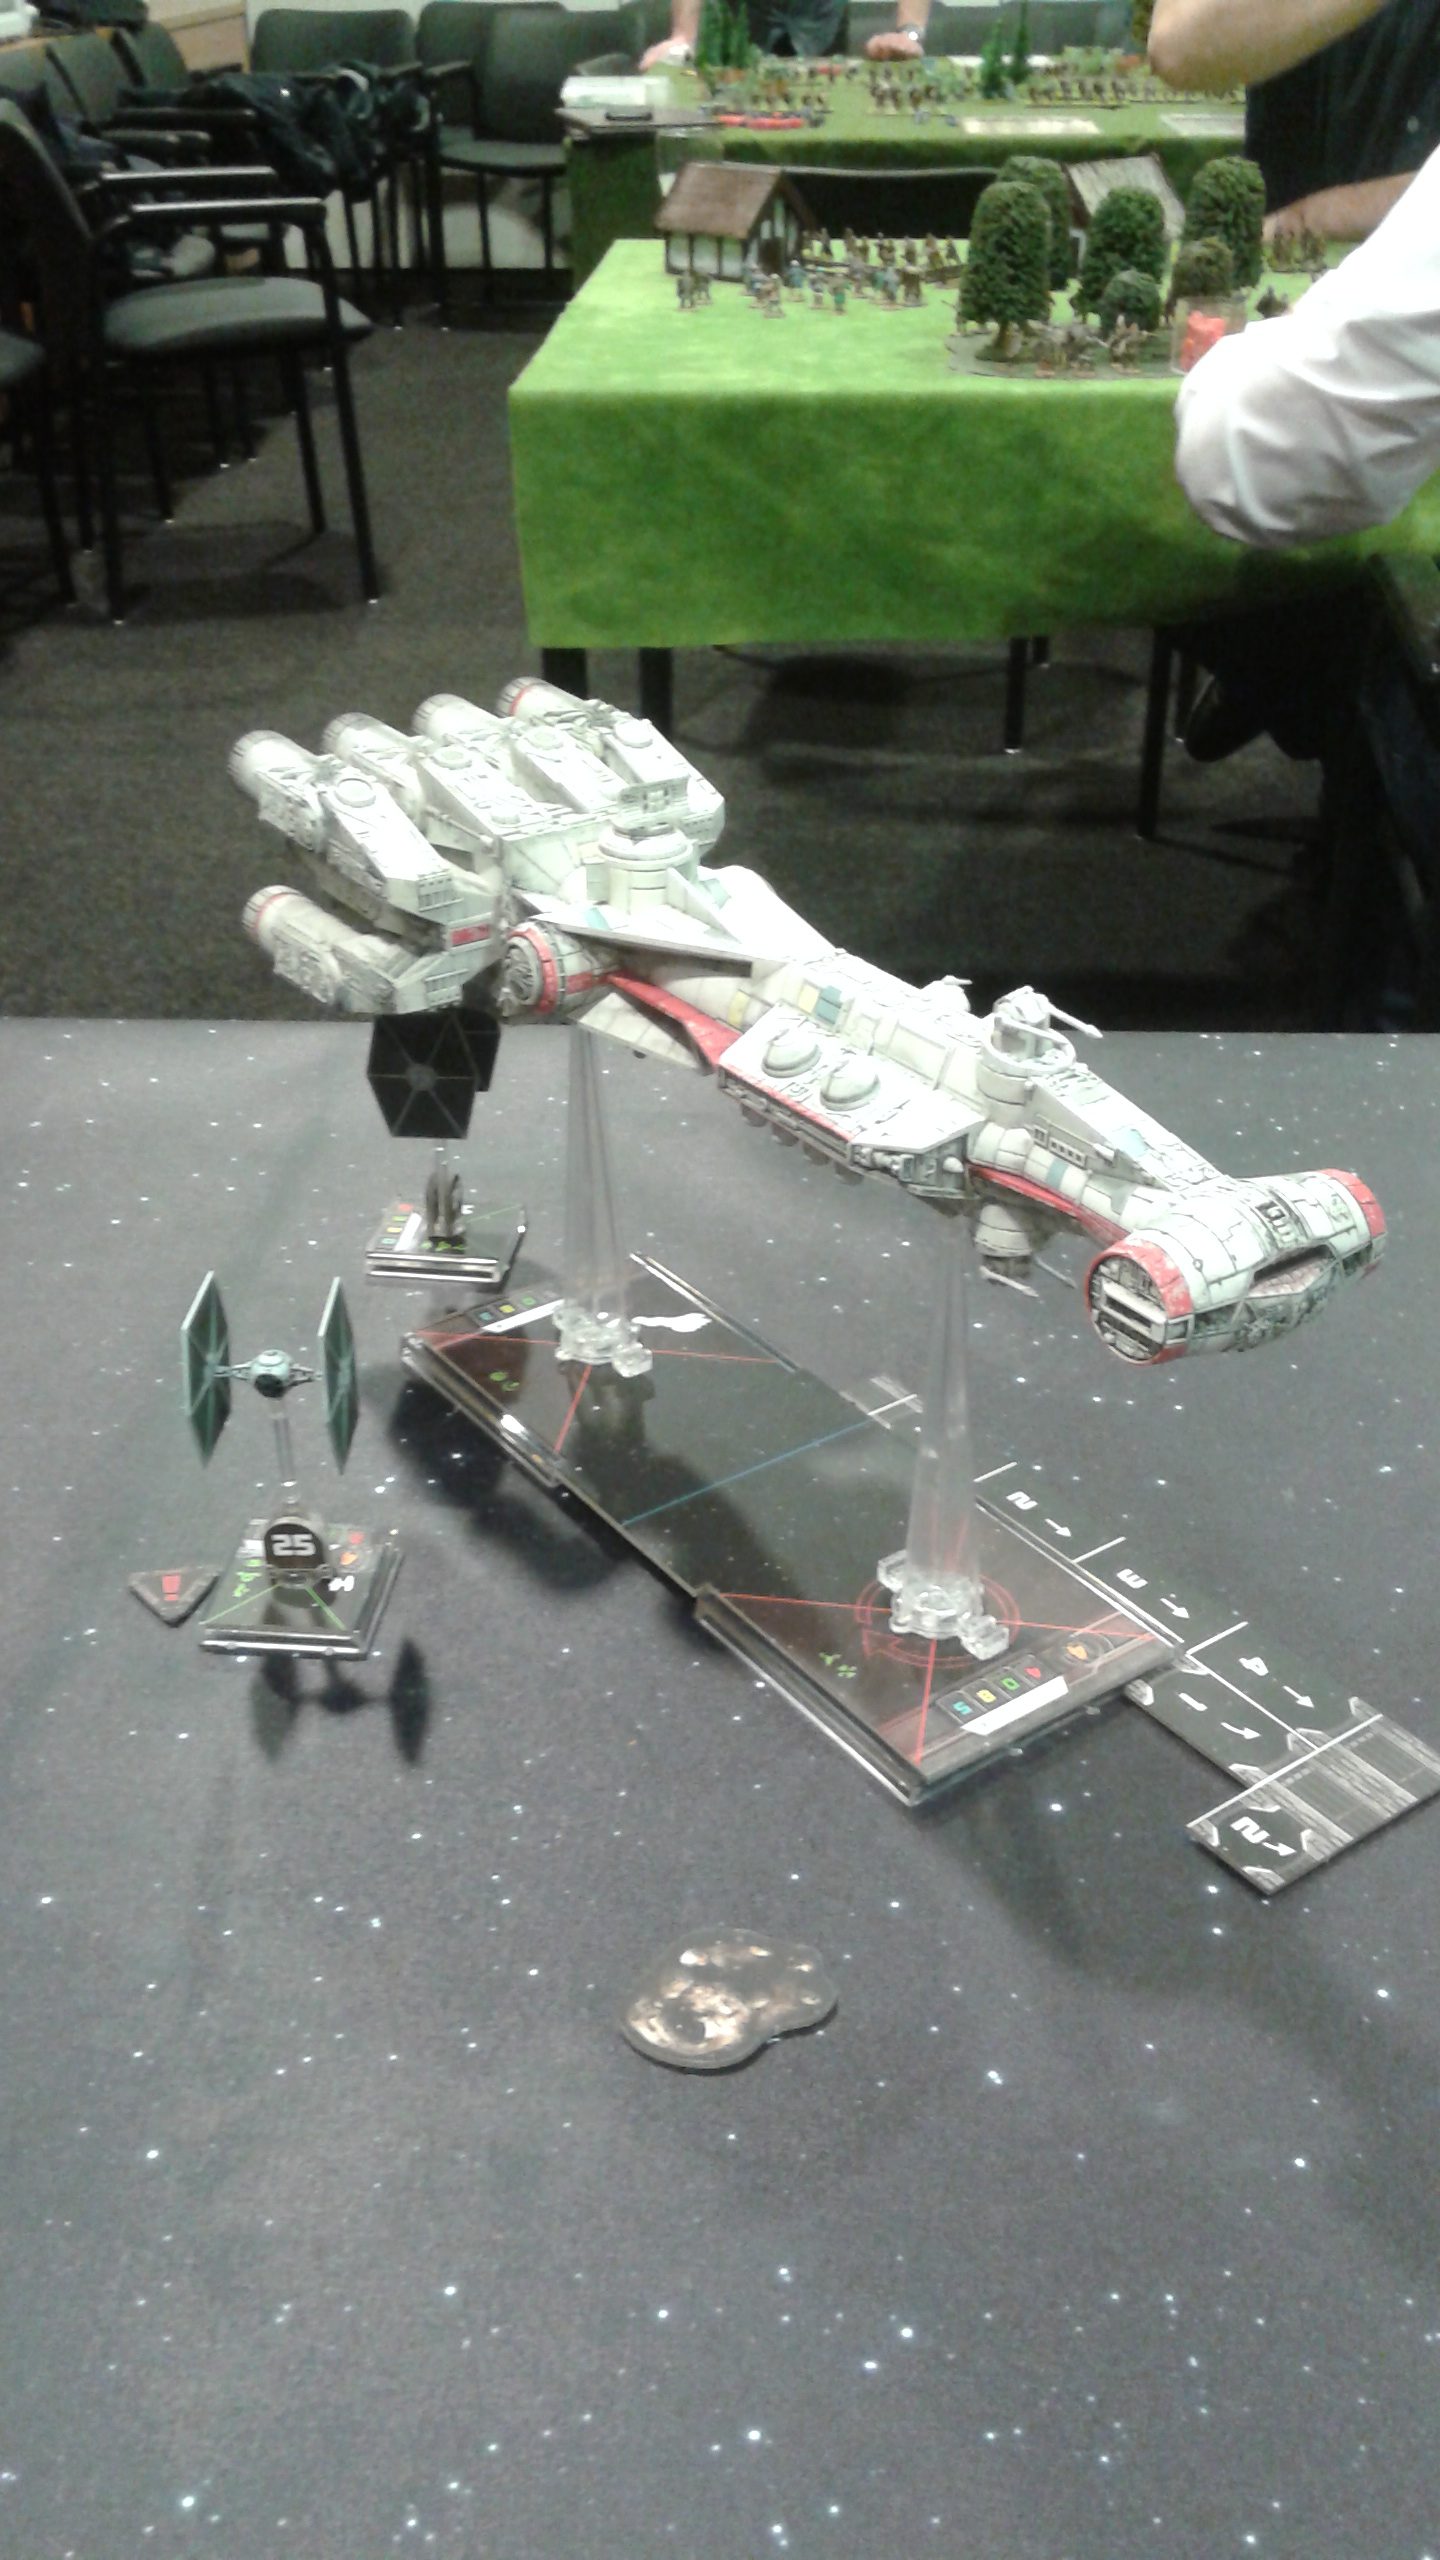
Next turn I tried to keep the fighters as close as I could get them and let the three who were still closing in keep up the pace. The Tantive made a slight turn, hoping that it would run over some TIE’s, but failing to do so. More damage was dealt and I had good hope of actually crippling the aft section. But the large ship was not done yet and blasted some more of my fighters out of the sky. The remaining fighters gave chase, while the Tantive continued to turn.

This resulted in the fact that I could not effectively line up the remaining few fighters for the last shots of the game. Turn six was up and the aft section of the CR90 needed only 2 more damage. But one of the TIE’s could not make a sharp enough turn to have an arc of fire. In the end I could only do 1 damage and the victory was for the Rebels. But damn, that was a very close call. We both had lots of fun and the game was exiting until the very last shot. It could have gone both ways. A well balanced mission.

After the first game you have to fill in the progress sheet. After each mission you keep track which side has won and in case of the first battle you state which section of the CR90 was crippled when the Empire wins. Casualties are also written down when these are unique pilots. In our case Howlrunner was added to this list.
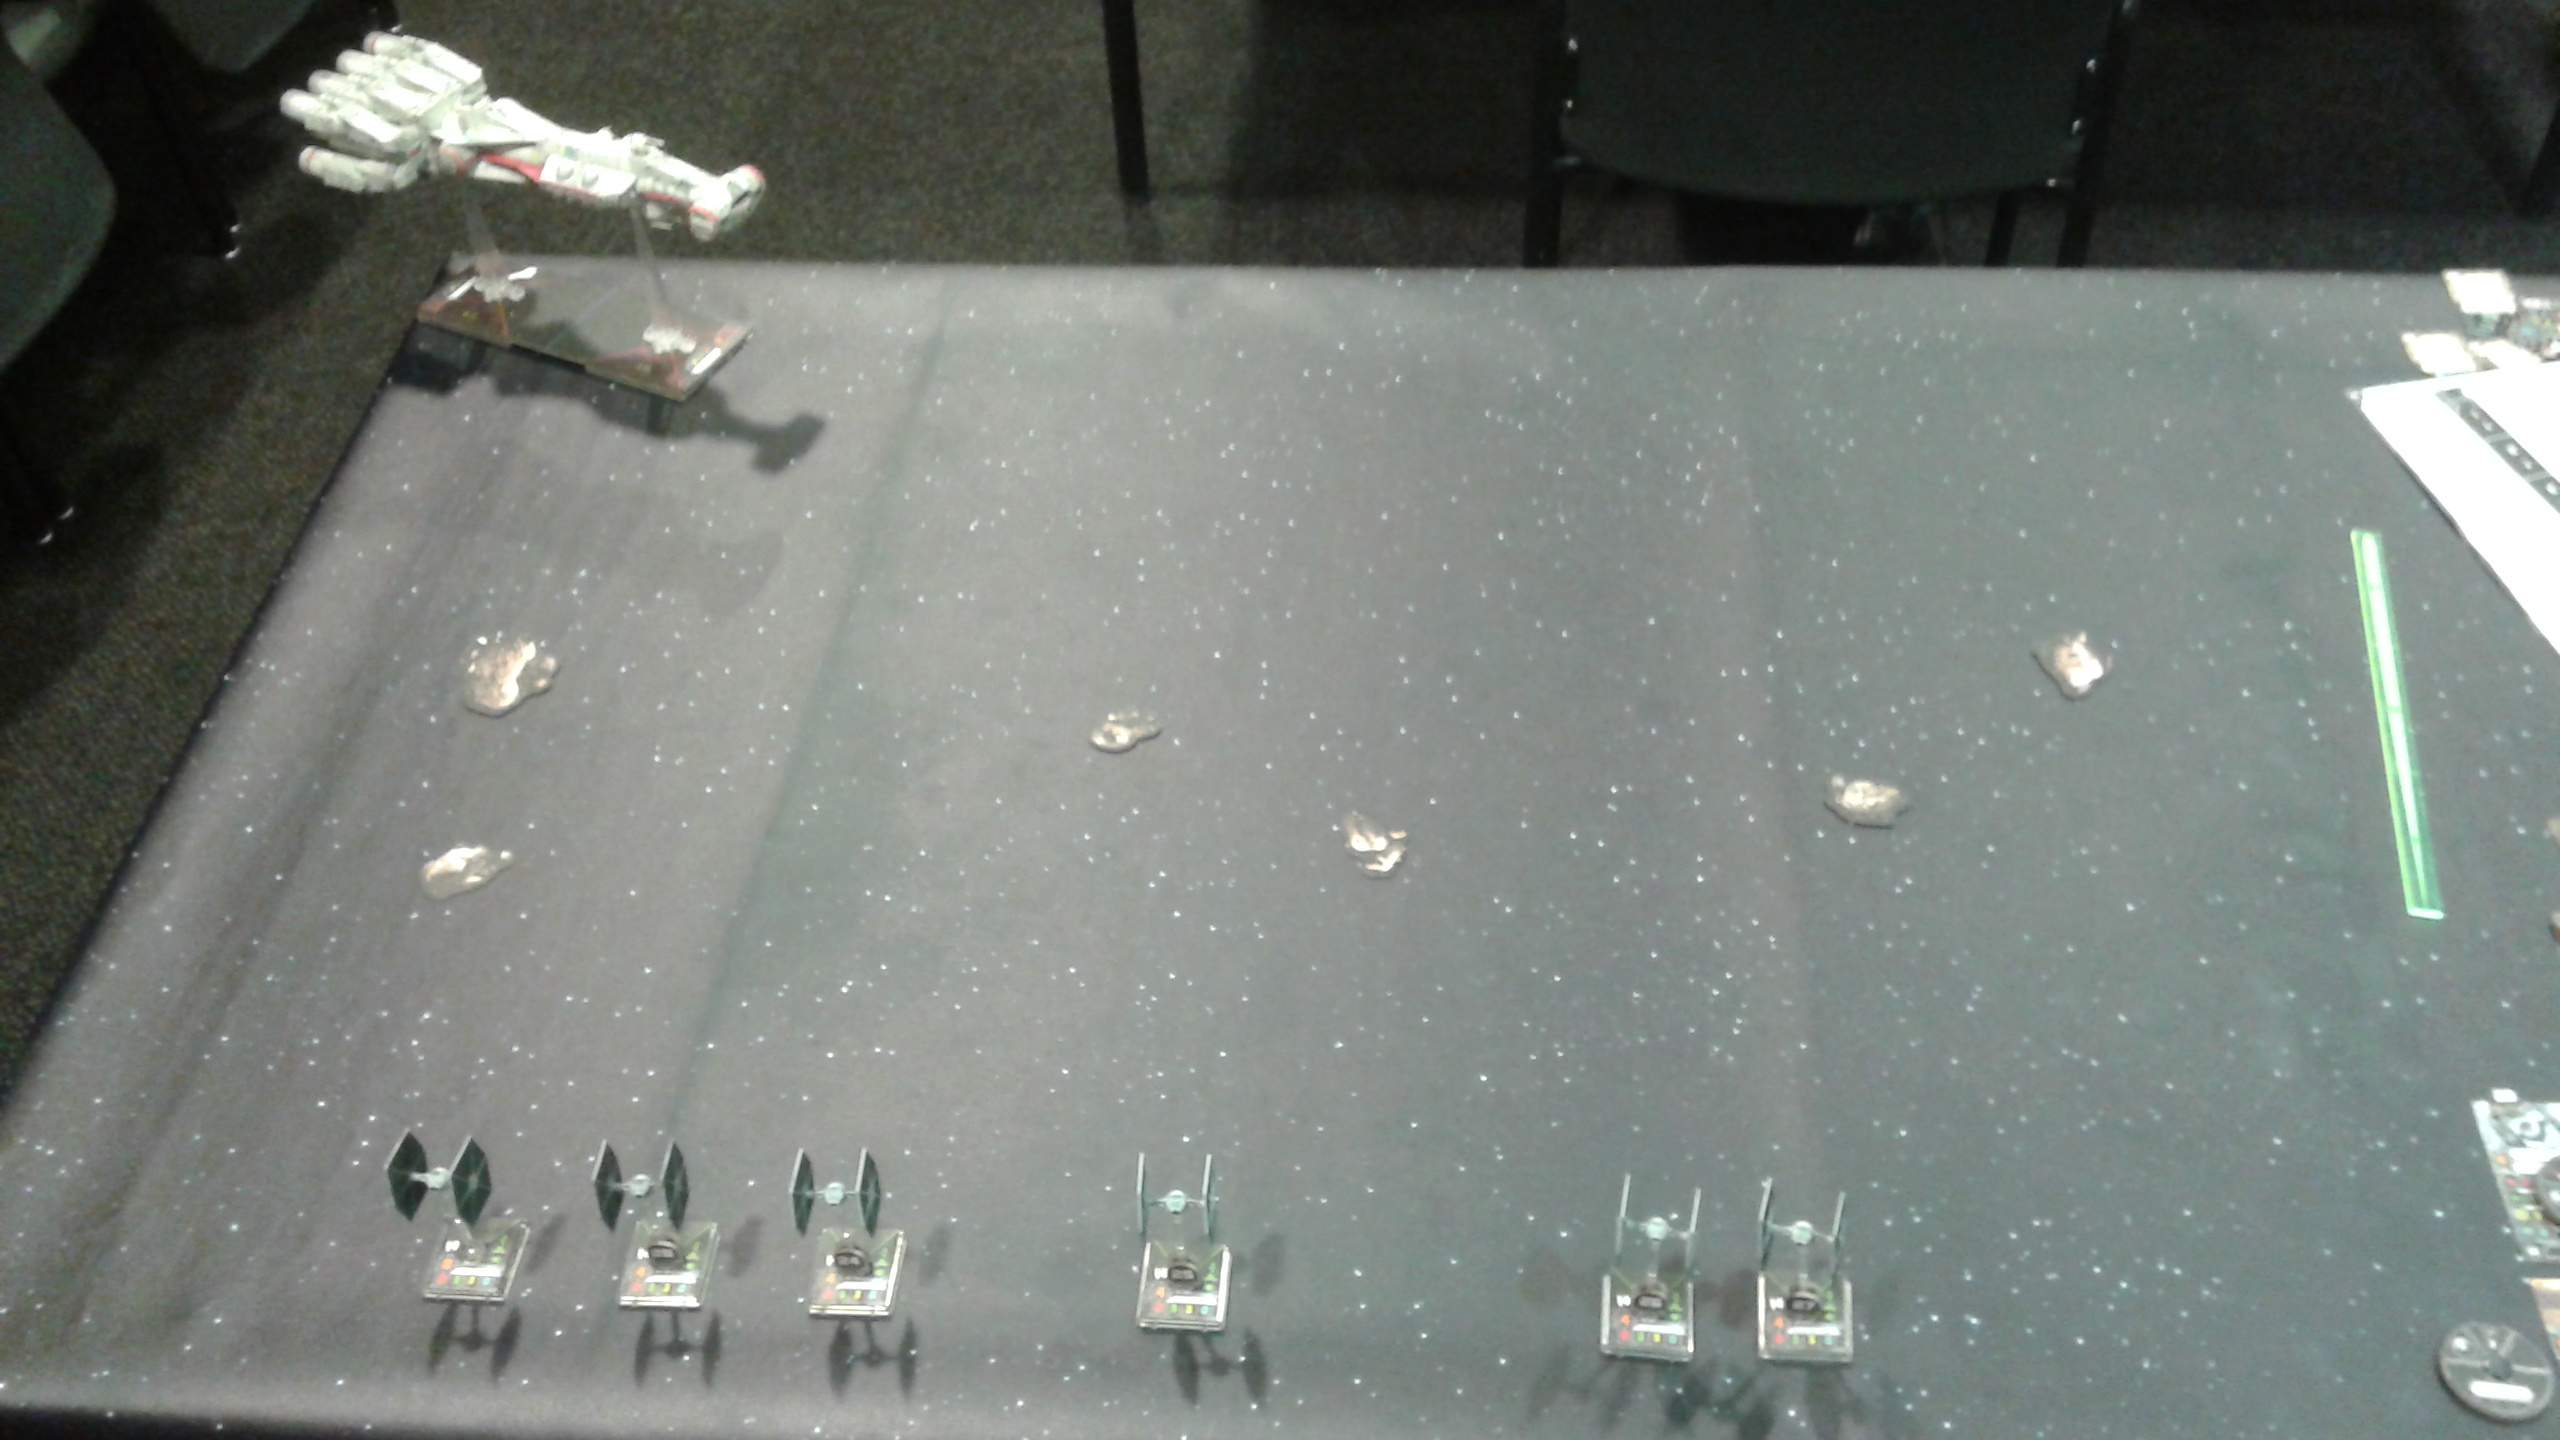
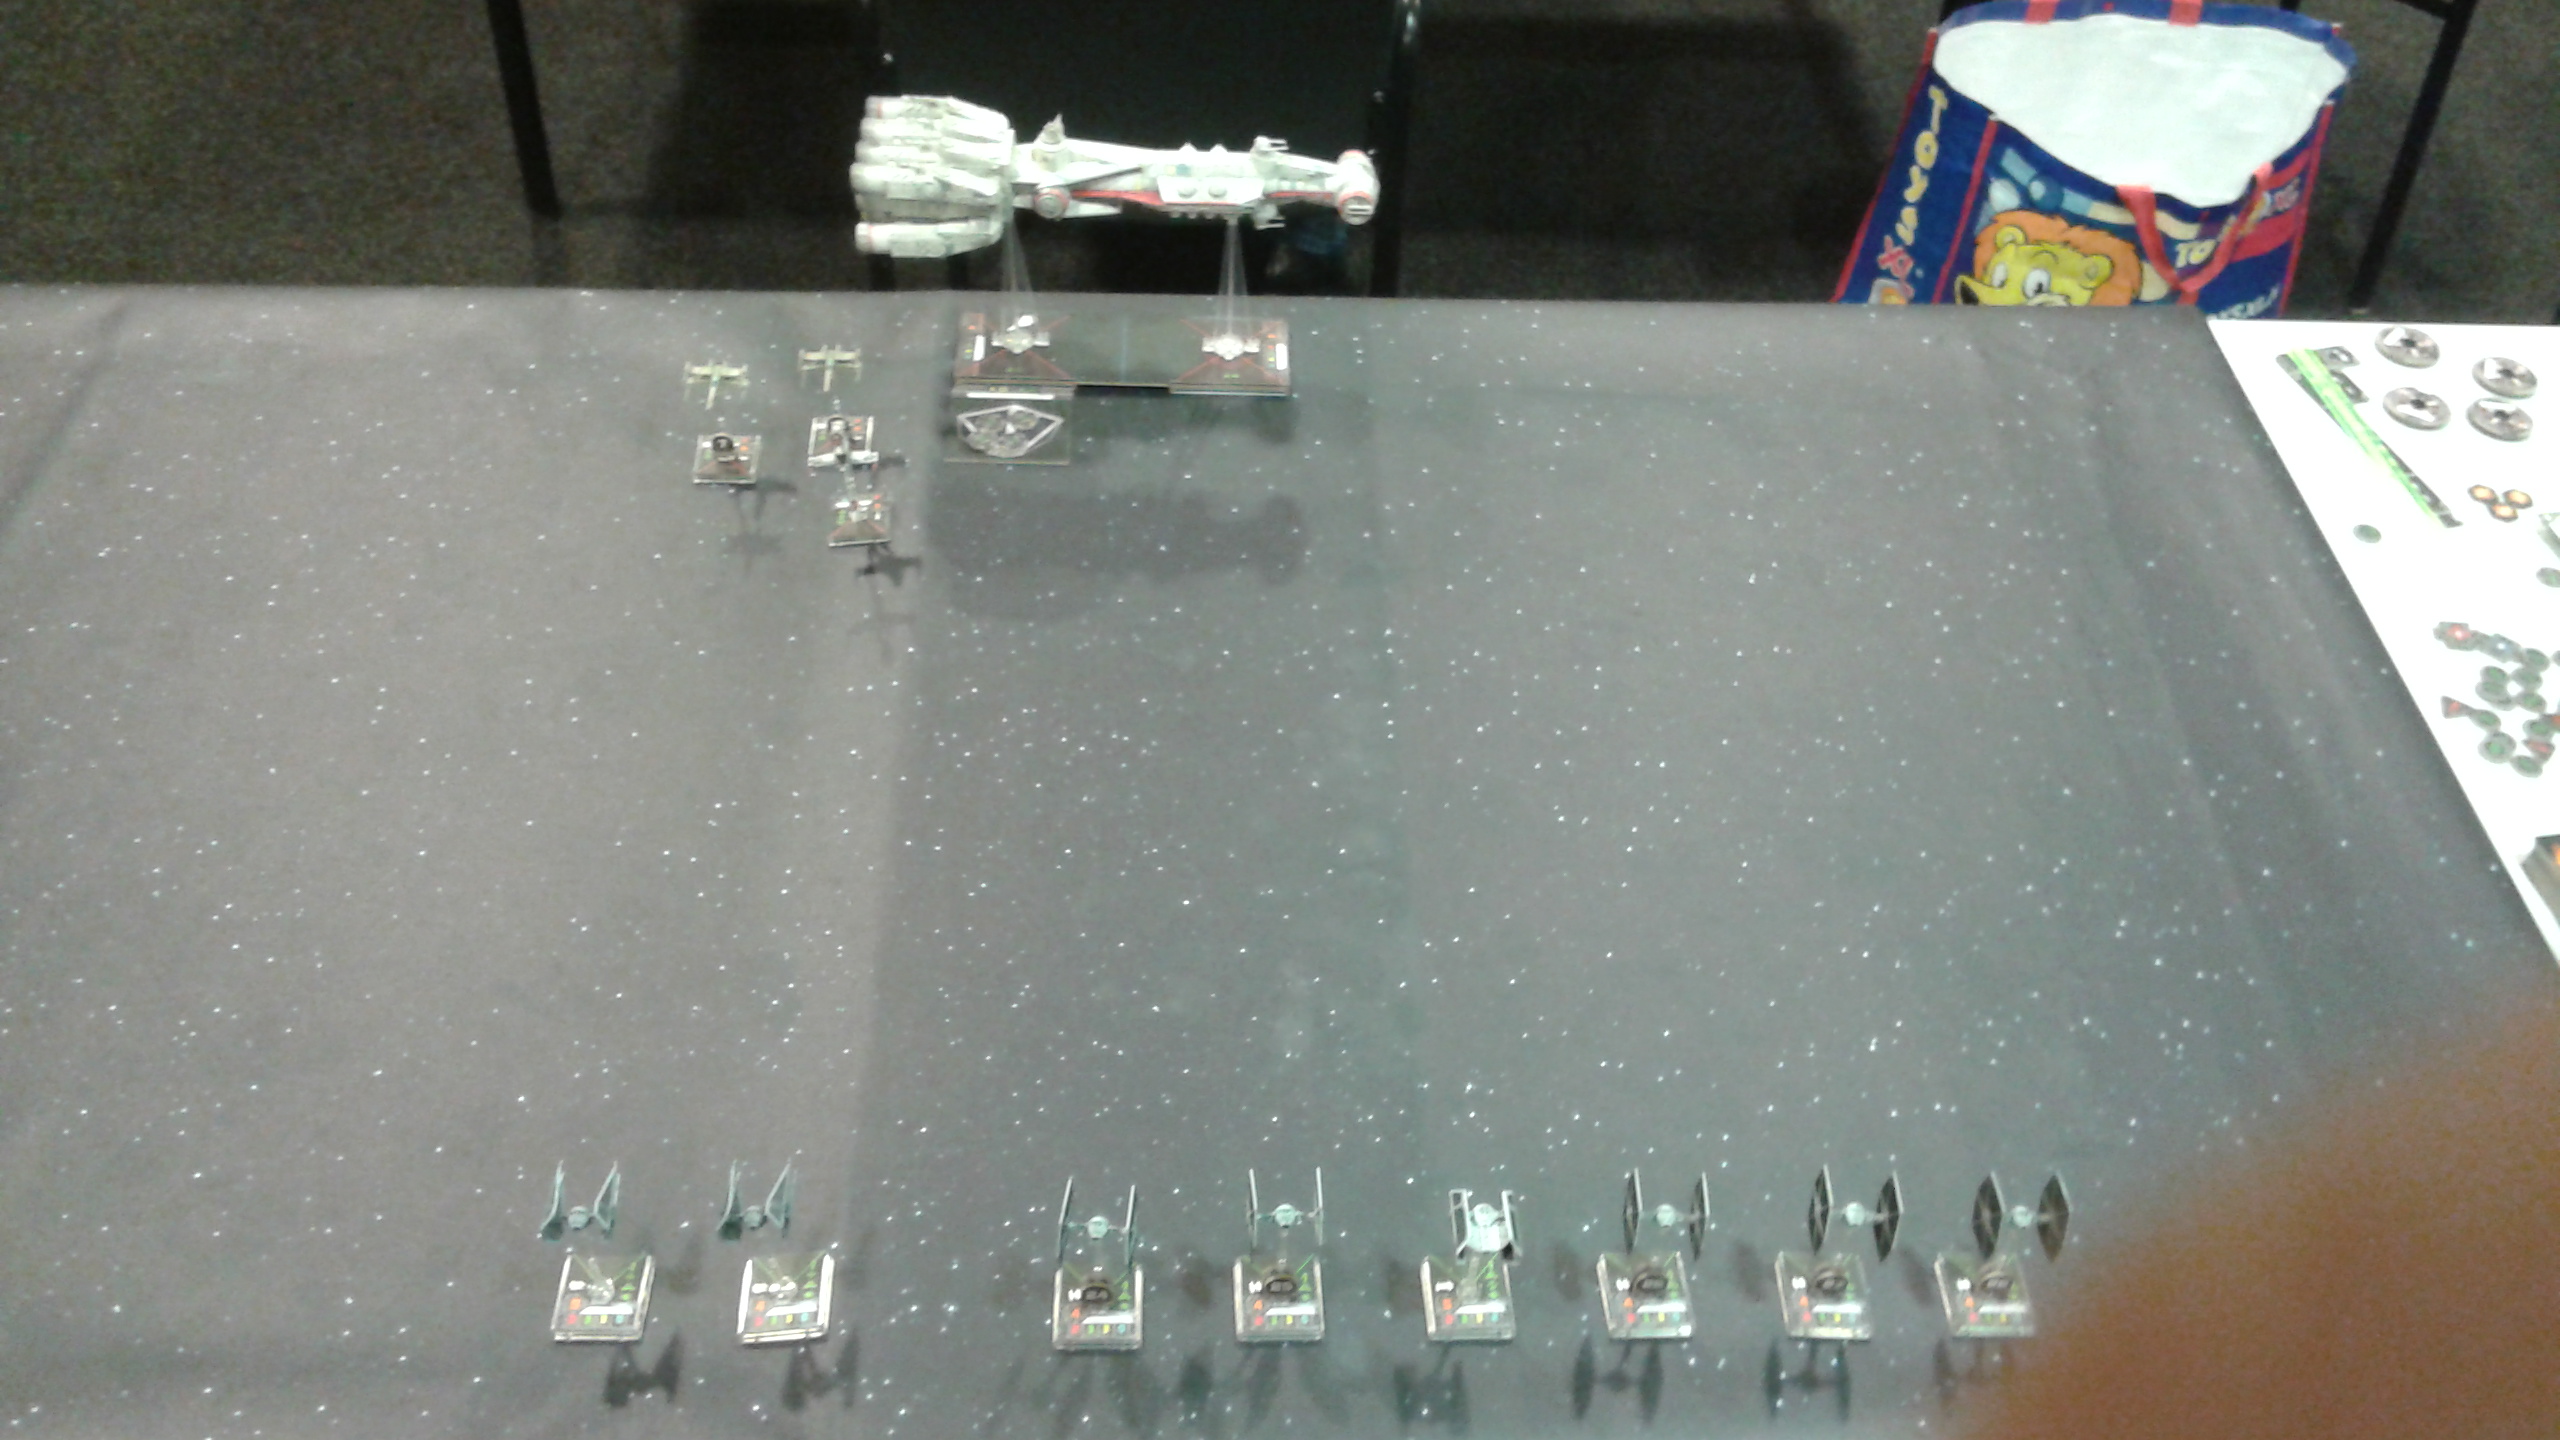
The next mission the Tantive had stopped to refuel when the Empire returns with company. The Rebel player gets 75 points to make a nice squadron to defend the CR90 which is still attached to the fueling station at the beginning of the game. The Empire gets ‘Soontir Fell’ with ‘push the limit’ and 3 ‘Black Squadron pilots’. Then 75 points to spend as you like, but only one large ship can be taken. I went with another TIE Interceptor (Saber Qs.), ‘Commander Alozen’ in a TIE Advanced and used the rest of the points to field more TIE Fighters. Hamza choose 2 X-Wings and a B-Wing for the Rebel side. The Tantive model is docked to the fueling station (a card token that comes along with the model) for 4 turns of the game. During the time it is docked it can not move. It can activate as normal and choose a maneuver, but simply does not execute it. The energy gained is reduced by the number of tokens still remaining on the fuel container. So detaching and moving is not a nice option because it is running on fumes then. The Rebel objective is to get the Tantive at the table edge where the Empire deploys. So you want speed, but only get it when you stay docked longer. The Empire again tries to cripple one of the sections before the ship can flee the table. As before the setup and special rules are clear enough written in the booklet. So let the game begin!
Initial setup.
I tried the same tactic as before, get as close as possible as fast as possible. This time however, there were some other Rebel ships as well.

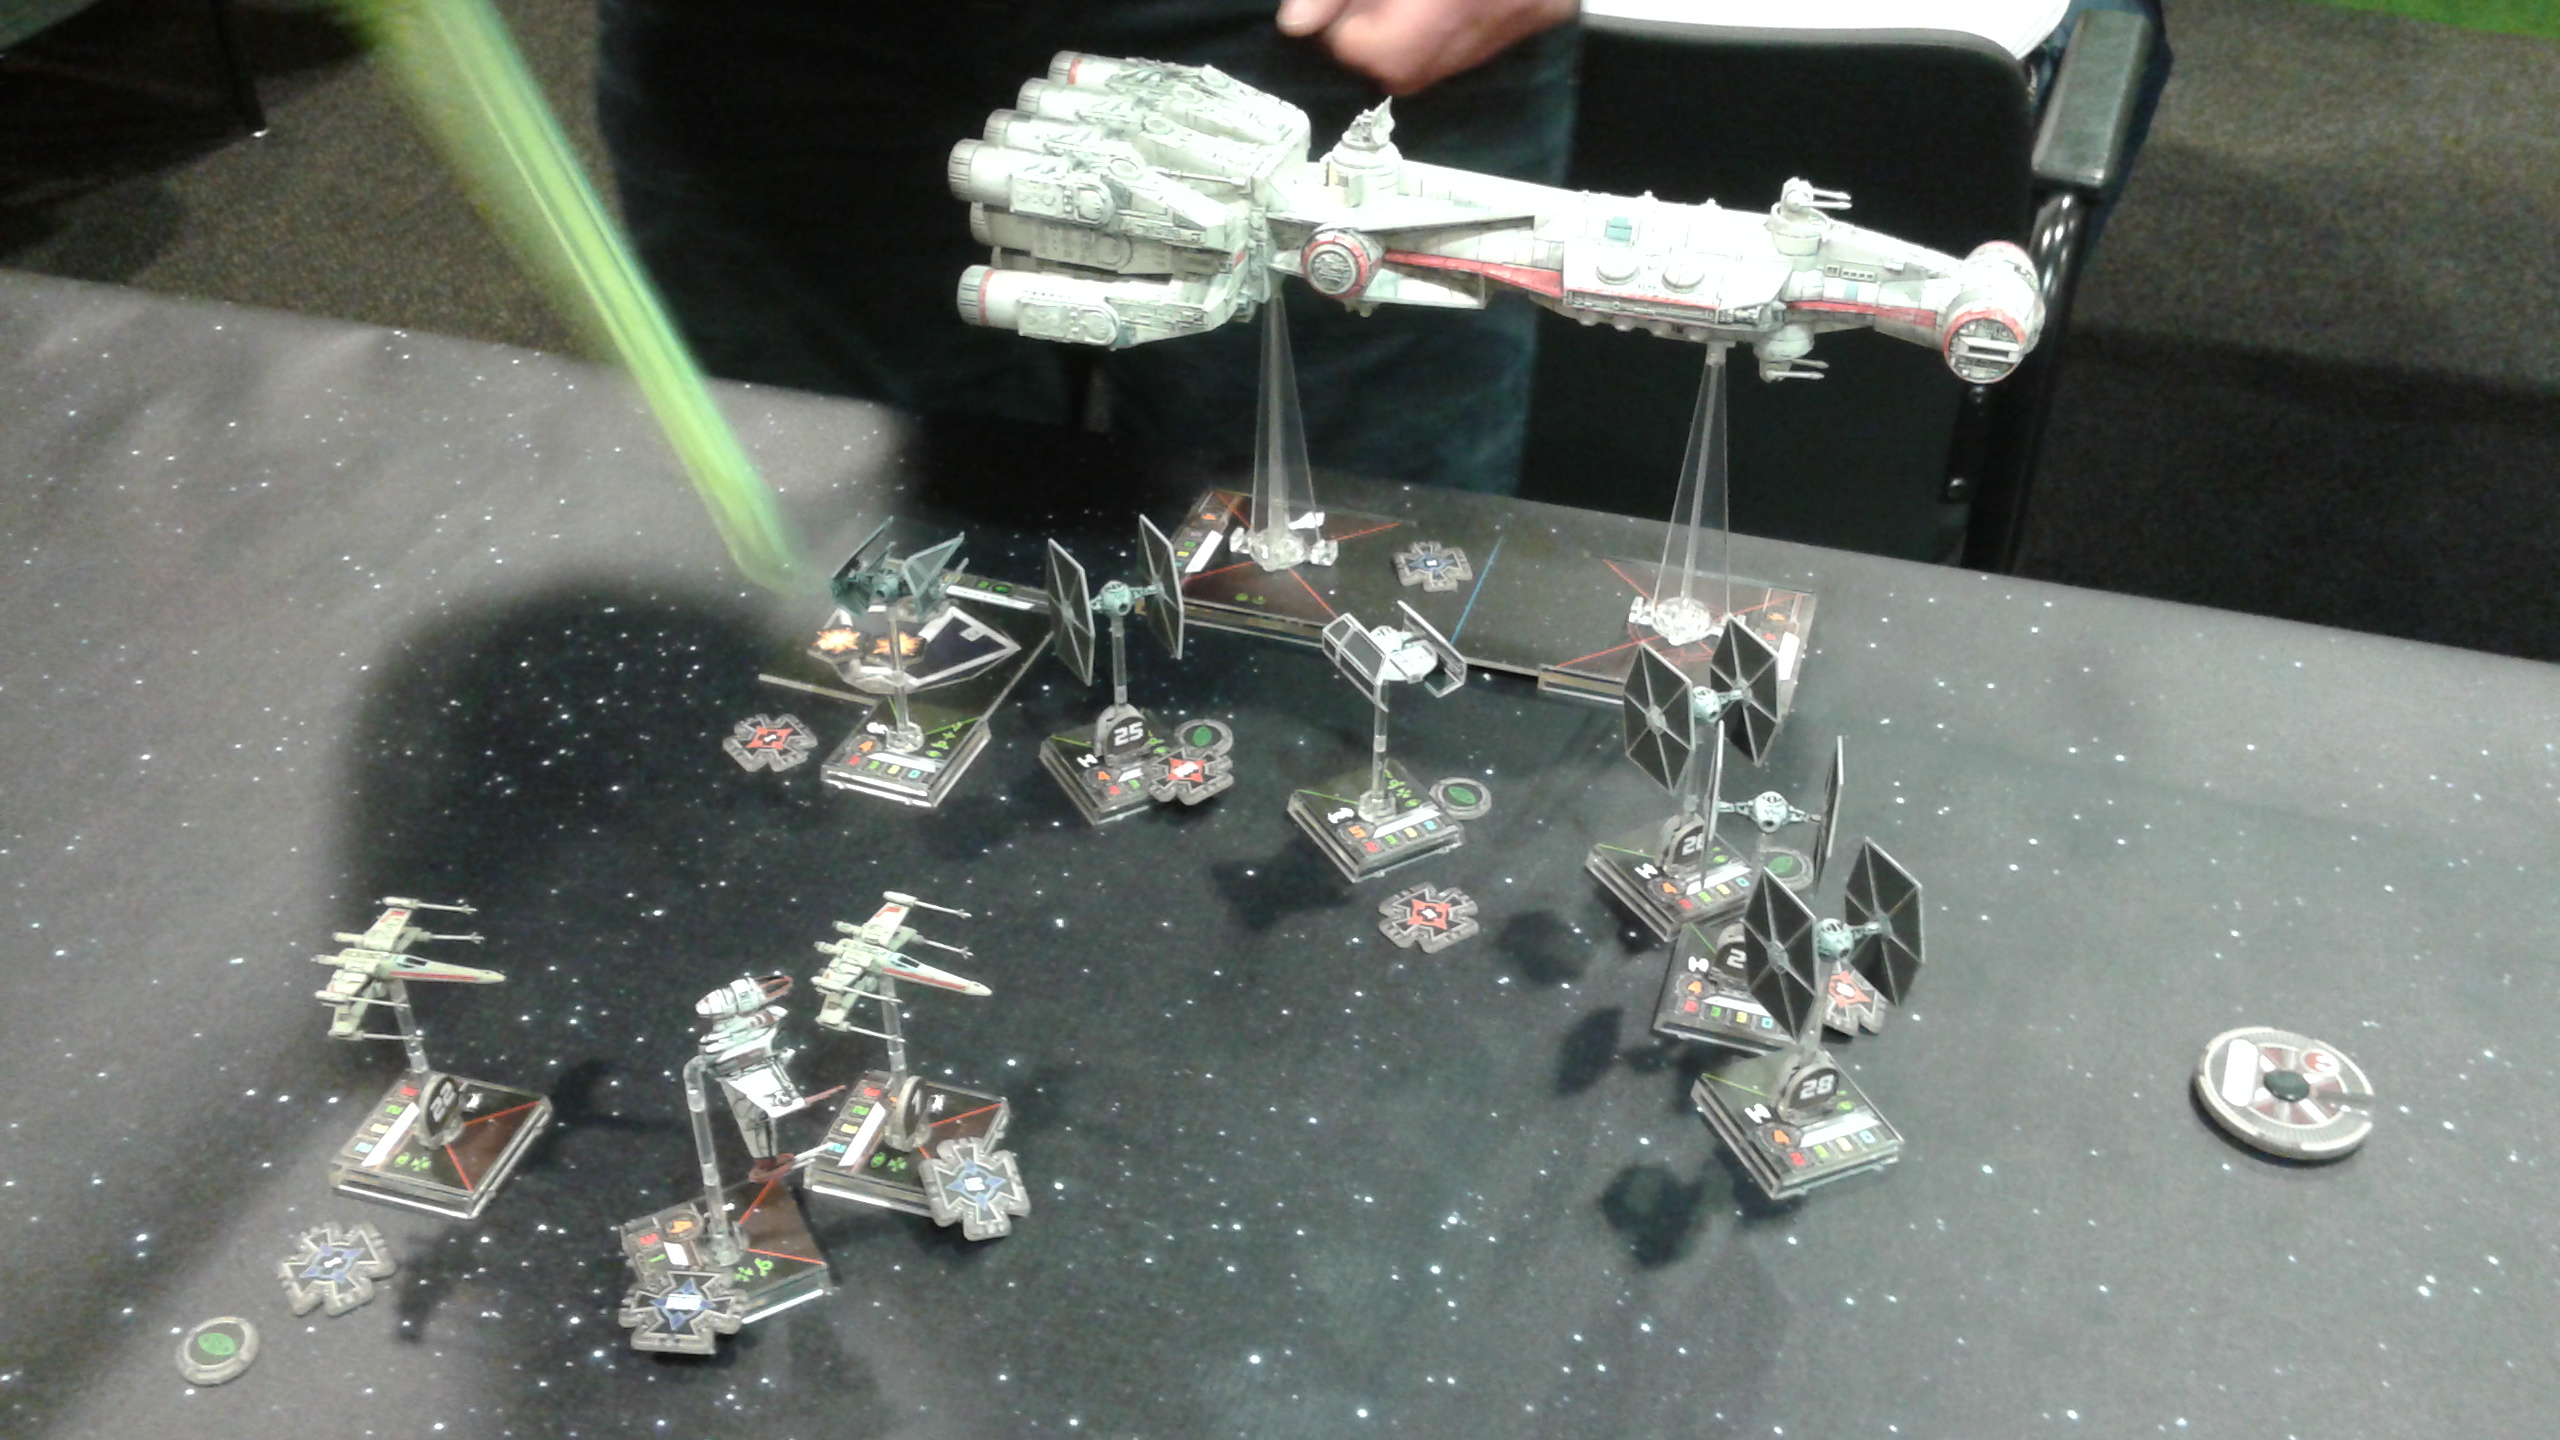
Soontir Fell was killed before he even got close enough to target the big ship. Somehow he drew all fire from the Rebels. The rest of the Imperials got closer while the X-Wing and B-Wing fighters tried to circle around them.
The best thing of a large fuel cell attached to the ship you need to destroy is that fuel can be made to explode. Once you shoot 3 points away from the fuel cell it detonates with a nice load of damage to all within range 1. The Tantive was pretty shaken when I used this tactic. It cost me two of my TIE Fighters as well, but these were sacrificed in the name of the Empire, so all was good.
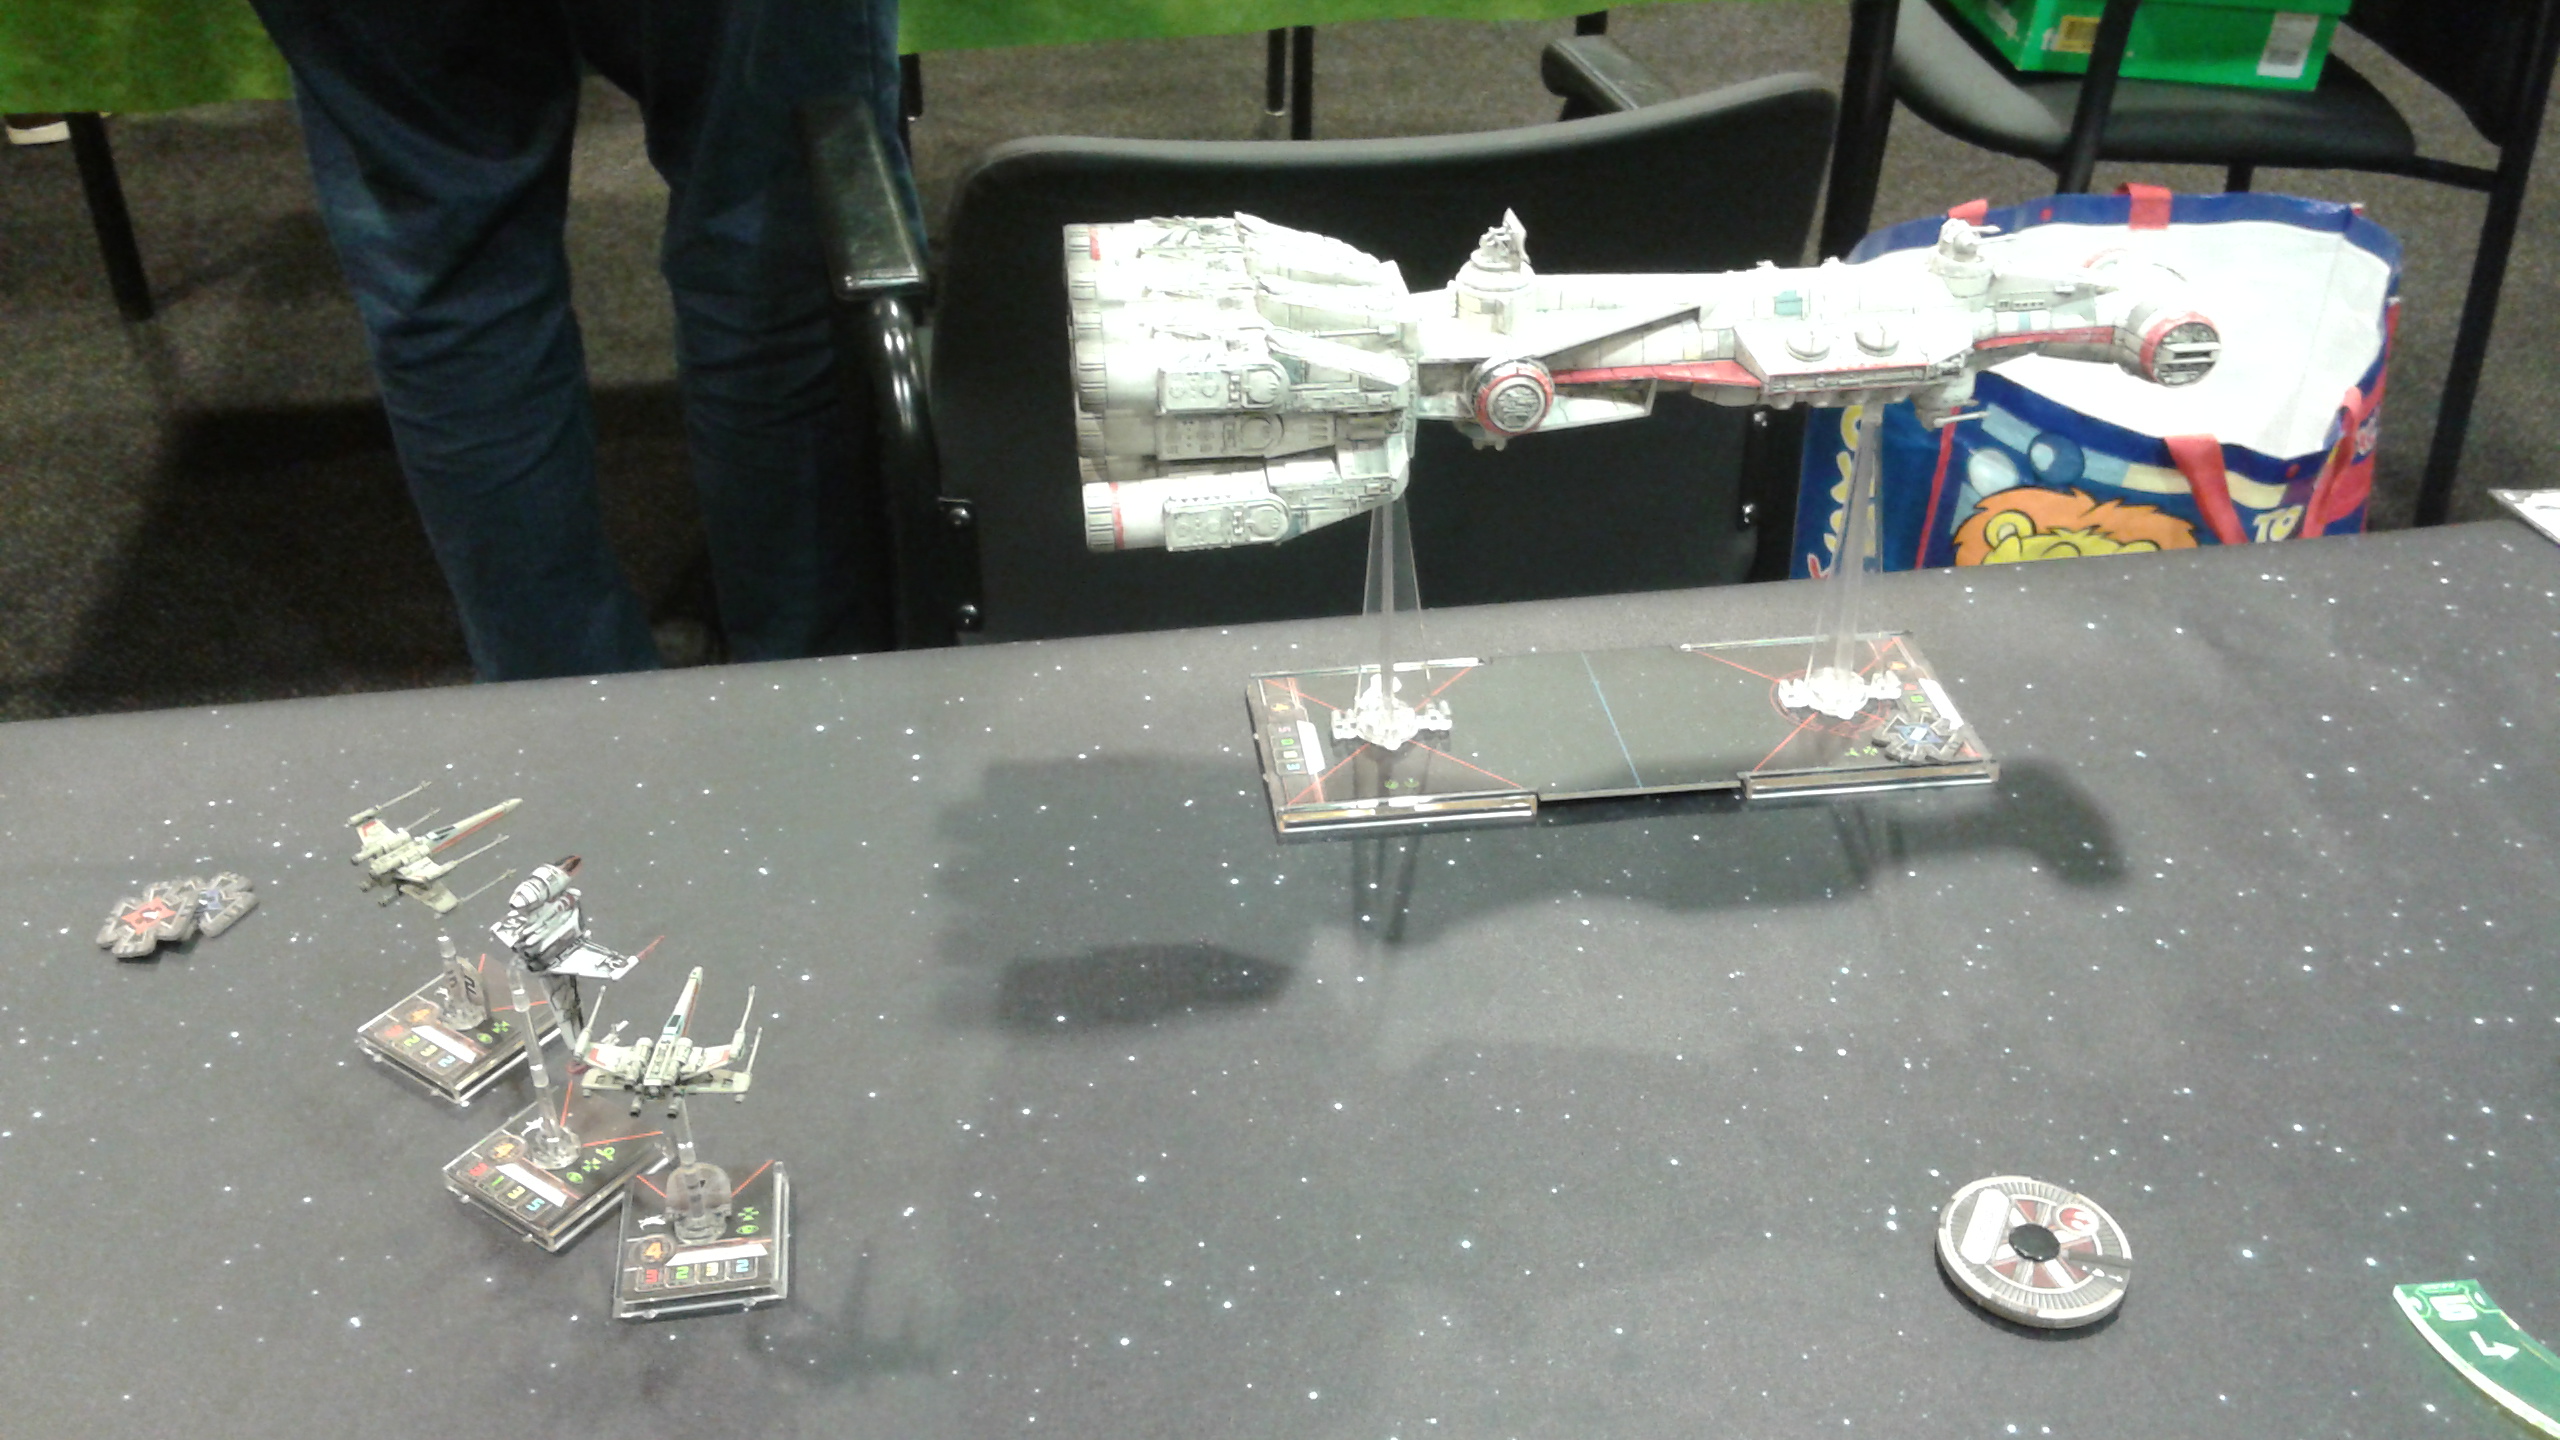
But in the end all my fighters were mercilessly destroyed. The Tantive had begun to race towards the table’s edge and I gave chase while the Rebel fighters were hot on our tails. During the game I had dealt enough damage that in the end it again came down to a very decisive turn in which I had one chance to deal just enough damage to cripple the damned thing. If I could just get three solid hits I would have won the game. The first fighter left made hits, but not enough. So it all came down to the last fighter. The last dice roll. If that roll went well I had crippled the aft section. If not the Tantive could make sufficient movement in the next turn to reach the edge and flee the battlefield. Excitement to the last again. The dice were cast. We both wiped sweat from our eyes to see the result…. it was a miss! The Empire had failed once more. But again, such a close call. Another superbly well balanced game. ‘Soontir Fell’ and ‘Commander Alozen’ were added to the casualties list and we called it a night. We were very pleased with the games we played so far, so we will continue this campaign another time. Well done Fantasy Flight games. I had not thought that these missions were so well balanced before hand.
When we have played the next missions I will post a new battle report on our progress and see if the upcoming battles are just as good as these. It could be a while before we return to this campaign because we both got invited for a game of Dead Man’s Hand next club night. So we will exchange our flight suits for cowboy hats and revolvers and shoot the crap out of each other in the Wild West for a change.
Until next time!
Pingback: X-Wing – point of no return battle report – pt. II – The Desert Scorpions
Pingback: X-Wing – point of no return battle report – pt. III – The Desert Scorpions