Last friday Hamza and I continued the point of no return campaign that is included with the Tantive IV model.
Two weeks ago we started this campaign and were able to finish two of the four games. A battle report of these two games can be found here: http://thedesertscorpions.com/x-wing-point-of-no-return-battle-report/
The campaign had been going well for the Rebels, both of the scenarios had been a Rebel victory. So we now started with mission T3A: Satellite uplink. The captain of the CR90 has survived two Imperial attacks and is now ready to join the Rebel forces. He is asked to stay near a satellite cluster in order to intercept an Imperial transmission (which is off course of the utmost importance)….
The Rebels get the CR90 model with the upgrades as described in the mission booklet, Wedge Antilles (X-Wing) with proton torpedoes and R2 Astromech and 100 squad points (but no unique ship or upgrade cards are allowed). Hamza went for another 2 X-Wing red squadron fighters, a B-WIng and two A-Wings.
The Imperials get Maarek Stele in a TIE Advanced with cluster missiles and marksmanship, 4 Black Squadron TIE Fighters and 100 squad points to spend. Without having read the mission outline I just decided I wanted to get a lot of ships on the table as possible to swarm the Rebels. I choose another two TIE Fighter black squadron pilots, another TIE Advanced with cluster missiles and marksmanship and two TIE Interceptors (Saber squadron pilots) of which one got expert handling.
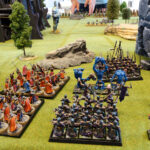
The Rebel player places the CR90 somewhere in the middel of the deployment zone and places 5 satellites as described in the mission booklet. Then he can place the rest of his ships. The Imperials get a somewhat smaller deployment zone than the Rebels, but a straightforward deployment.

For the Empire to win this scenario they have to either destroy all five satellites or the CR90. Rebel victory is secured when all Imperial ships are destroyed. (By fielding so many ships I may have accidentally given myself an advantage).
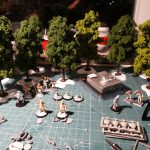
Satellites can be targeted as normal, have a hull value of 2 and an agility value of 1. Furthermore, they can have up to two shields (given to them by the CR90 as described later on). When a satellite is destroyed it has some destructive feedback for the CR90 through the upload link. This is reflected in a face up damage card on the fore or aft section (chosen by the Imperial player). The CR 90 can choose to give the satellites extra shields during the game by a using recover action, but instead of enforcing his own shields spent the energy on shields for the satellites. Also, the reinforce action can be placed on a satellite as well. The CR 90 itself does not move during this game, but gains energy equal to the number of satellites still in play.
Initiative goes to the Rebel players in this game.
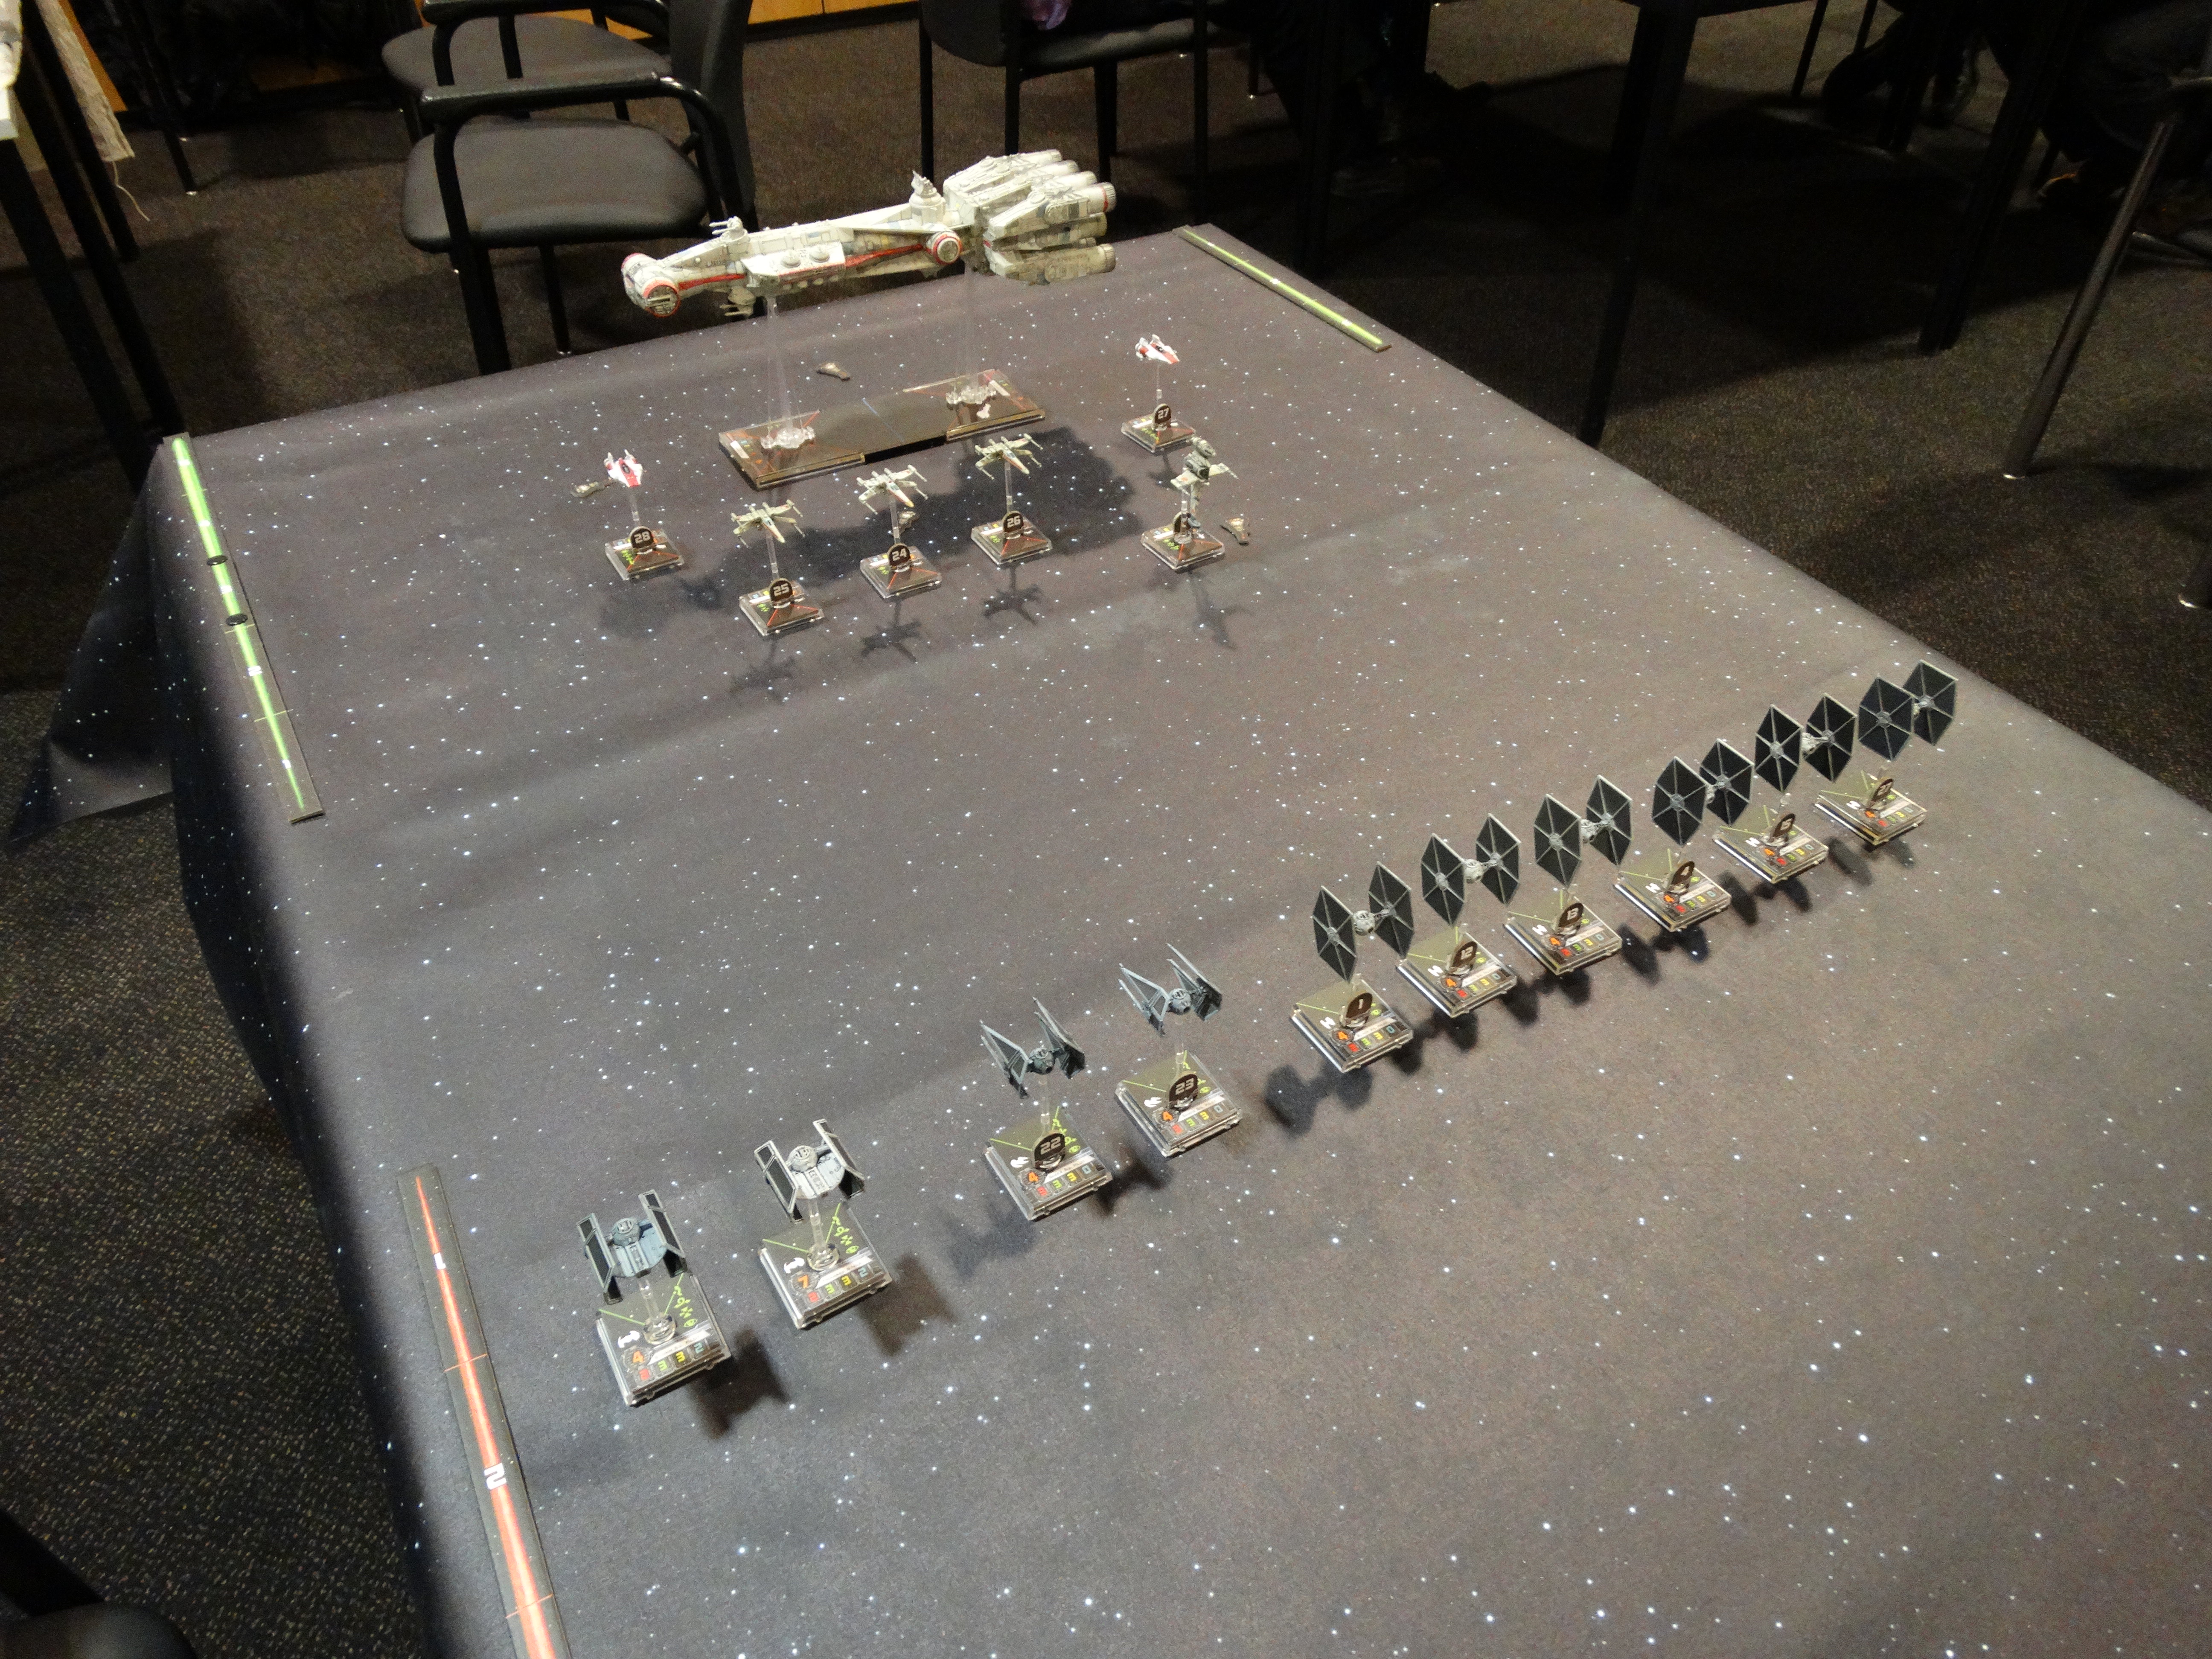
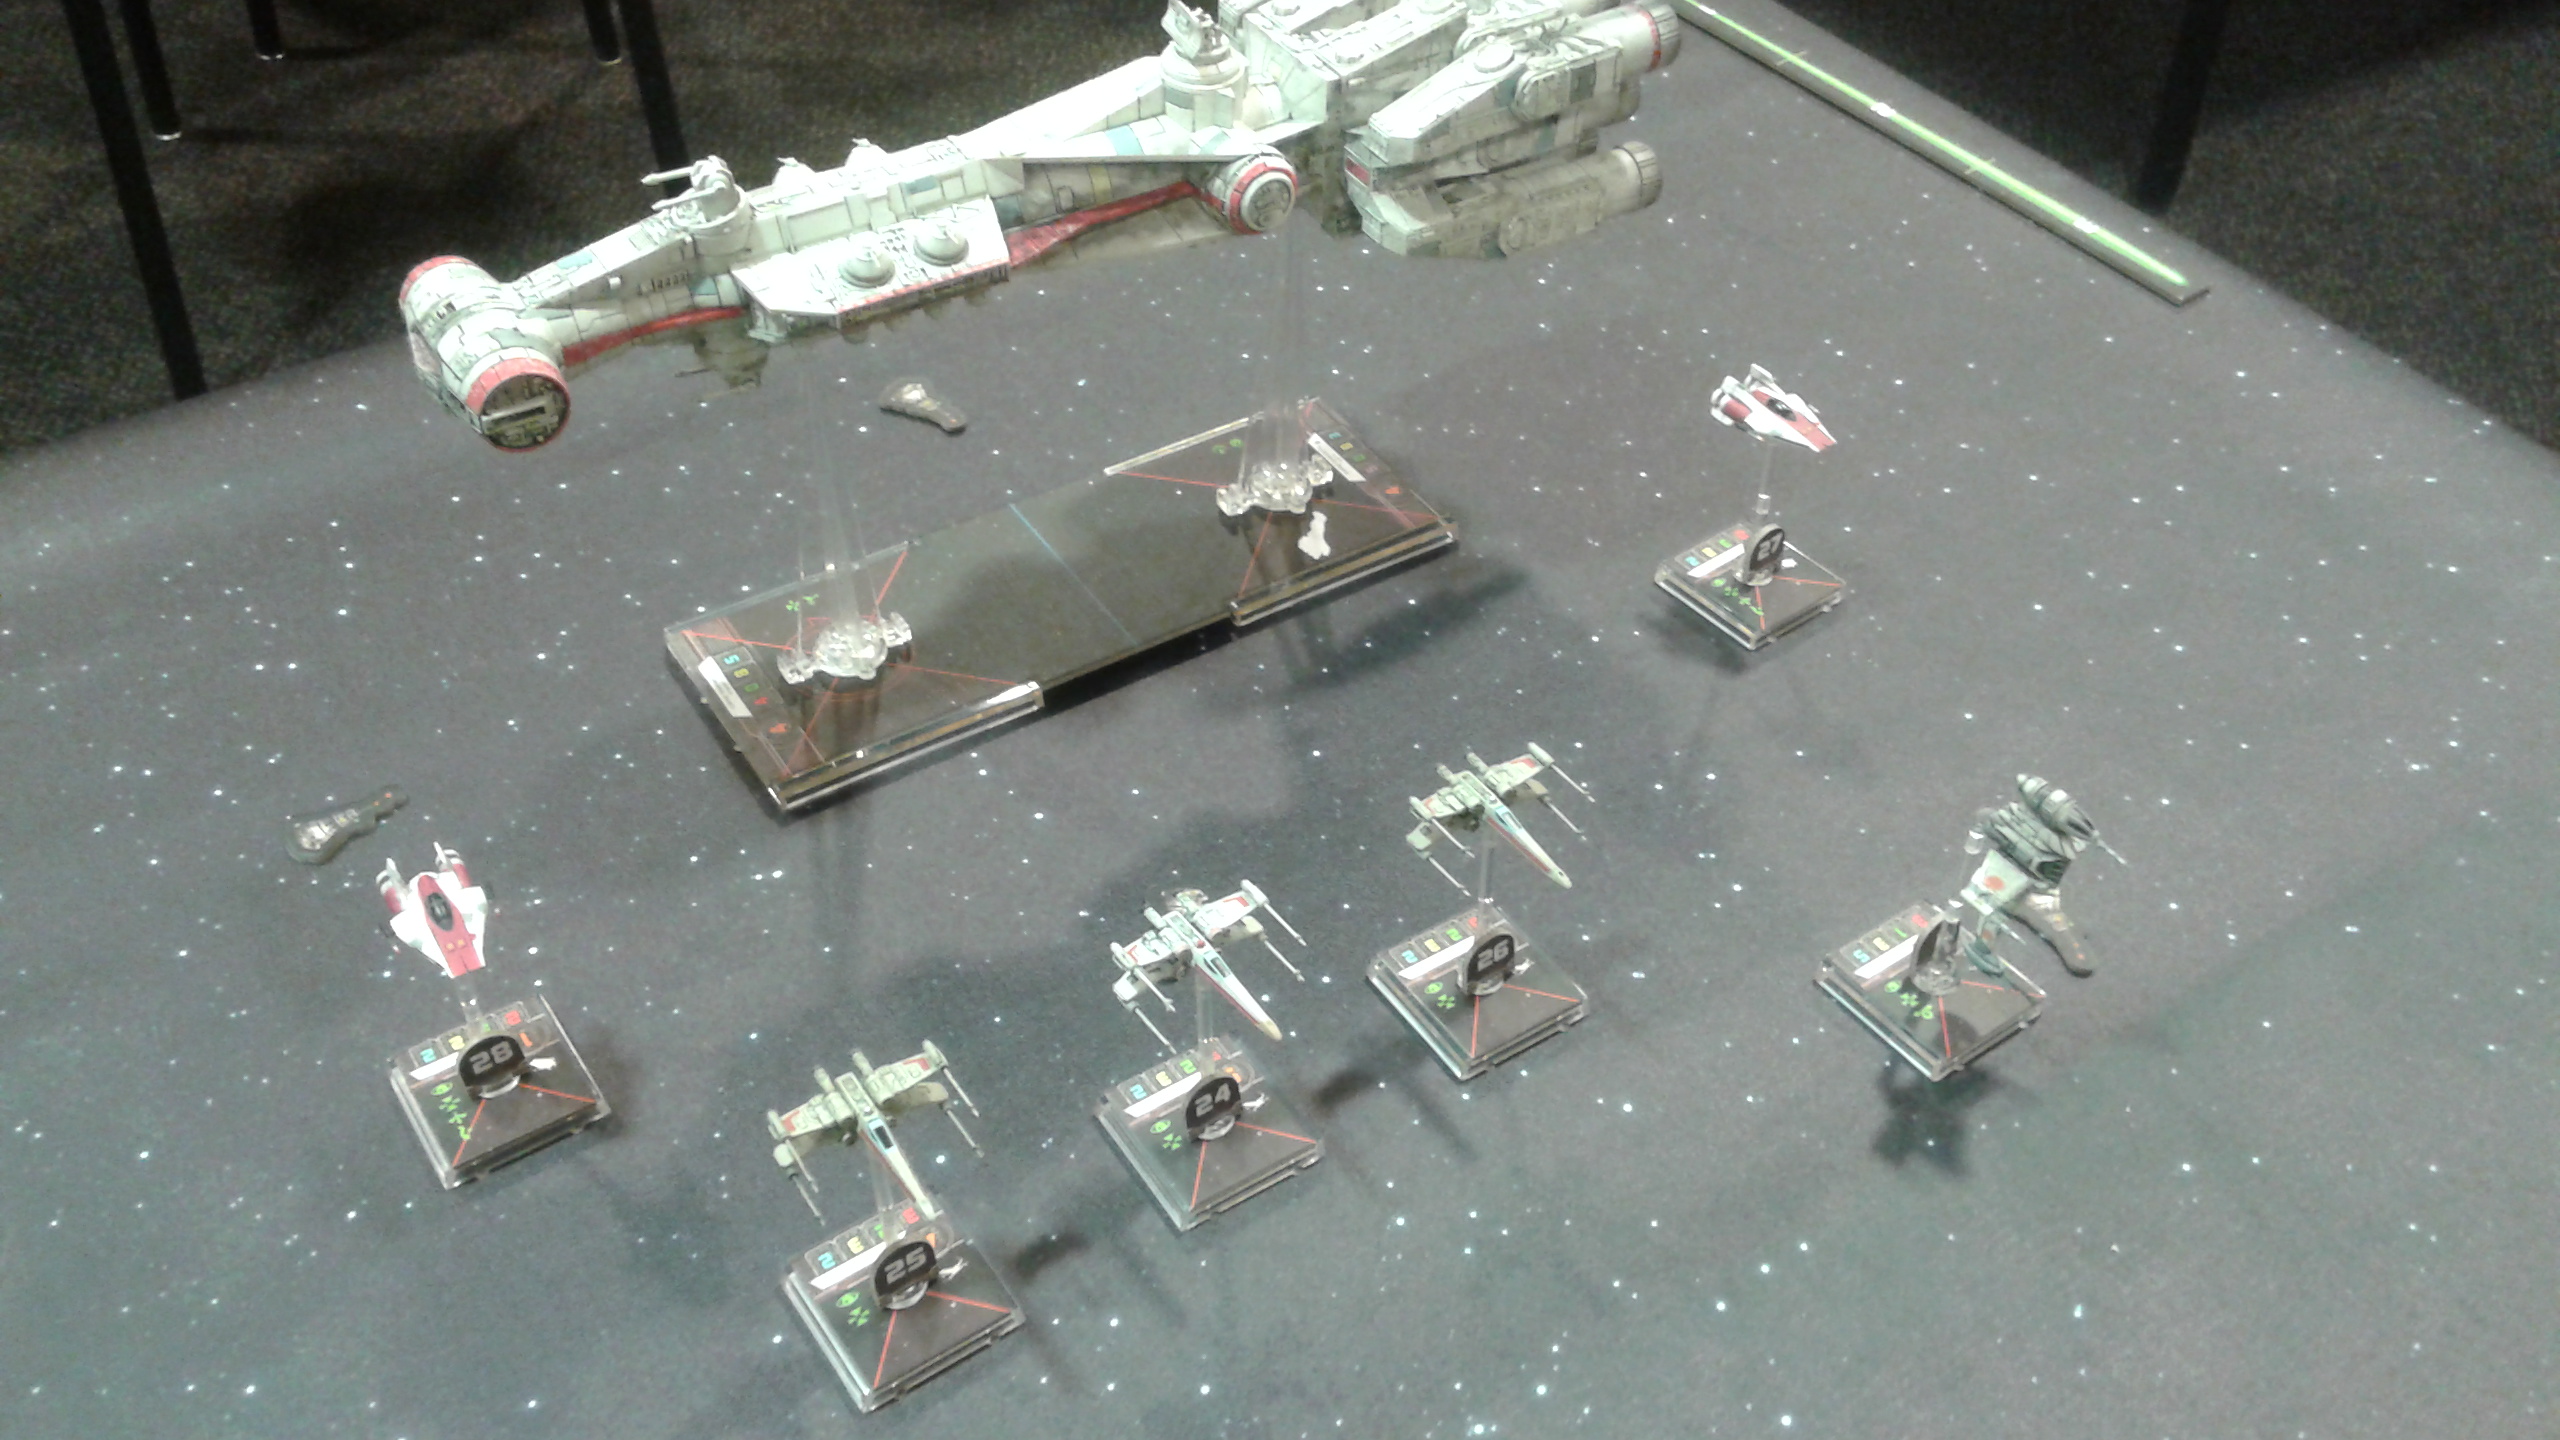
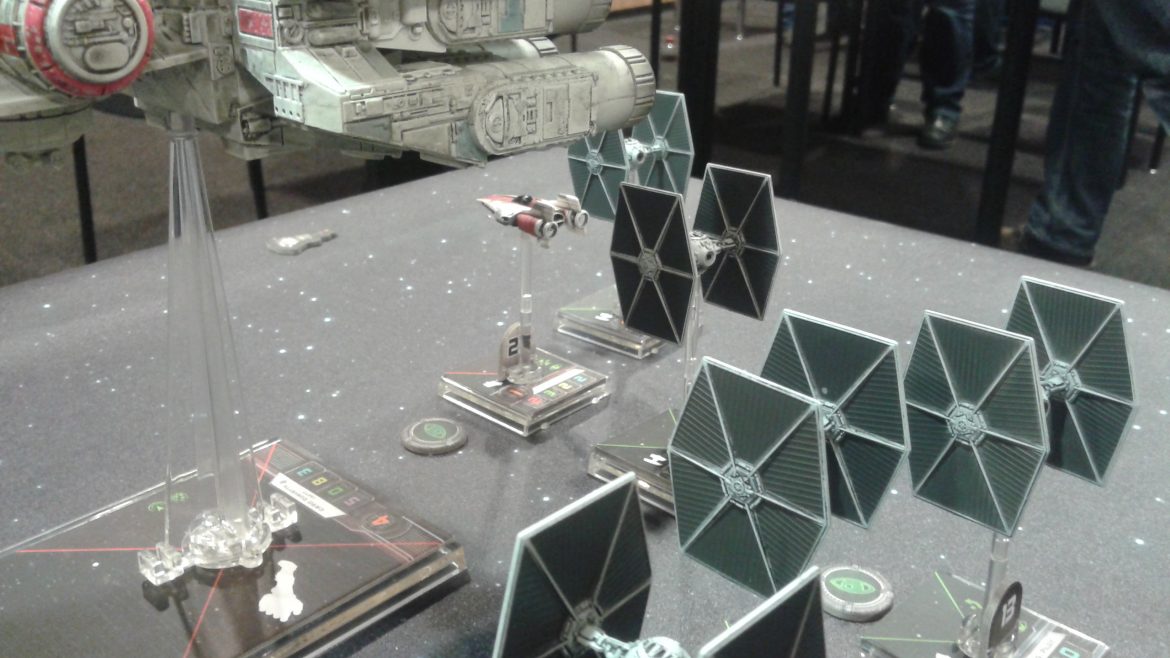
I deployed all my ships on the edge of the deployment zone, knowing full well that the primary weapon of the CR90 has a long range and getting closer is to my advantage. Certainly in this game since Hamza had much to gain by giving the satellites extra shields and could then spent less energy on charging his secondary weapons. I wanted to use the 2 TIE Advanced fighters with their cluster missiles and marksmanship to engage the CR90 with the Interceptors as guards against the Rebel fighters. The normal TIE’s could then try to destroy the satellites on the right flank. When we started playing I realised I had placed the Advanced models on the side of the table were they would be engaging the front part of the CR90, which has more shields and hull points than the aft section. A tactical error on my part.
Hamza had much less models to deploy and centered them so he could then sent them either way.
The first turn I made all my ships move foreward as much as they could and Hamza steered his B-Wing and X-Wings towards the TIE Advanced and Intercepter models, clearly seeing in them the biggest threat.

Shooting commenced and Wedge was first up. He had a target lock on Maarek Stele and immediately choose to use his proton torpedoes. This resulted in both shields being blown away and on top of that a critical hit which appeared to be a 2 hull damage card. Maarek only had one hull point left and we had just started. Since I thought that Maarek would not last this round and he was now up for shooting I opted to use his cluster missiles on the red squadron X-Wing on which he had a target lock. This also resulted in a lot of damage (both shield gone and two hull points) but I had really wanted to use this attack against the CR90. The big ship also started shooting. It’s primary weapon destroyed one of the shields on the other Advanced, but that was in itself not to bad. Then the turbo lasers openend up on Maarek in order to finish him off. I defended the first shot and miraculously the second one as well. The TIE Interceptors openend fire and the badly damaged X-Wing explodes while the other suffers a shield damage. The TIE Fighters came next and most of them target the B-Wing on range one. All it’s shields are blown away and 1 hull damage is the result. The dice were clearly in my favour this turn. The A-Wings were better at evading because the other TIE’s could not hit them. Now the B-Wing had it’s chance to retaliate, but the dice gods were still on my side because the Interceptor could defend all hits. The shots of the A-Wings also missed and while Maarek was targeted again in order to blow his last hull point away he still flew. I could not believe how well the dice rolls went for me since I do not have a good track record when it comes to this.
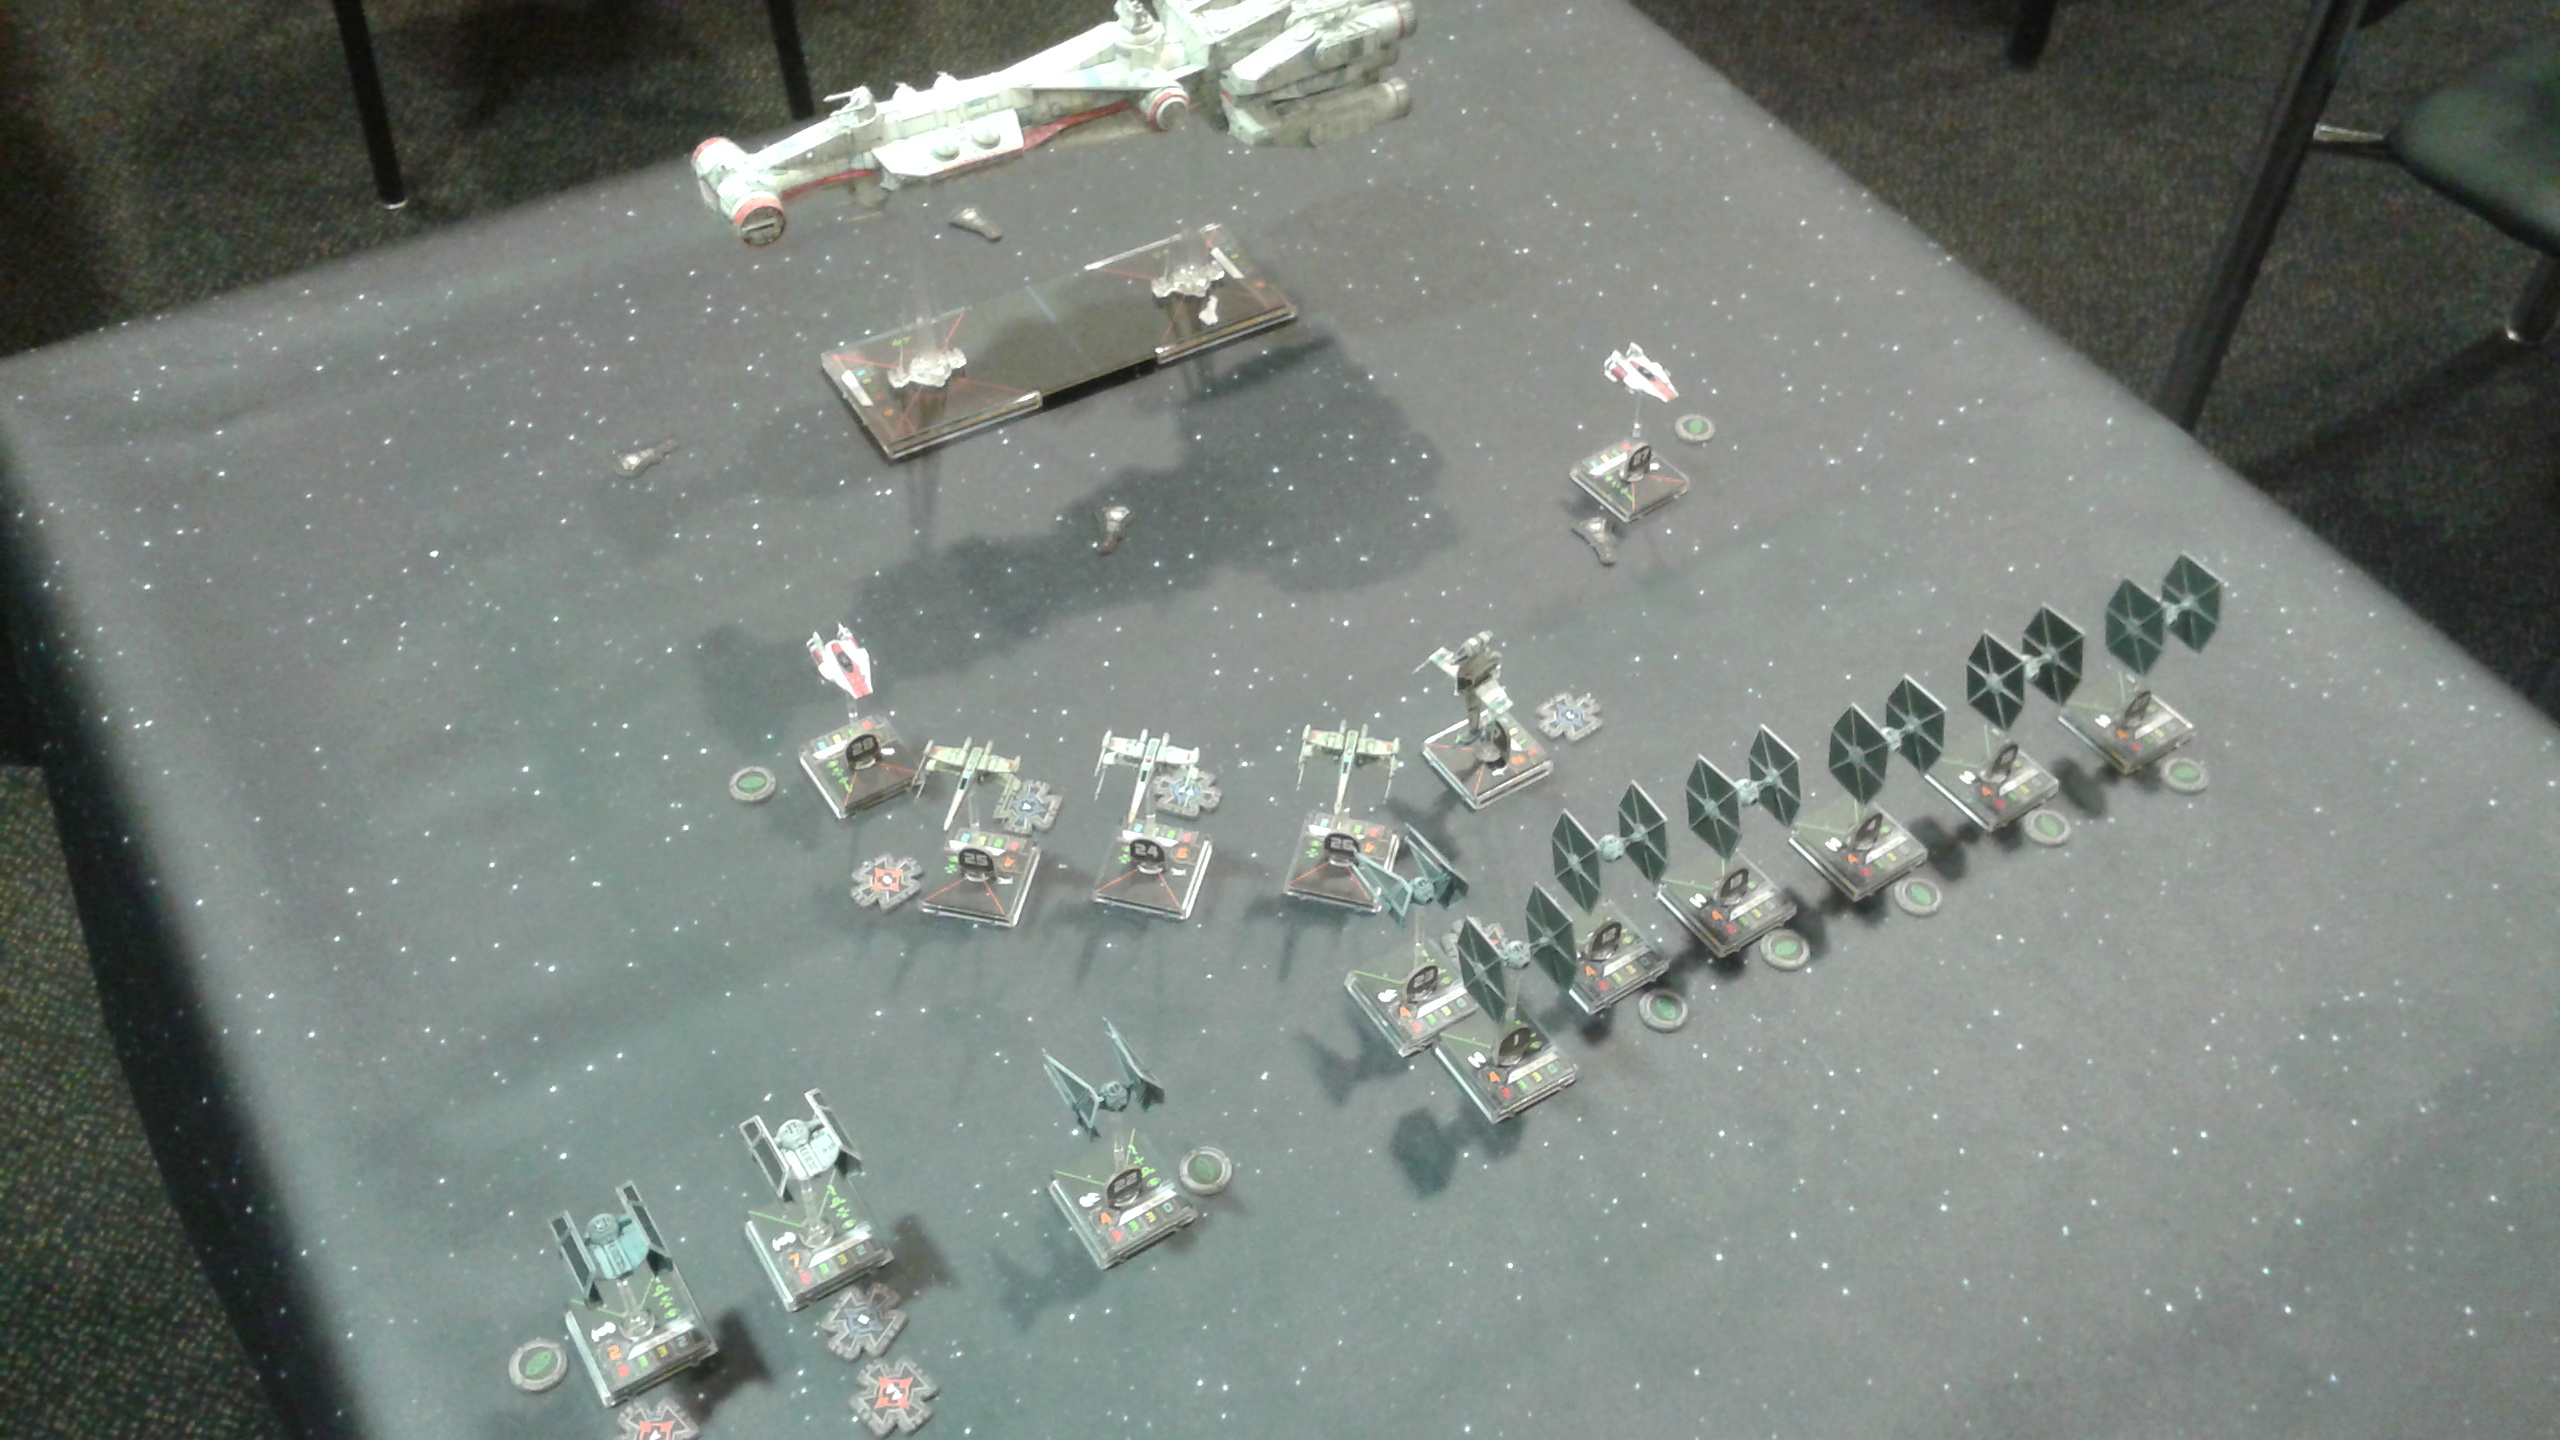
The second turn I pushed the Advenced models more forward, now thinking I could perhaps get one of them around the Tantive and target the satellites behind it. The Interceptor closest to them went along for the ride. The TIE Fighters and remaining Interceptor charged ahead in two groups. I intented the Interceptor and some TIE’s to target the satellite close to the CR90 and use the remaining TIE’s to head for the satellite on the furthest part of the table on the right flank. Most of the Rebel fighters had to make a Koiogron turn in order to keep them in the fight. This put some nice distance between them and my ships and also gave them stress so no actions for them in this turn. The CR90 desperately uses energy to power the shields on the satellites which are now under serious threat. One is in close range and the other is target locked twice by the Advanced ships.

Wedge tries to shoot at a TIE Fighter which is still somewhat in range but sadly misses. Maarek targets a satellite and manages to destroy a shield and one hull damage, right before the CR90 finally manages to destroy him. Well done Maarek. Your sacrifice for the Empire was not in vain and your resilience will be remembered. The big vessel was not done shooting though. Secondary weapon batteries try to target an Interceptor, but both shots are evaded. The remaining Red Squadron X-Wing does not fare better and does not manage to damage a TIE Fighter. The Interceptors are next and they prove to be far more effective by destroying two satellites. I get to choose two face-up damage cards for the CR90. I choose the aft section for both. Next to the two normal damage the cards reveal that the model can no longer choose the reinforce action and gets 2 damage to the fore section as well. By this point I start to like this mission. My superb dice rolls are also a very welcoming change I might add. A TIE fighter blasts another shield from the aft section and two other TIE Fighter manage to destroy another satellite and give the aft section of the CR90 an extra damage. The card reveals the crew is now out of action as well. Since a few other TIE’s were lined up for this satellite they have no choice but to target the aft section of the Tantive at range three. They get another shield down as a result. The Rebels now have a change to do some damage to my fighters, but the B-Wing and both A-Wings fail miserably. Again my dice rolls are perfect.
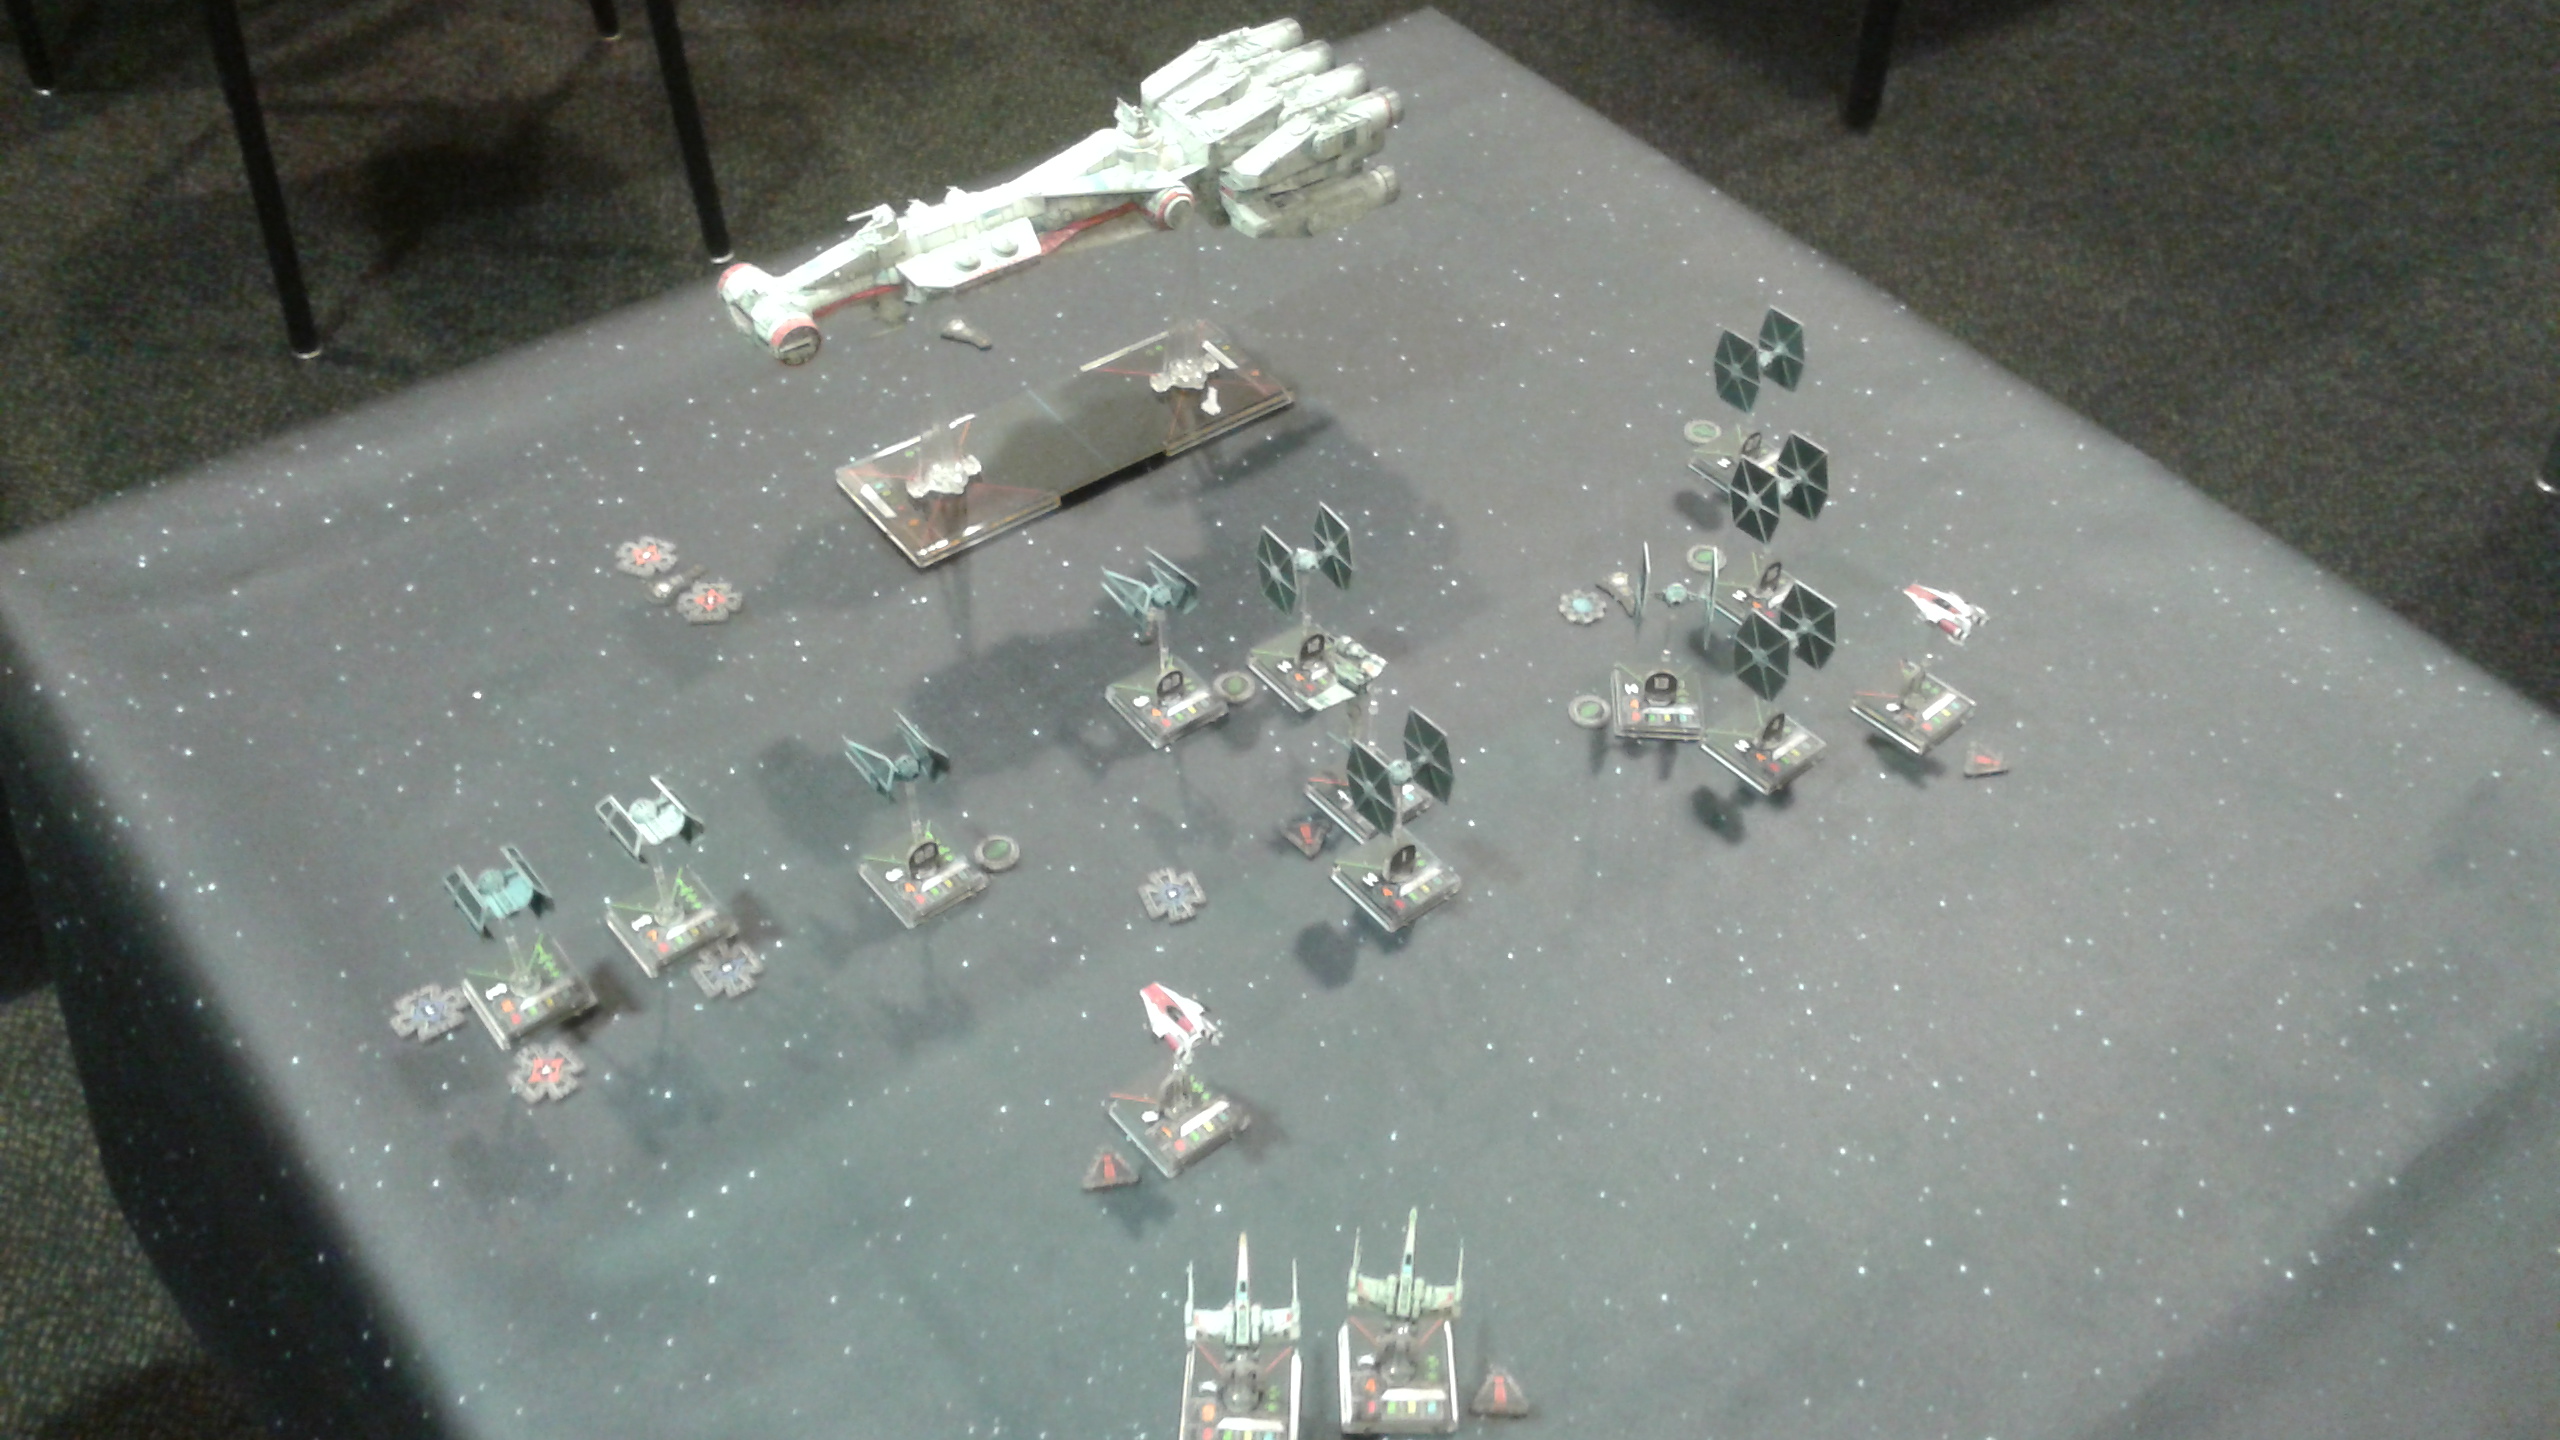
Turn three sees the Rebel fighters closing in once more. My TIE Interceptor and Advanced move around the CR90 to target one of the remaining two satellites while the TIE’s on the right flank use their maximum flight distance to reach the other one. The remaining Interceptor and TIE who are in the middel turn to get them in line with the aft section of the big ship and on route to the satellite. The Tantive uses it’s Tibana gas supply to gain an extra three energy this turn and puts shields on the two remaining satellites and charges it’s aft secondary weapons.

Again Wedge tries to hit a TIE but misses. The other X-Wing does somewhat better and damages a TIE fighter somewhat. The Tantive’s primary weapon’s long range sees that it can only shoot at a TIE Fighter near a satellite but the pilot’s focus is such that it can evade the shot. The secondary weapons cause some damage to another TIE. Two of my TIE Fighters manage to destroy all shields on the satellite and three others take shots on the aft section of the CR90 and destroy it’s last shield and a further 4 hull points of damage. An A-Wing also looses a shield and the Interceptor near the Tantive can take a nice shot at close range and blasts away the final hull point, thereby crippling the aft section. The other Interceptor destroys one of the shields on the satellite on the left flank. The B-Wing takes a shot at a TIE Fighter and scores three hits. But all three are evaded by my perfect dice roll, much to the frustration of the Rebels, who keep seeing the evasive power of the Imperial pilots. These appear to be expert flyers indeed. The two A-Wings do somewhat better damaging yet another TIE Fighter and the Advanced (last shield gone and critical damage which causes stress).
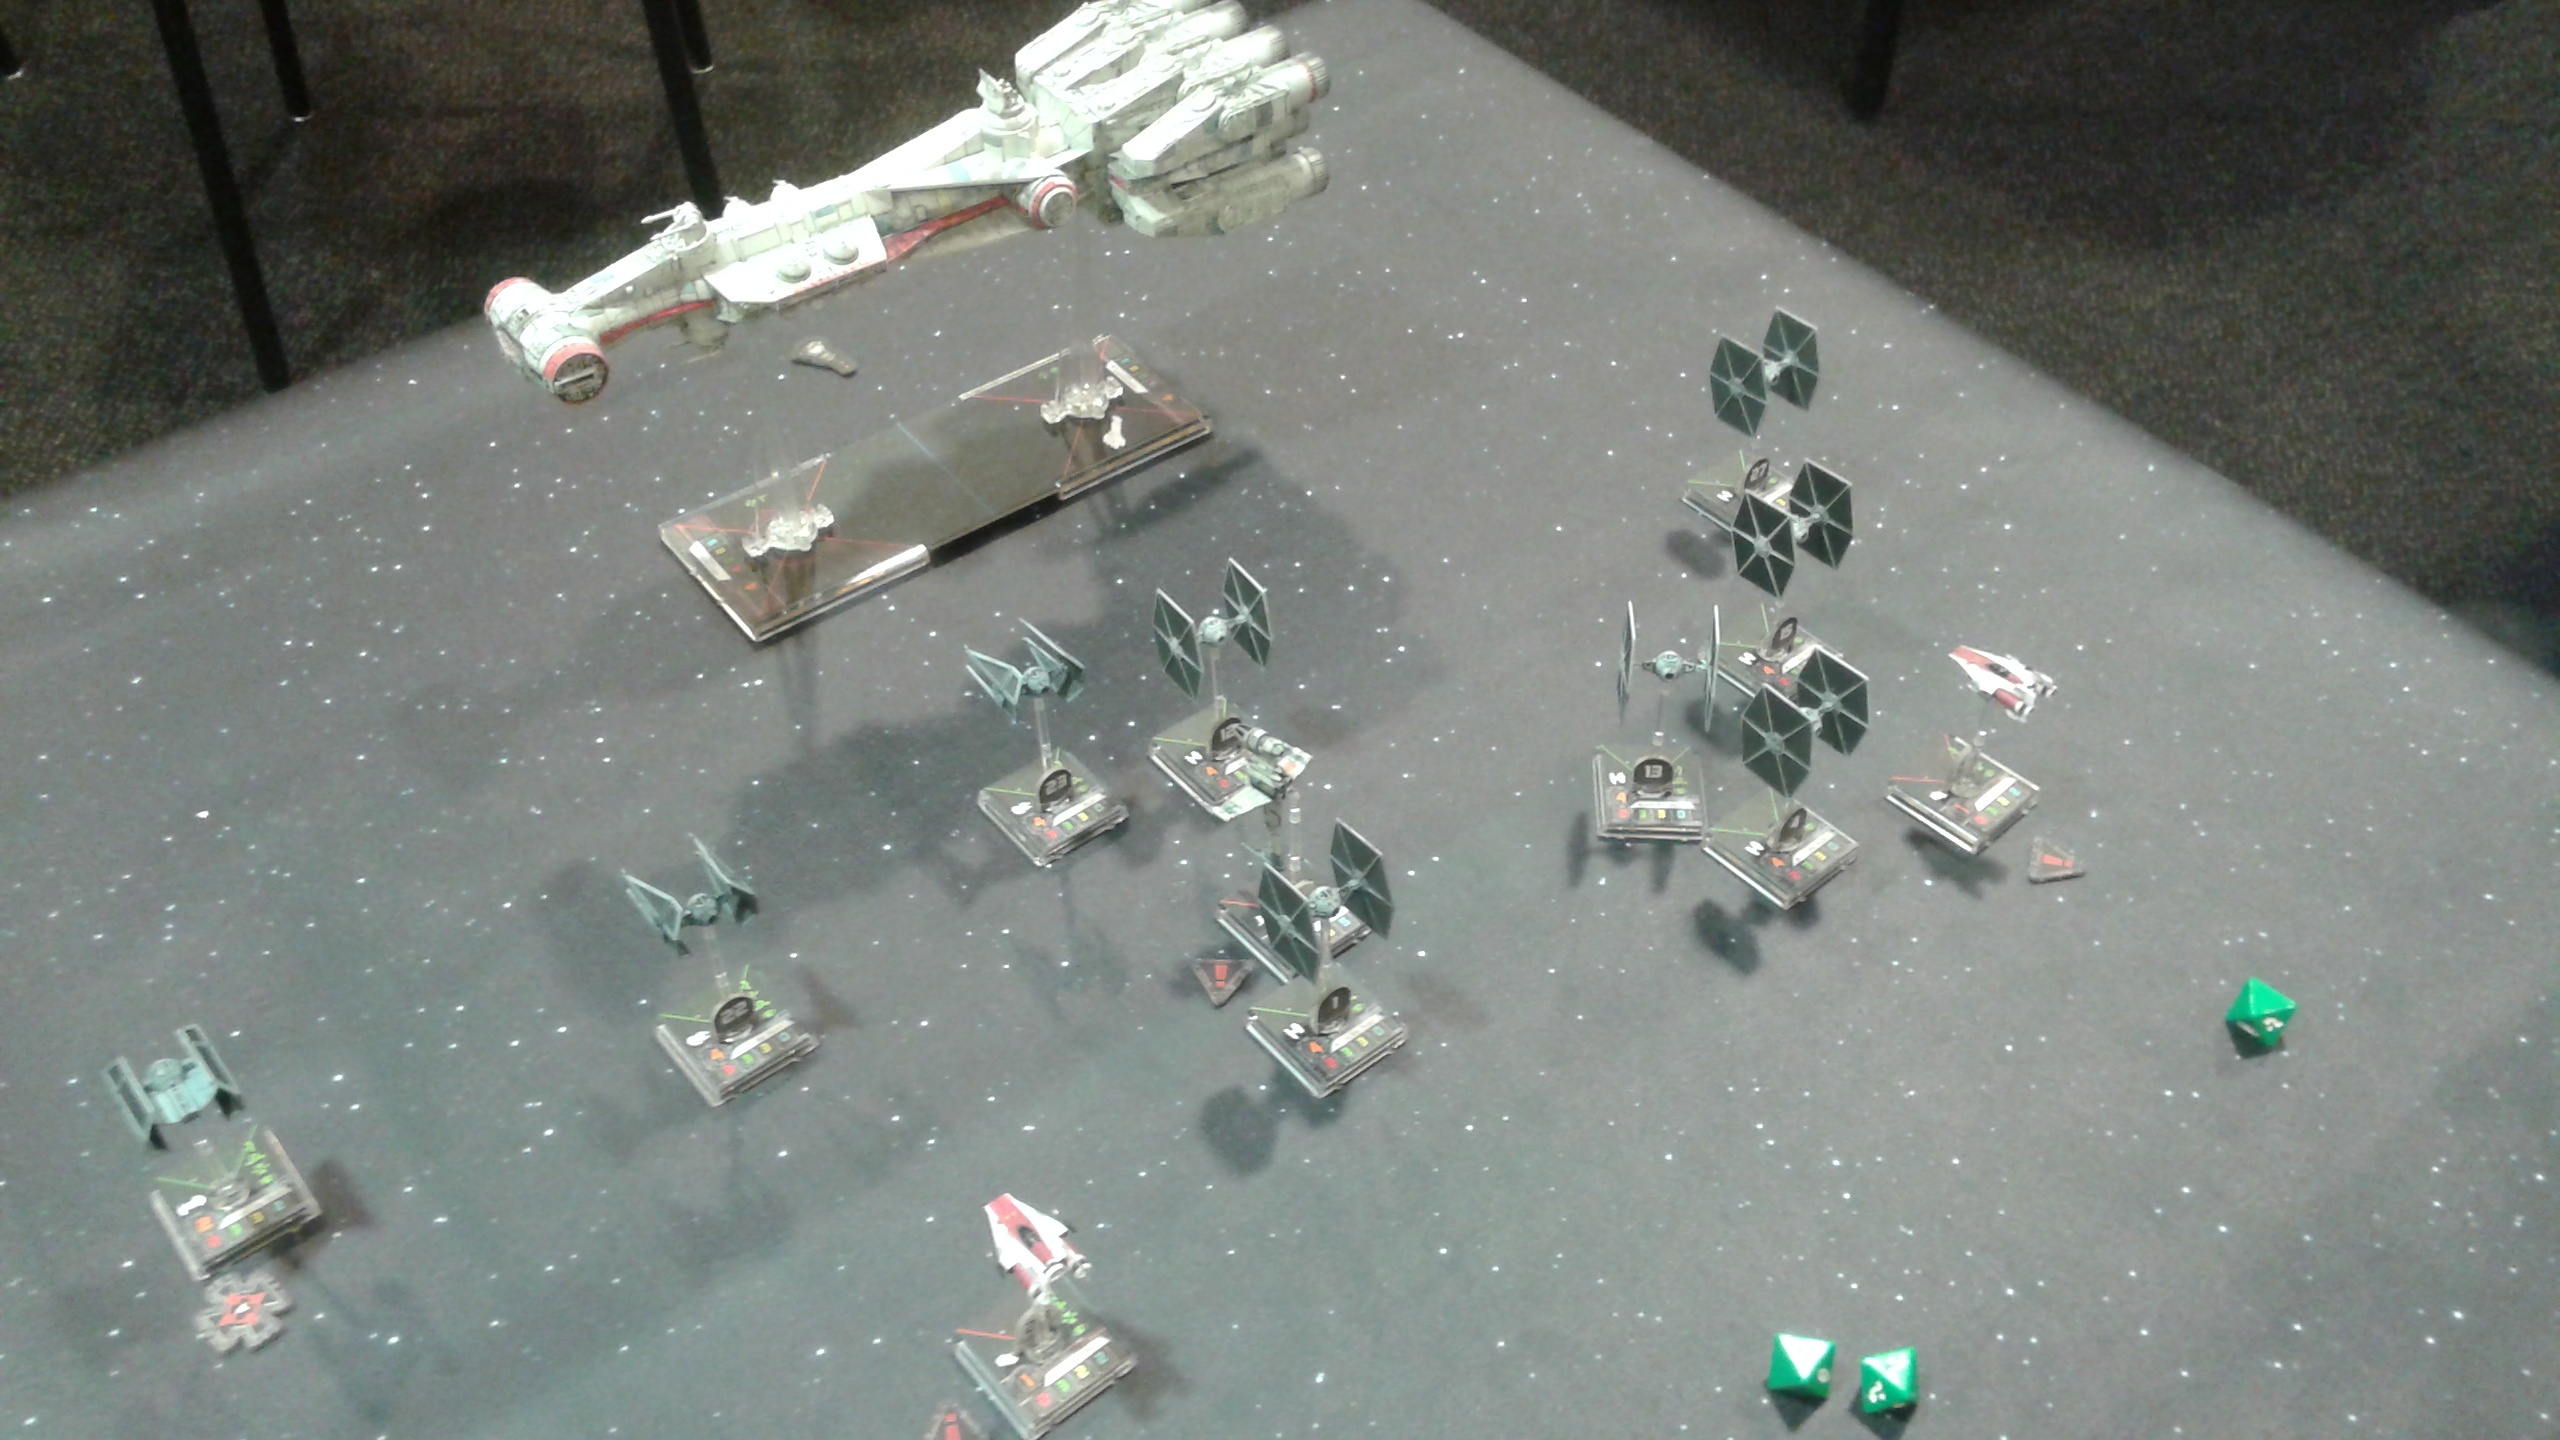
By the time of turn 4 I have only two satellites to destroy and both are well in range of my ships and have no more shields. I move all ships as close to them as possible to also have the advantage of close range attacks. The Rebels desperately pursue and hope to do some more damage. A fair number of the TIE’s have sufficient damage to be destroyed by the next attacks. The TIE Advanced bumps the CR90 model and as a result gets another damage.


Wedge finally becomes effective and destroys a TIE, just as the Tantive (but since they have equal pilot skills the TIE stil gets to take a shot this turn). The other X-Wing targets an Interceptor but misses. Now the Imperials have the chance to finish this fight. The first TIE in close range of a satellite uses it’s focus and destroys the thing. And this gives an extra damage on the Tantive’s remaining front section as well. The other TIE Fighter’s now have no target left to shoot at, but the Interceptor at the remaining satellite has no mercy and destroys it. And thereby gain Imperial victory!
We had fun playing this scenario, but in the end we concluded the former two games were much better because these remained very exciting until the last turn whereas this game became a one-sided affair pretty quickly. This could be because the Tantive in this mission is not very effective and the remaining squad points for the Rebels are much lower than those of the Imperials in total. It could also be that I accidentally gave myself an advantage by taking so many ships. And let’s not forget the dice rolls. I had perfect rolls all evening for offense and defense. This also had a big impact on the game.
Next time we will play the last mission in this campaign and we will see who will be the overall victor. May the best Imperial win… (or perhaps I get to cocky because of this one lucky victory?)
Cheers all!