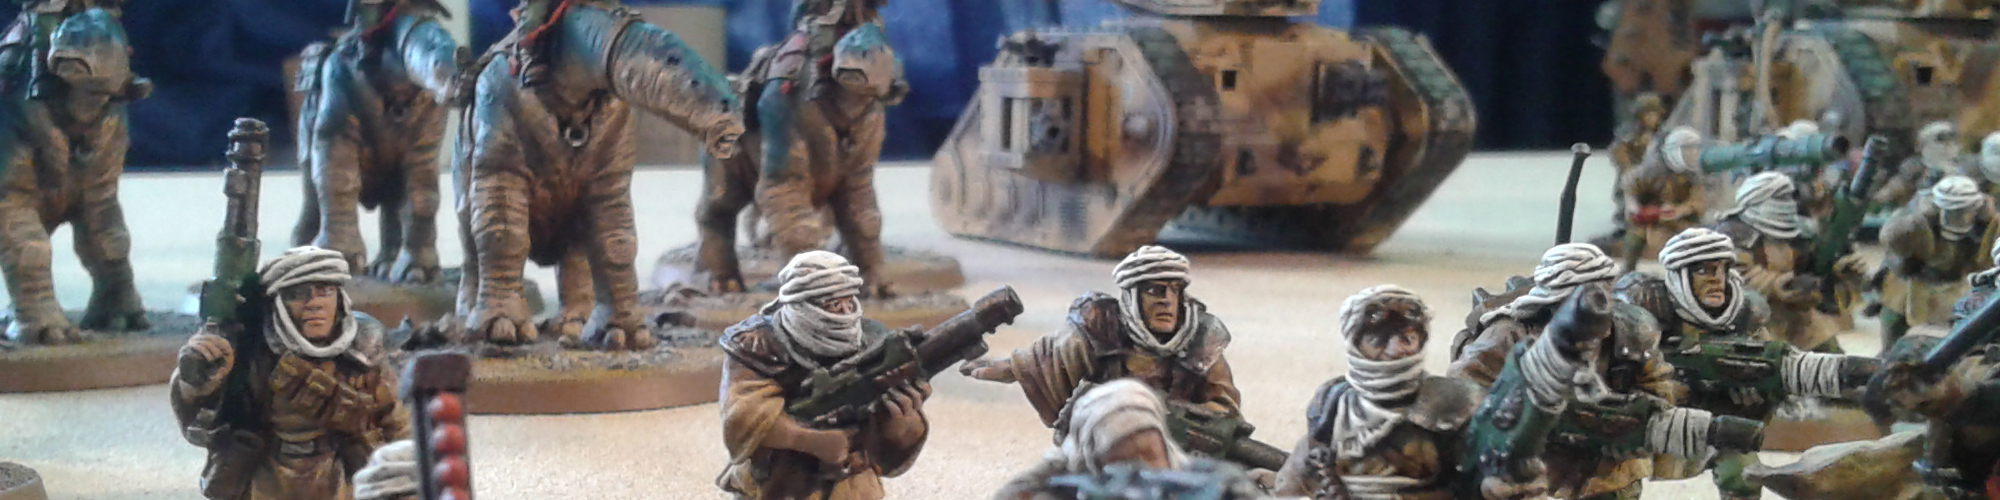

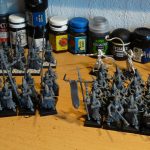
A while ago I was asked by someone in our local gaming club if I wanted to join a game of Legends of the High Seas. This is a 28mm Warhammer ‘historical’ setting with (as you might have guessed) pirates. The rules are pretty nice and simple to play with in my opinion and since I already had some old Harlequin Undead Pirates lying around somewhere it would be easy to complete this crew with some Black Scorpion models. Not really historically correct, I agree, but fortunately the blokes who I happen to game with are not that overly correct when it comes to just playing a fun game on friday night. The rulebook gives you three different crews to use as templates and I would simply use the pirate crew.
Since I have been painting Tallarn for a long while now and my army is essentially ready for games I decided it was time for something different. So pirates it would be!
But every decent pirate crew needs a ship…
Apparently there are websites where you can order models for ships. There is also the option of finding a nice modeling kit of a ship of the pirate era and remodel it to your liking. But I wanted to make a scratch build undead-worthy ship. Now, even the least observing reader/hobbyist can see that this is quite some work and I can give you a spoiler; it is not finished. Yet. But I have come a long way and I thought it would be a nice step-by-step item. There will be a second installment once the damn thing is finished, I promise.
I never sketch layouts or plans beforehand. Instead I simply start at some point and see were it all goes along the way. Off course I have seen enough paintings, pictures and movies with boats in them and I had these in mind when I began thinking of how to start this project. I usually start to think on how I will construct certain parts and put these in the correct order in my mind. I essentially go through a step-by-step build up of the project before starting it. By doing so I have a general idea of what it will look like and most of the time encountered construction problems in my head, which I can avoid when actually building.
To get some more inspiration I wanted to go to a modeling shop to see if I could find some items like anchors, lights, steering wheels and such. As it happened me and my wife were near Maastricht one weekend where we found an amazing modeling shop called Shamrock. (https://www.shamrock-maastricht.nl) If you happen to be in the area one day make sure to visit them. Here I found lots and lots of stuff once I told one of the staff members about my plans. He happily started pulling out drawer after drawer of very useful bits and pieces. Together with the myriad sorts of balsa wood and sheets of pvc/plasticard I already had this would be enough to make a nice ship.
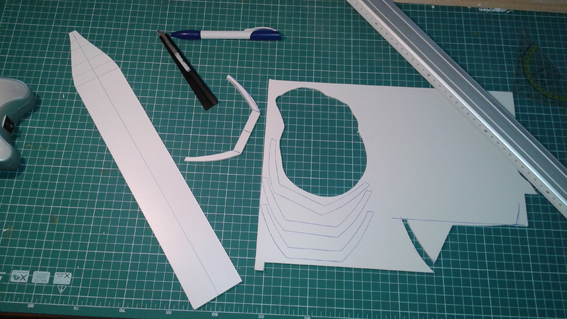
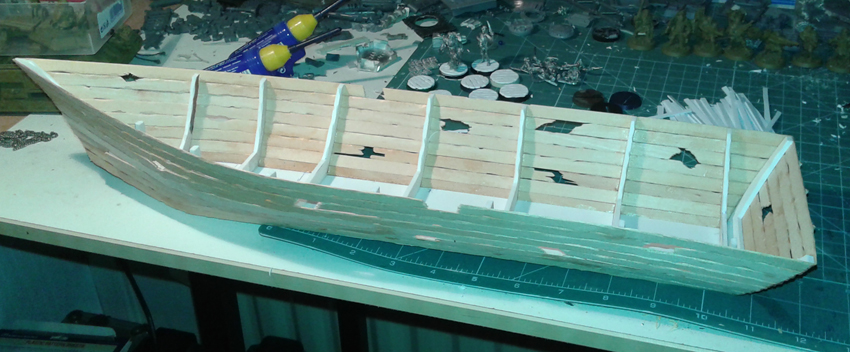
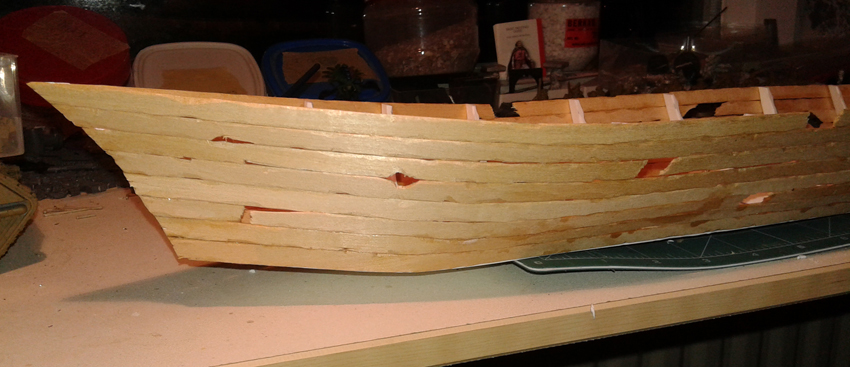
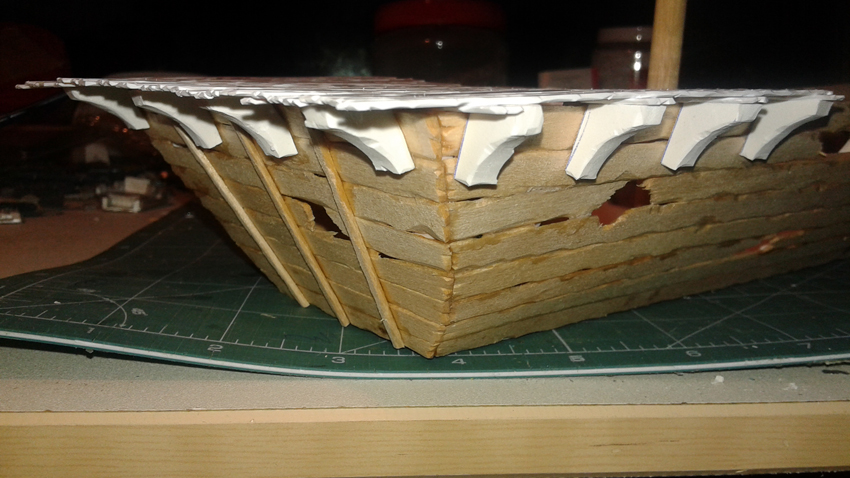
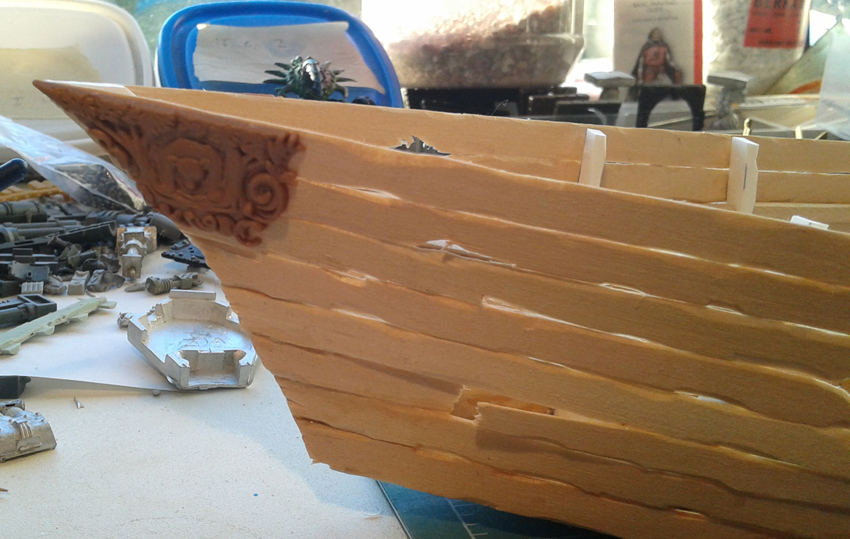
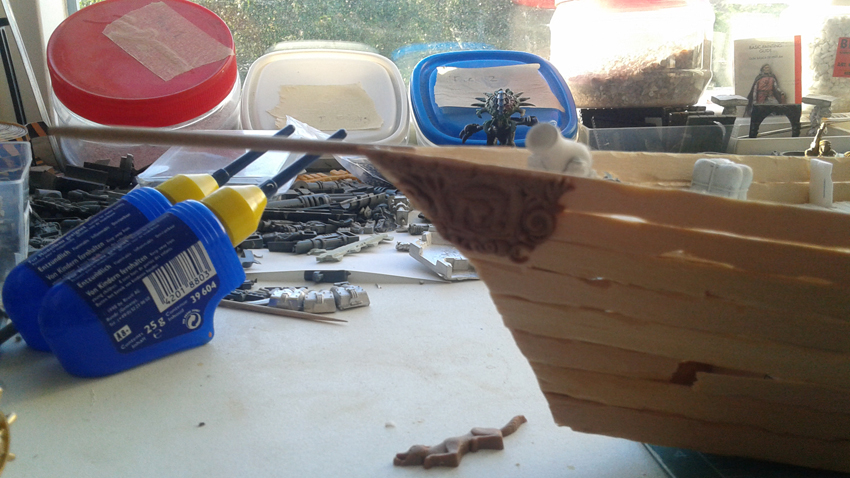
I started with some 3 mm pvc sheet and made a cutout of the bottom of the ship. I had seen some old ships in musea and saw some of the construction drawings of model ships once so I knew ships were made around ribs. I cut the ribs from the same 3 mm pvc. I measured/guessed the hight they needed to be by comparing it to a 28mm model and some educated guessing. Of course I used some measuring utensils to get them all symmetrical.
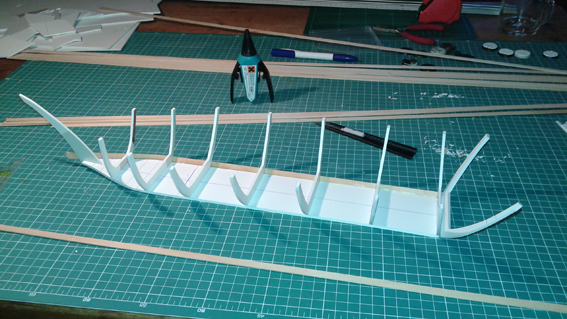
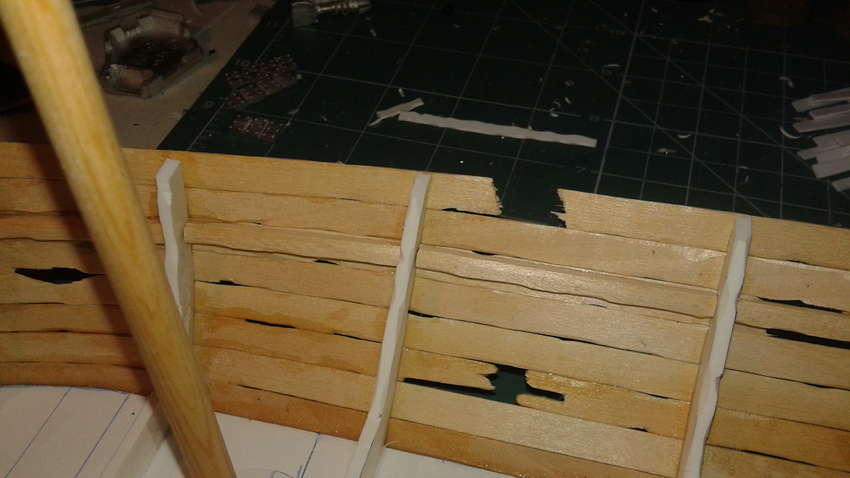
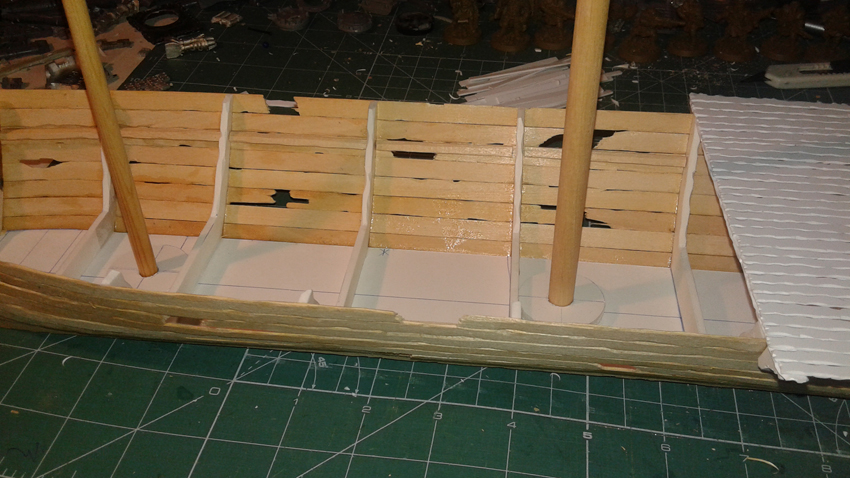
Once the ribs were firmly stuck in place I could begin with the boarding up of the thing. I used strips of balsa wood for this, but I felt the edges were to clean. So I used a sharp knife to cut nudges all along the edges. Once all edges were done the boards could be glued to the ribs. As this would become an undead ship there would be holes here and there. The best way to get these i to simply snap the strip where you want the hole to be. This way you get some nice rough breaks which look pretty natural. I started by glueing the strips from the back of the ship and waited until it was firmly stuck before bending them towards the point, glueing them one rib at a time.
Once stuck, the part of the strip that is longer than the boat can be cut away easily with a sharp knife. I began with the short pieces at the back and then gradually build up going from one side to the other. This way I had more control of the two opposite strips meeting neatly at the point.
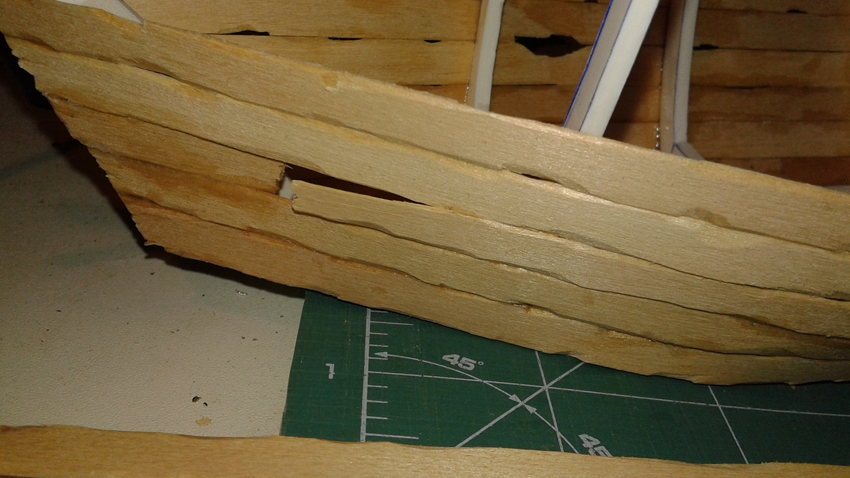
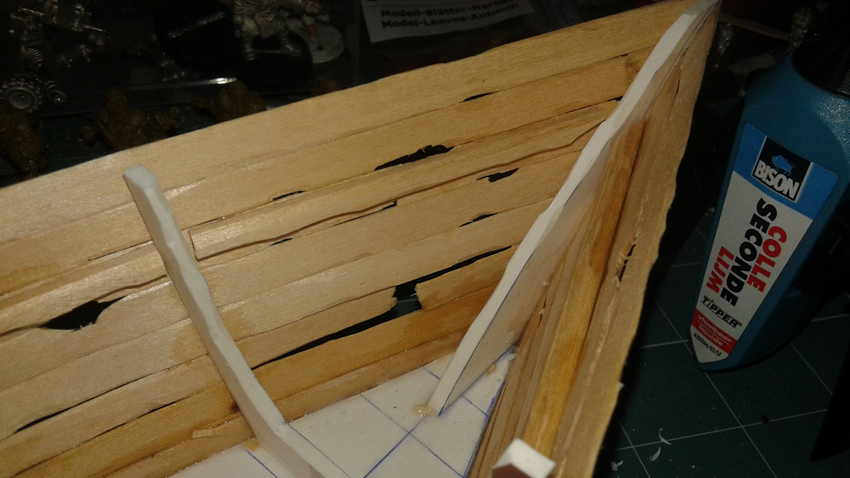
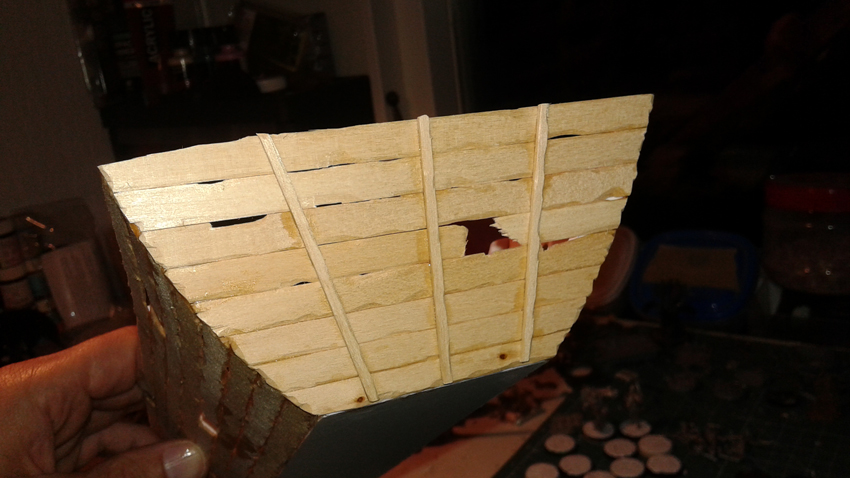
Some small strips of bass wood completed the back. All the balsa and plasticard I used was given the same treatment as the long strips. Nudges were made on every single piece before I glued them in place.
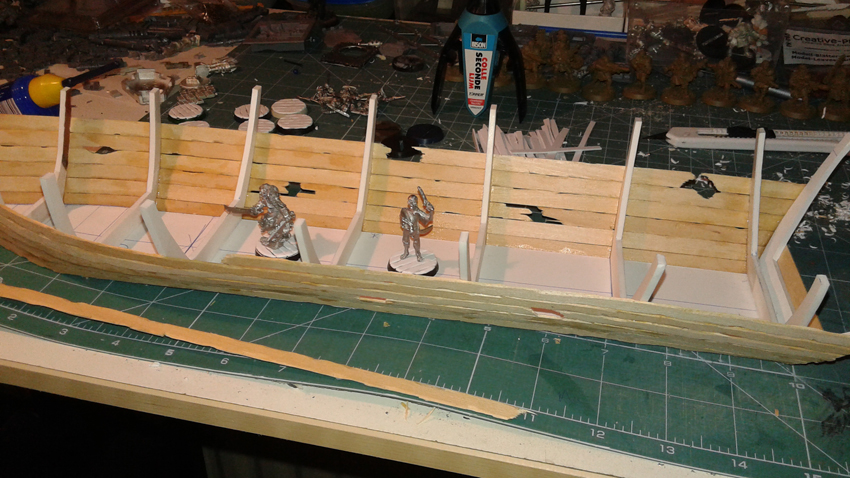
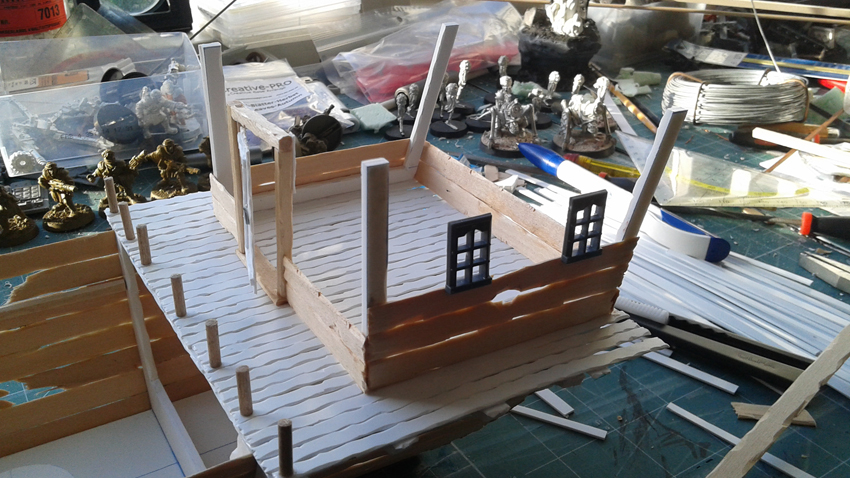
I had some nice round wooden poles which I used as masts. To keep them upright I made a hole in some 5 mm pvc and just pushed them in once the pvc was glued to the bottom of the ship. I did not glue the masts on, but made the holes tight enough so that they would remain firmly upright. I did not want them to be stuck yet so that I could remove them when building the rest of the ship. In the first picture you can clearly see the lines I used to indicate the exact center of the bottom and the part where the mast would be in. This helps where to place the part.

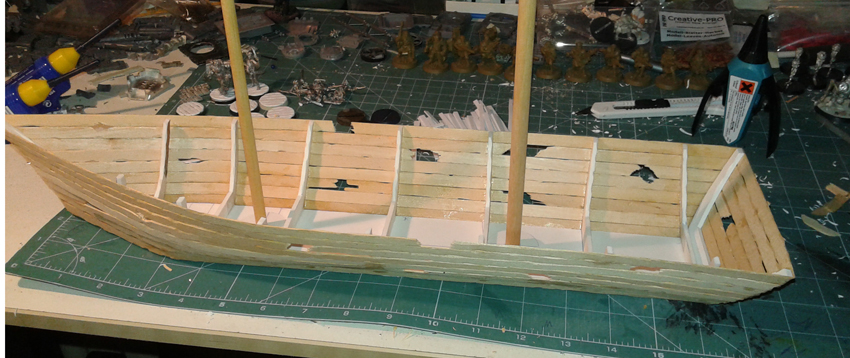
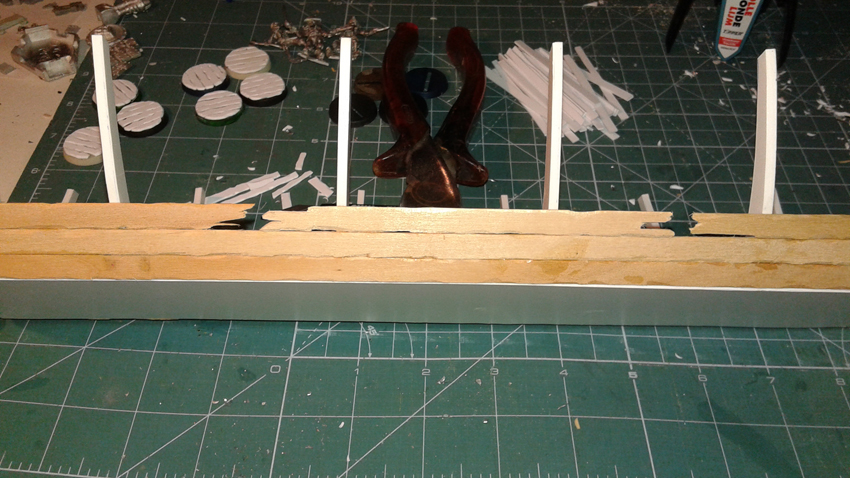
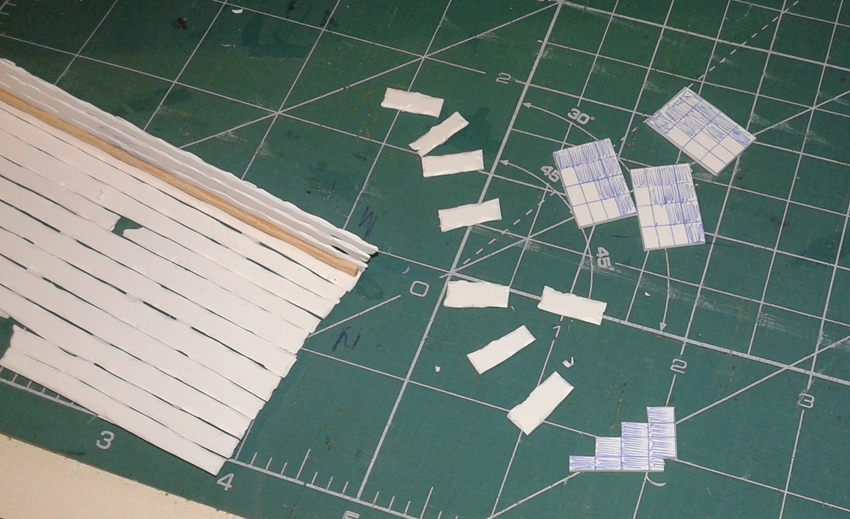
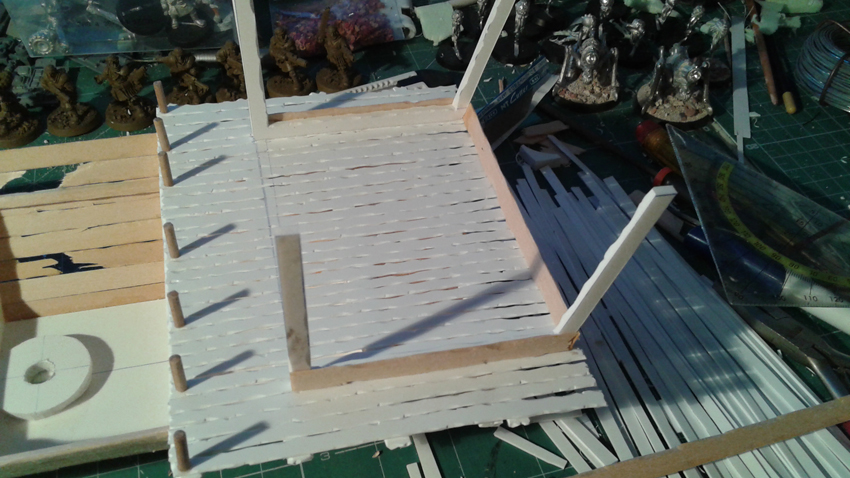
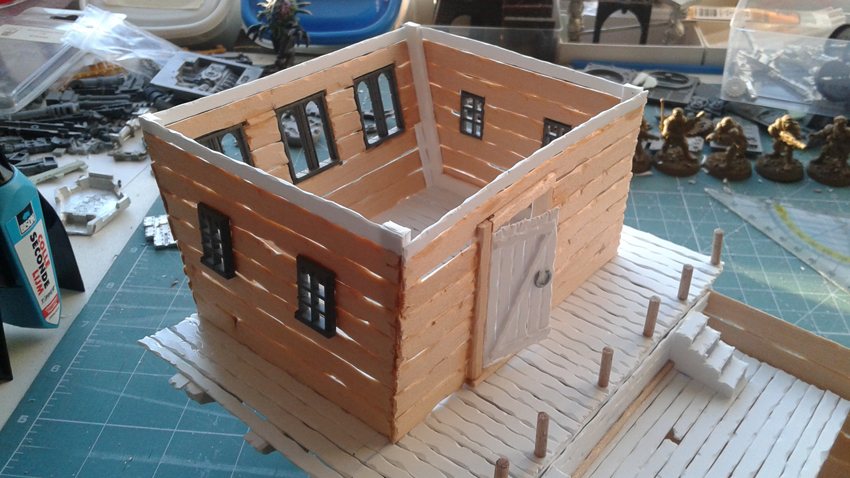
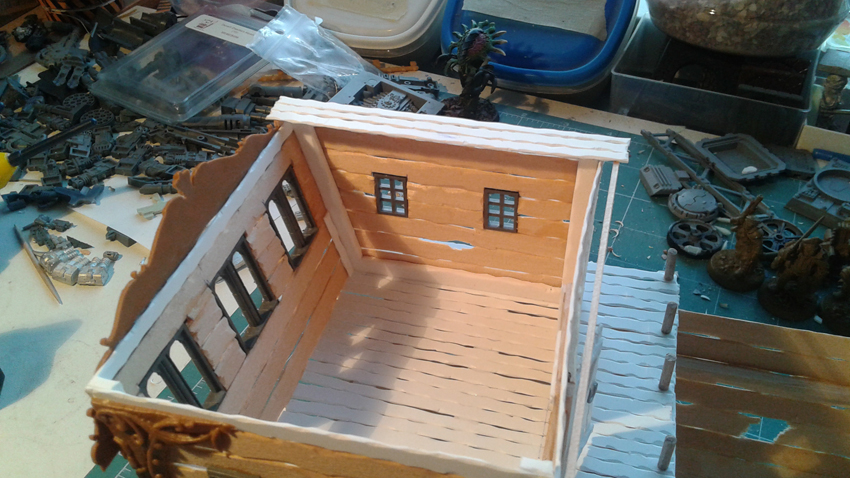
So far, so good. Now I neede to think on how I would get the decking and ships cabin on there. I decided to start with the cabin since I wanted some steps leading down from there onto the deck. I simply started by cutting 1 mm plasticard sheets into ‘planks’ (all of them ‘nudged’ before glueing). I did not use a ruler because I did not want these planks to be too neatly cut. This would give the whole thing a more hand-build feeling. The planks were then put onto the back of the ship to form a deck which would be the base on where the cabin would be. This deck was made wider then the ships hull itself and has some overhang at the back. I made it deep enough to make a cabin, but also to keep some room before the cabin to place models. I gradually placed the deck planks, dry fitting them before glueing them.

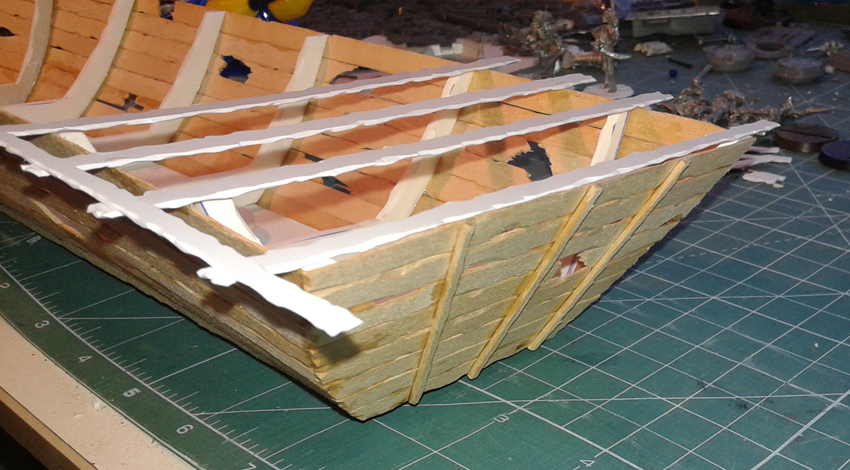
To finish it off I made some ornamental parts from 5 mm pvc and glued them under the overhanging part of the deck.
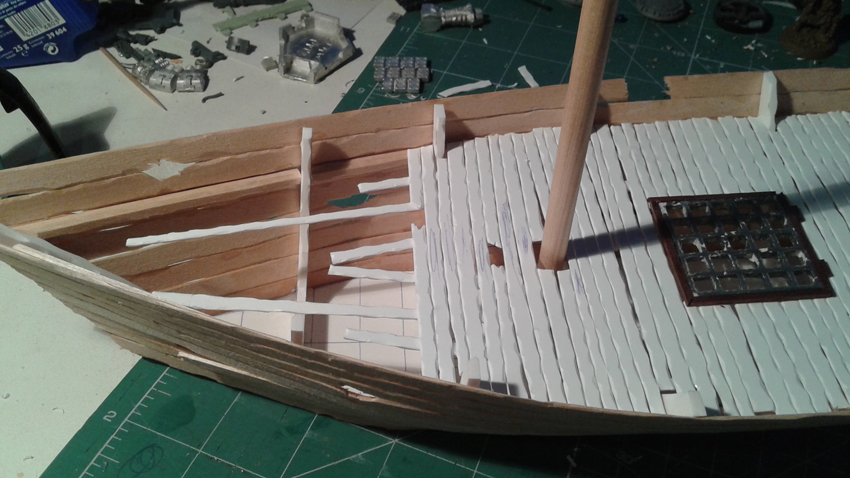
Since I wanted to build most of the ship before I would start to paint it I had to consider how I would make the rest of the decking. The deck for the cabin was already in place, but I needed to paint the area under it as well since there are holes in the hull which you can see through. I already knew I would use a black undercoat on the whole ship so I had to make a decision: I could now spray the part under the deck and just leave it at that, or I could opt for some extra work by making the rest of the deck detachable from the hull. This would give me the room I needed to paint all the parts of the inside under the deck later on and would give me the opportunity to make some extra stuff under the deck as well. What about some zombies crawling around there…
I used a small strip of bals wood along the inner edges of the hull that would hold the deck plates. Since the masts would be sticking out I decided to make three separate parts of the deck to fit around them. All the decking is made up of 1 mm plasticard strips I again cut from sheets and nudged along the edges. Under the decking are strips to keep them together. The part at the back got some extra planks to close off the gap between that part of the deck and the higher part where the cabin would come. To strengthen this I used another small strip of balsa to support the first upright strip.

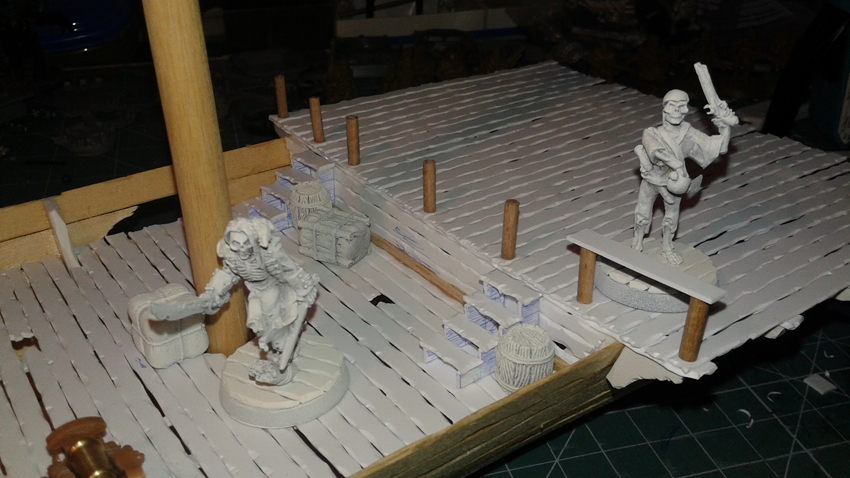
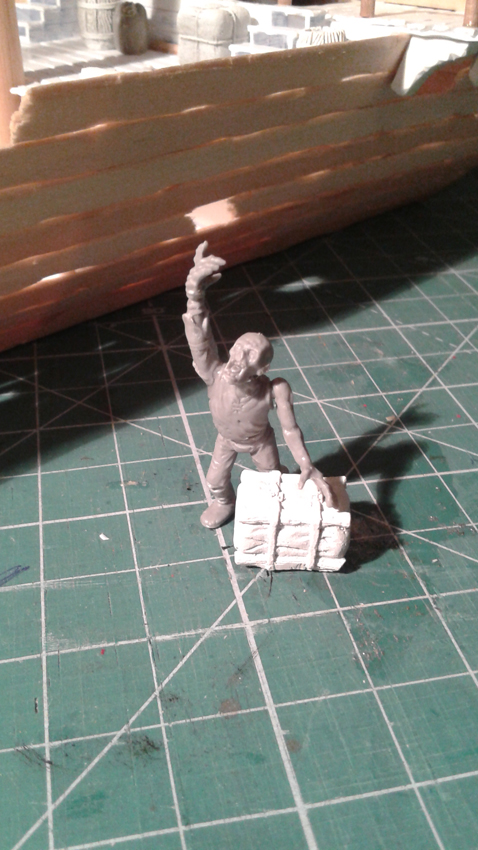
I wanted some steps to connect the two levels of decking. I measured how high these needed to be and started to draw the sides of these steps on some plasticard. Once the steps were glued on they could be fitted on the deck. I only glued them on the lower part of the deck so that the deck could still be removed with the stairs on them. Once the whole ship would be done I wanted to add some crates and such. I found some nice ones at http://www.sceneryworkshop.nl. Every once in a while I would place these and some miniatures on the ship to see how things were looking at that point. (Like a happy child with some new toys…) I also made some extra railing to try out. Round wooden sticks and plasticard would do the trick.
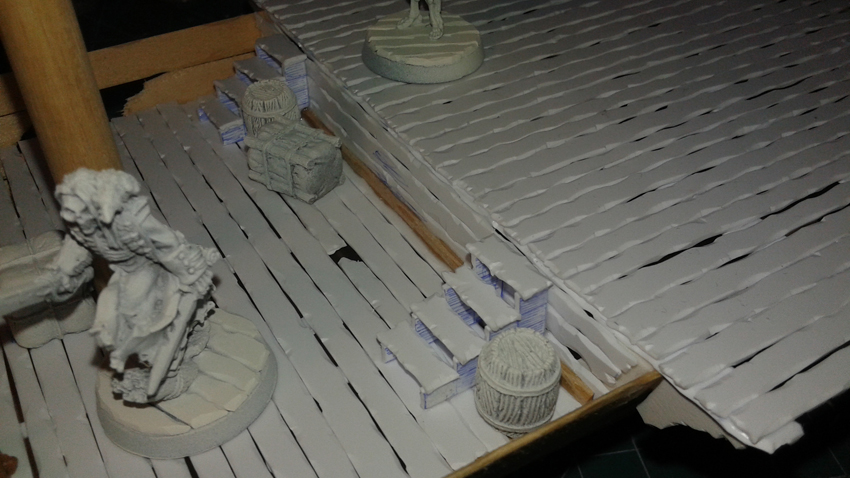
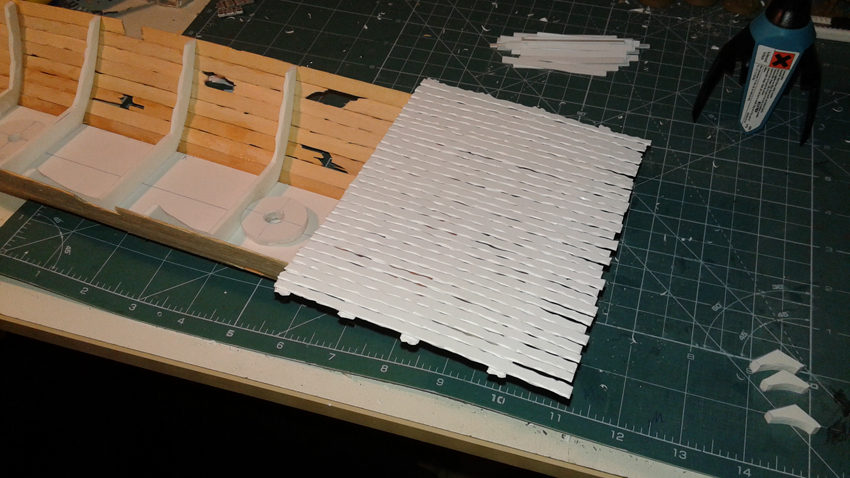
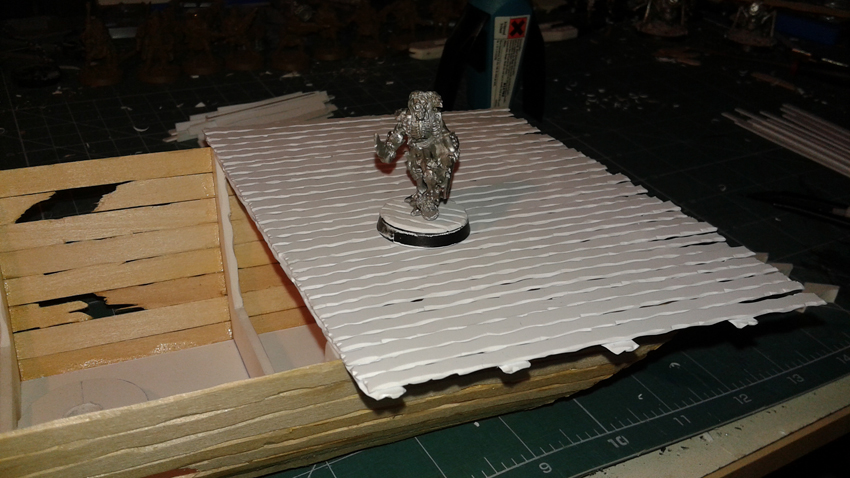
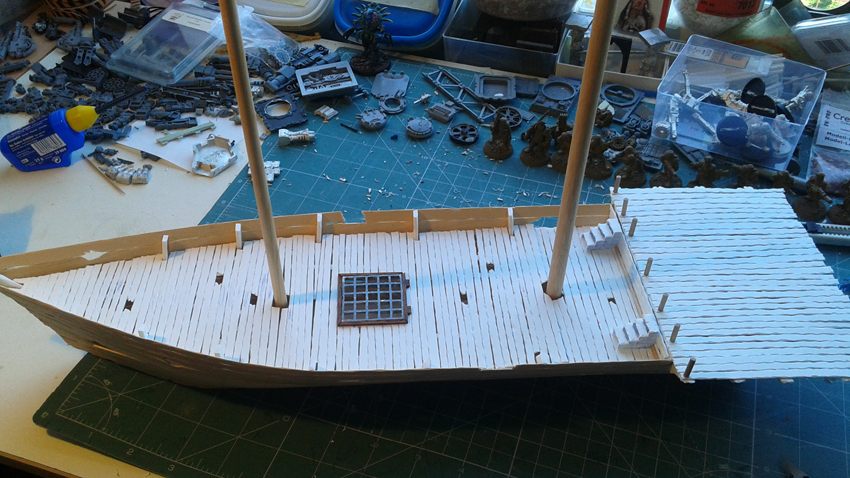
The following pictures show the gradual build up of the decking. Some patience and a curse here and there were helpful during this part…. The middle part of the deck got a grate in it. I found it in my bit box. With some wooden strips on the edges it was perfect for the job and would be a perfect spot for some zombies.

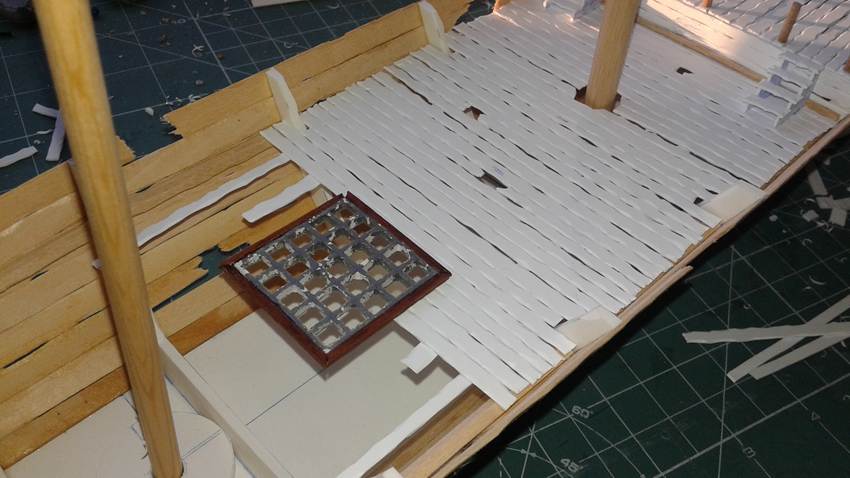
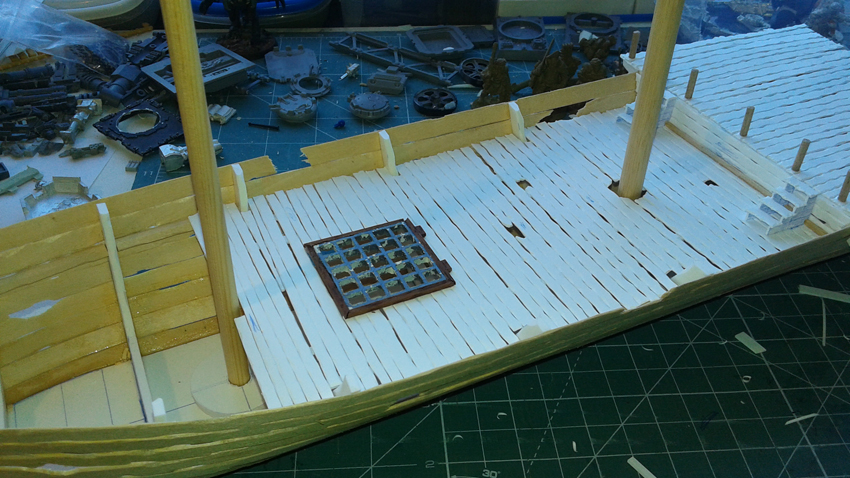
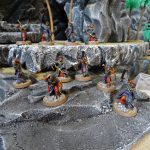
I also made holes in the deck for that good old undead feeling. By now the Black Scorpion models had arrived and I was eager to see all of them on the ship.

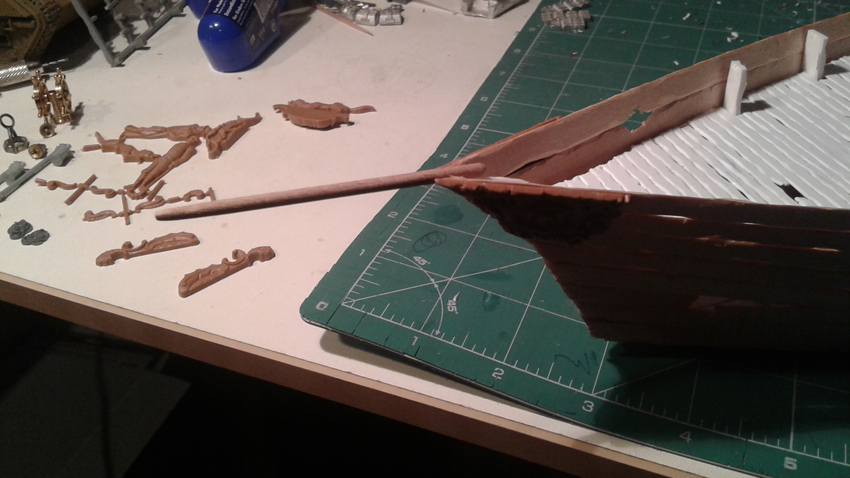
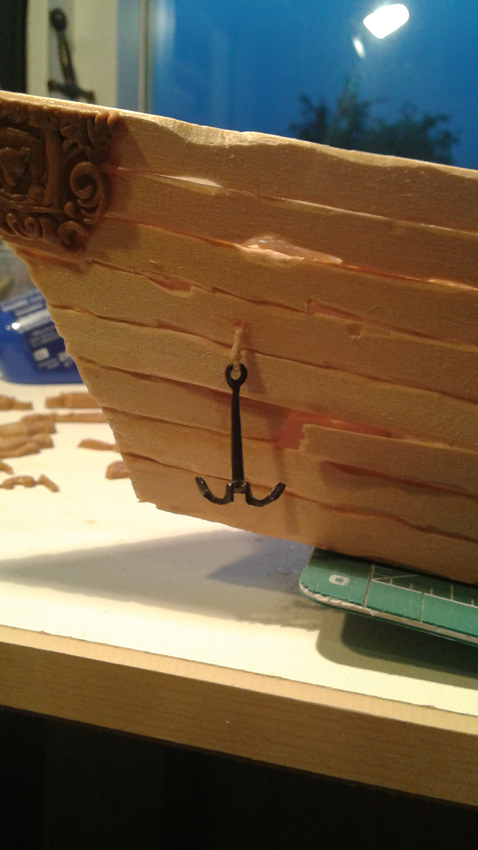
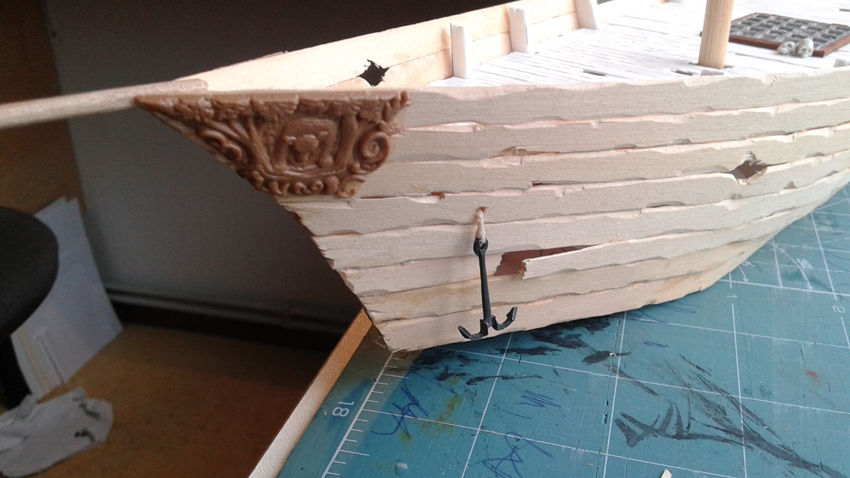
Now here are the first bits I found at Shamrock. Some ornamental woodworking. They fit perfectly on the point (quite by accident I might add).
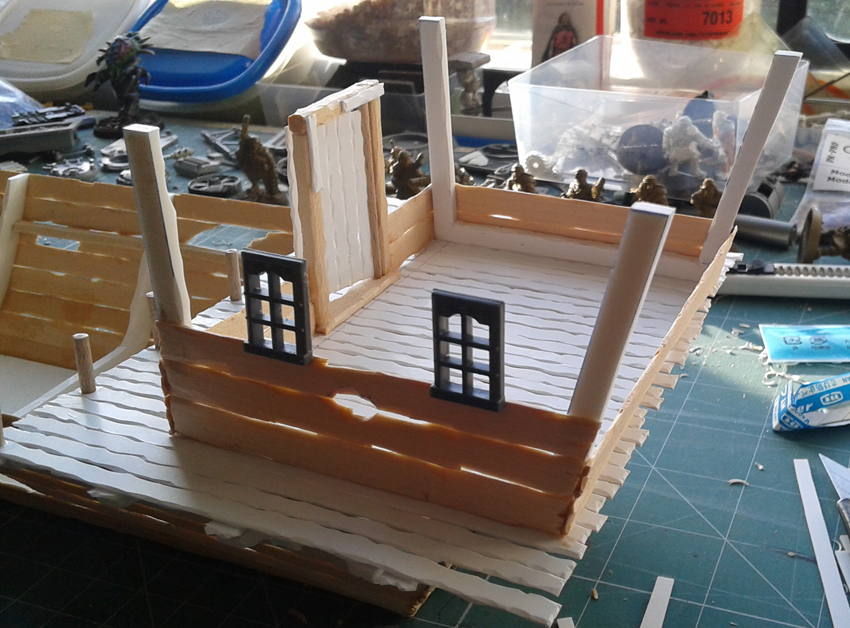
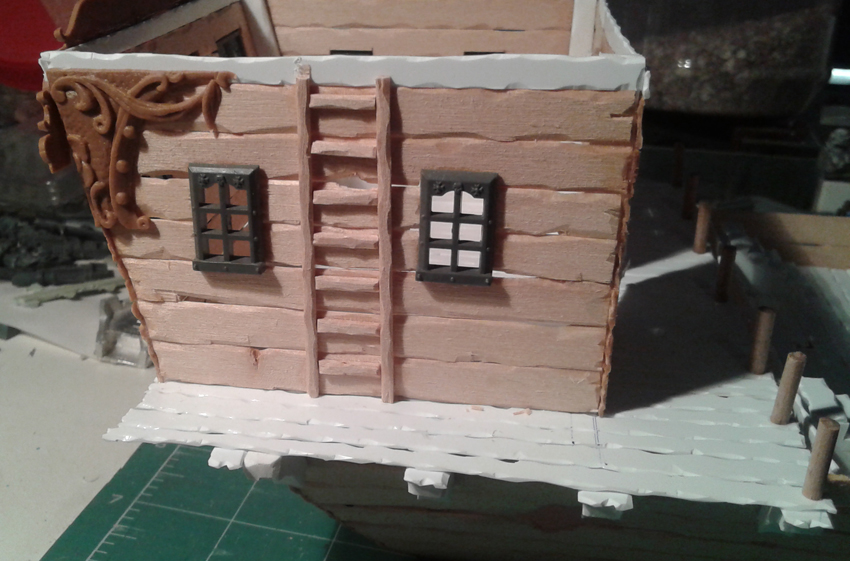
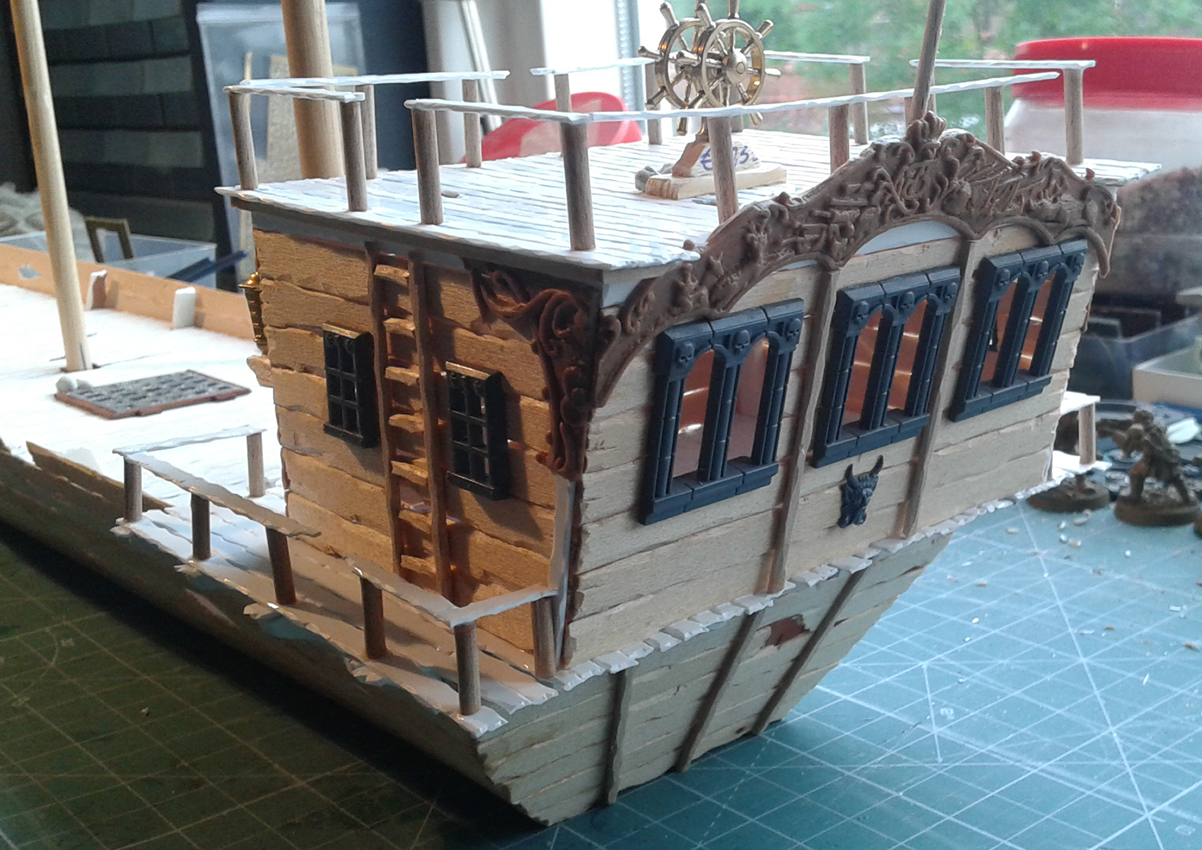
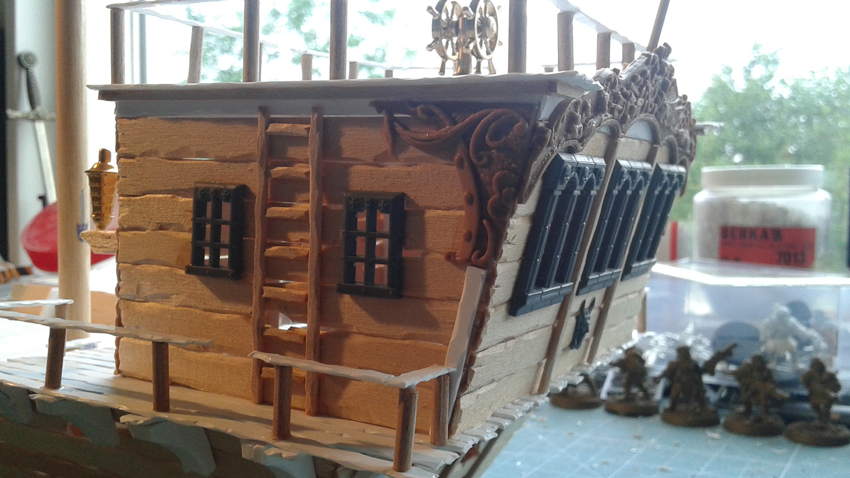
On to the cabin. I used some 3 mm pvc to make the framework for the cabin. I would use the same strips of balsa wood I used on the hull and gradually build it from the bottom up.

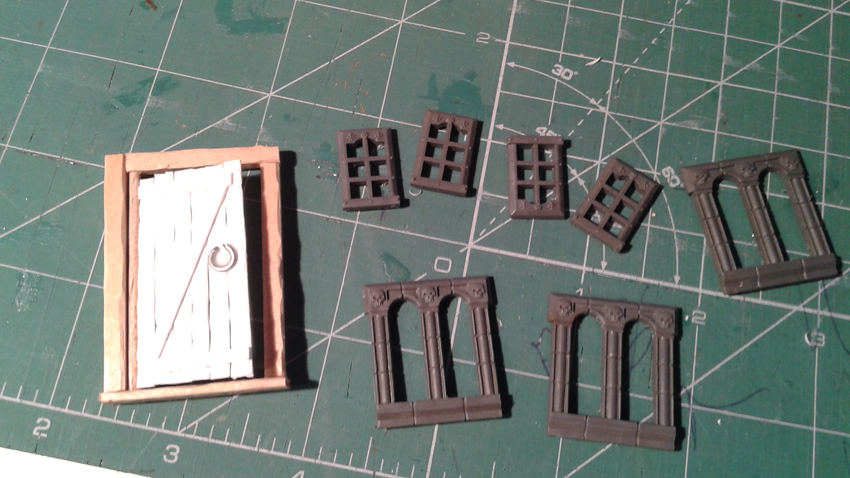
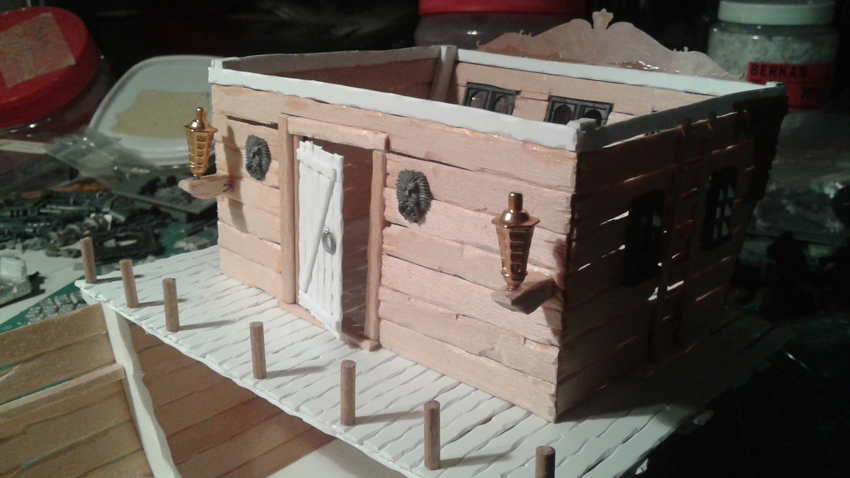
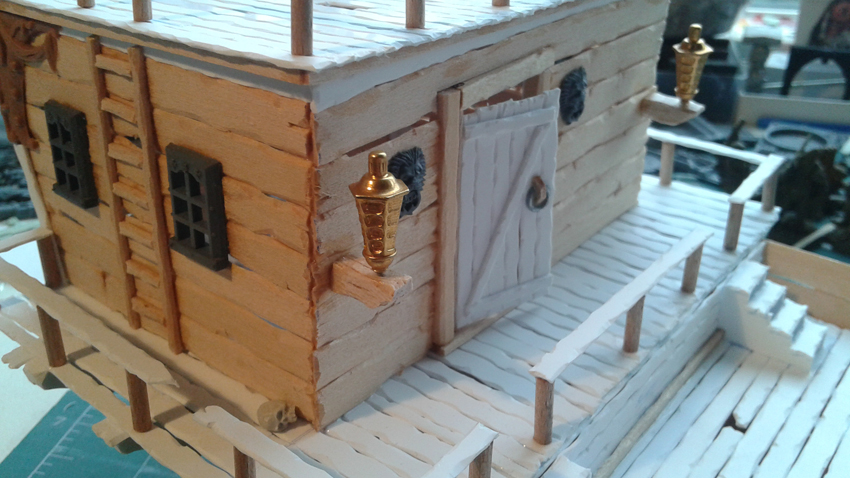
I found some windows from the old Mordheim buildings which would fit perfectly. The door is scratch build. I made this first so I could see where it would be placed before making the walls for the cabin.
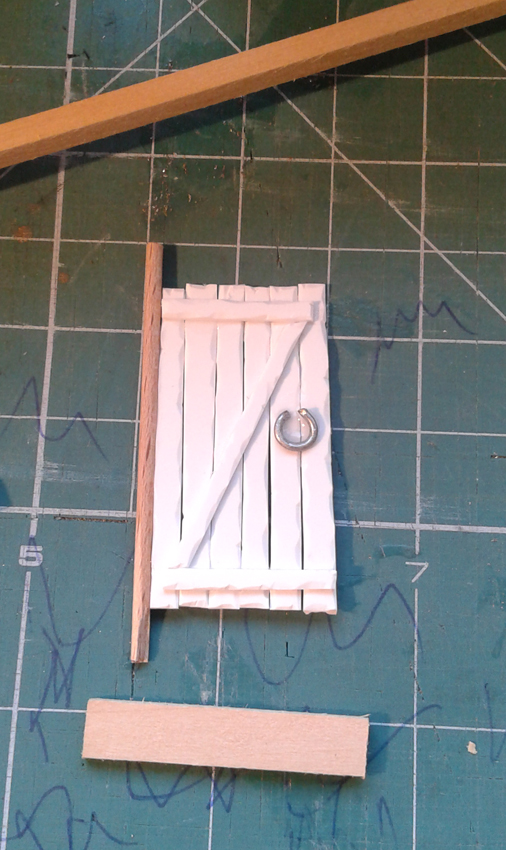
Once the door was in place (I tried to make it a working door, but somehow glue made an end to this illusion) I could begin building up the walls.
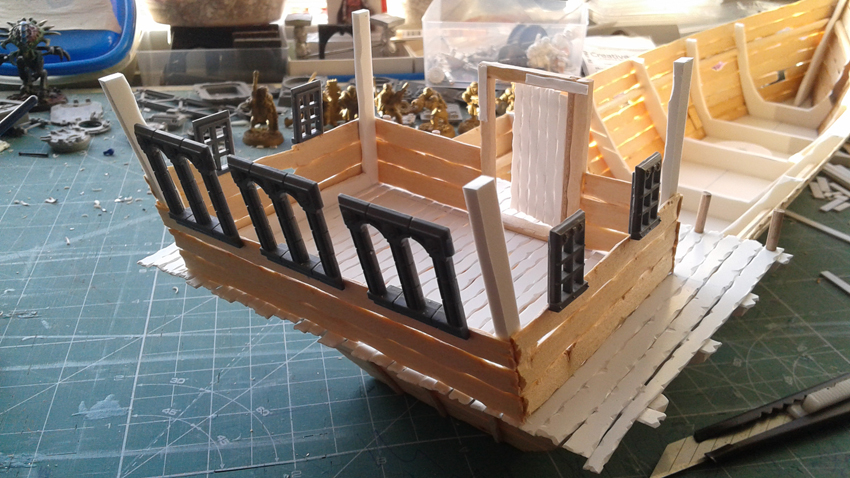

And once again some perfectly fitting ornaments found at the modeling shop.

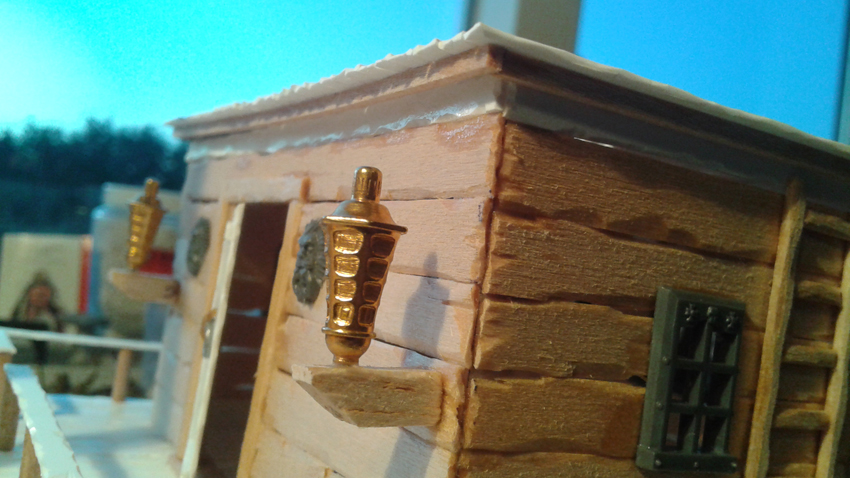
Small rods of balsa wood make up the ladders which will eventually lead to the roof of the cabin. Some plastic figure heads from the Mordheim box made perfect ornaments on either side of the door and the lanterns found at the modeling shop I glued on some balsa wood I cut into shape. The lanterns themselves had a small hole drilled in the bottom which were ideal to stick in some rod which in turn I stuck into the balsa wood to make them a bit more stable. Some good old trusted glue finished it off.

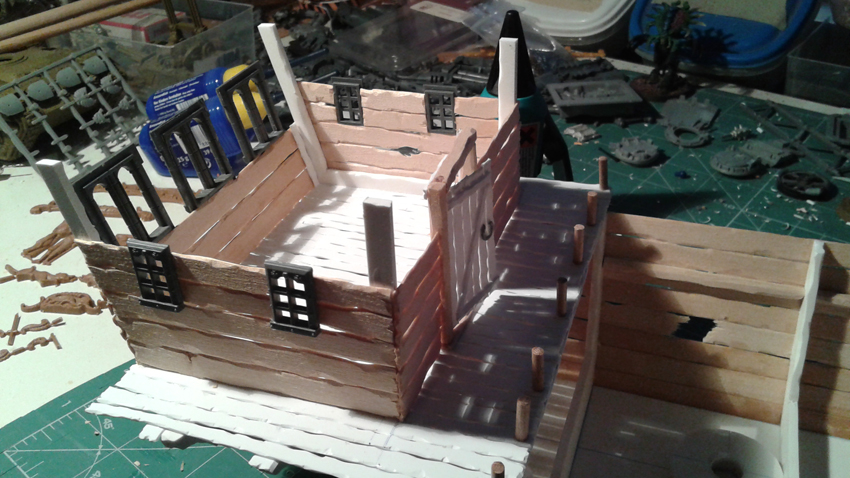
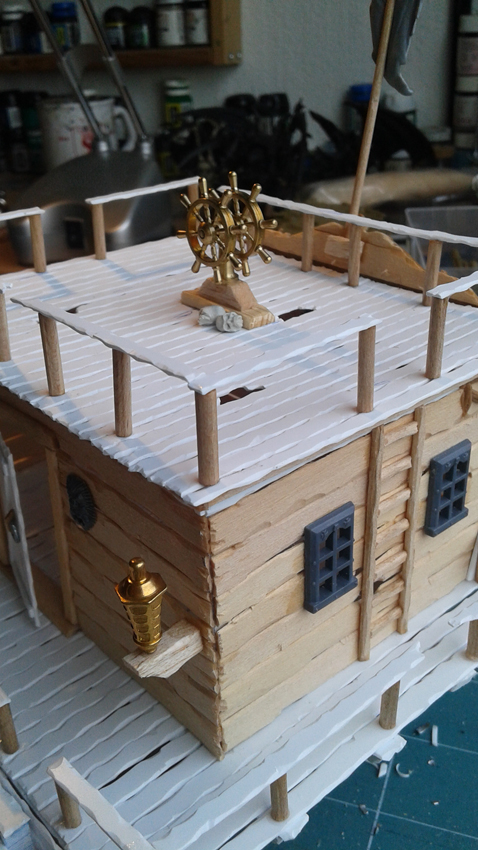
The roof of the cabin will also be removable so I can make some nice furniture for the inside and make it accessible when in a game. Again, it will also help me painting the whole damn thing later on. I stuck to the trusted technique of hand cut strips of plasticard and patience. I had to work around the ornament at the back, so regularly try outs of removing and placing it all back were needed at this stage.
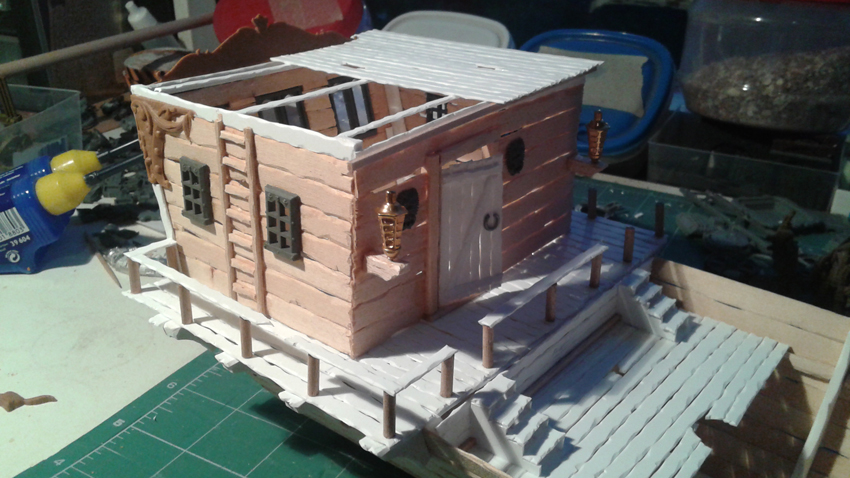


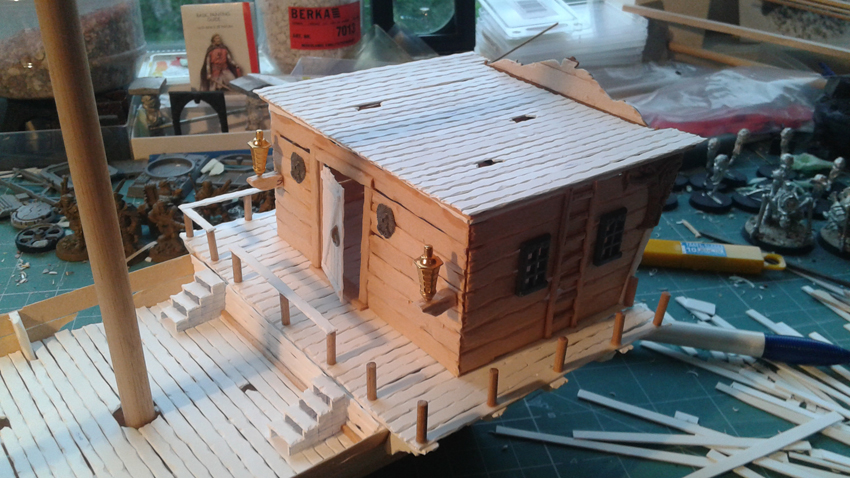
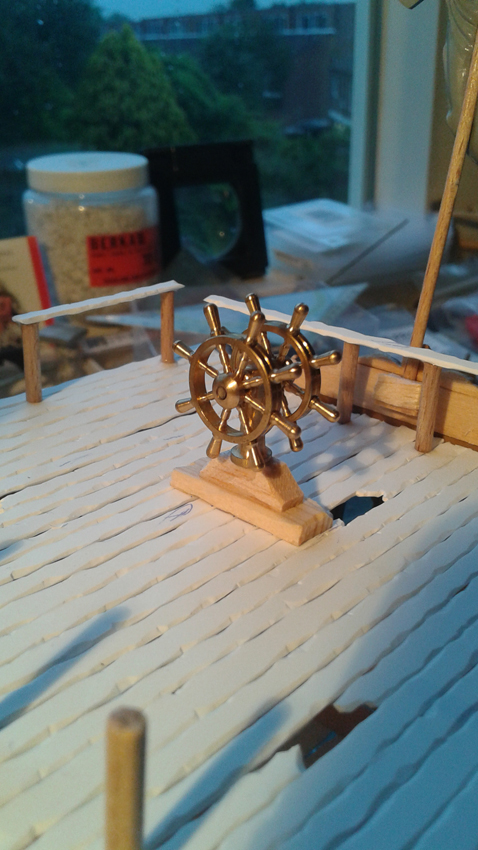
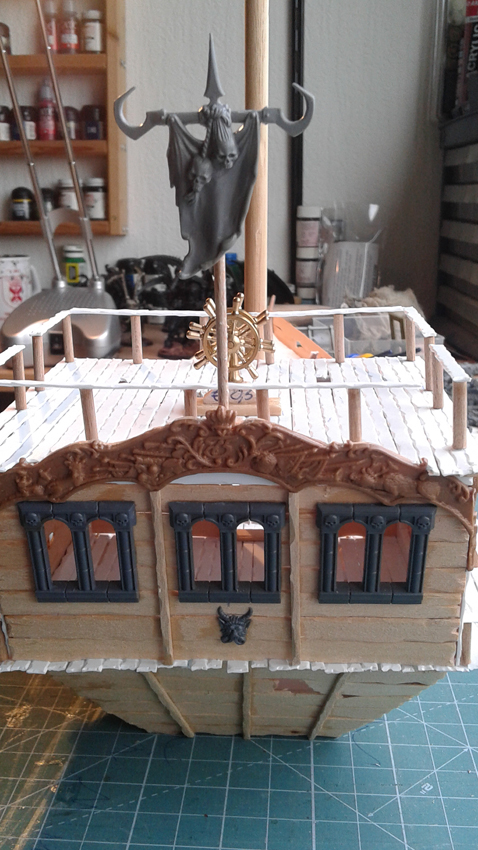
Once the roof was done it was time to give the ship some more detailing. I was pleased with the general structure and the size of the ship, now it just needed some better ‘looks’. An old orc banner combined with a piece of rod, the steering wheel I found at Shamrock shop combined with some hand cut balsa wood and some railing would do the trick for starters.
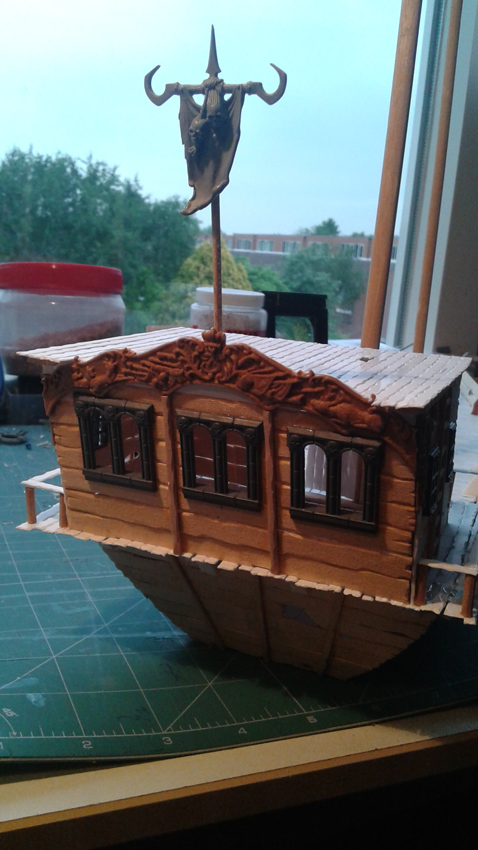
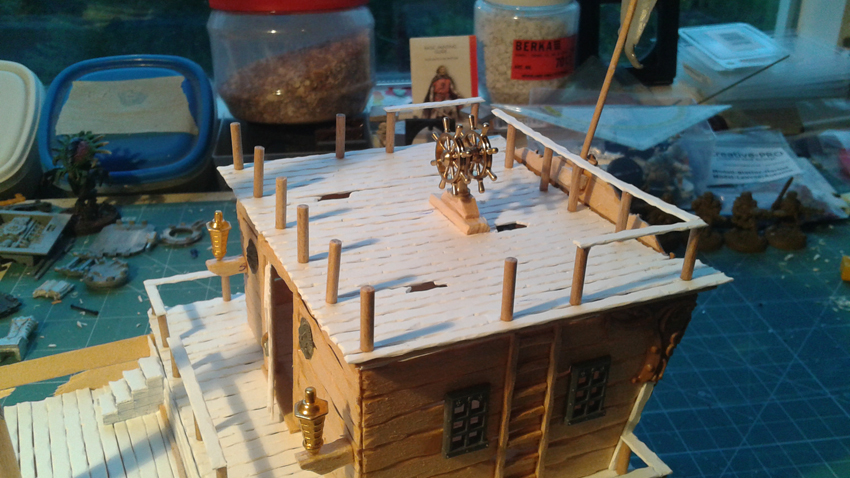

Some extra work on the point. A simple wooden rod filed to bit of a point at the end fit neatly. The anchors I found at the model shop were tied to some string. Once a small hole was drilled in the hull I pulled the string through it and glued the other end to the inside of the hull.
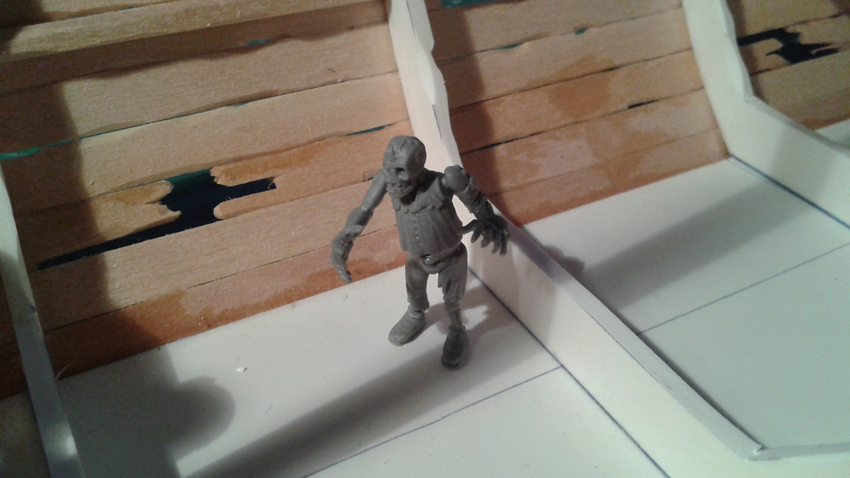
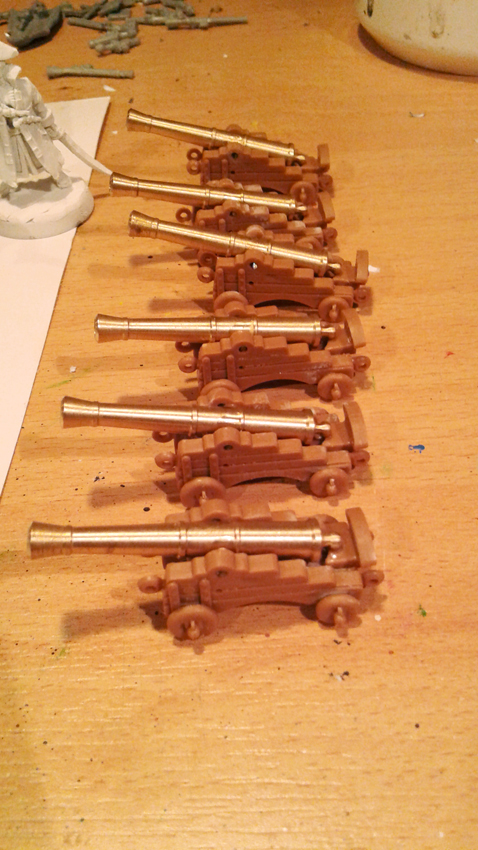
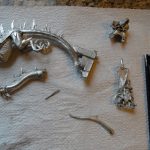
Some skulls here and there would liven up the place a bit. And I started building two zombies who would be put in the brig. An old box of multi-part plastic GW zombies kindly provided the parts for these. The cannons are plastic multi part kits combined with copper barrels all found at Shamrock.

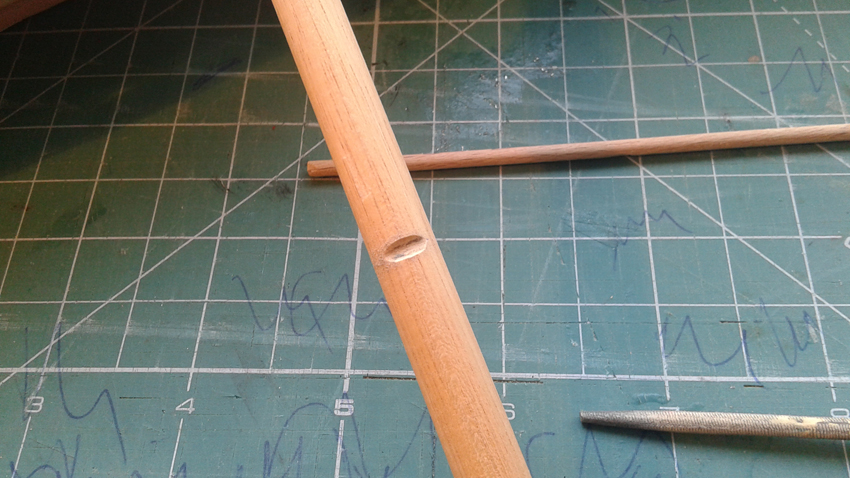
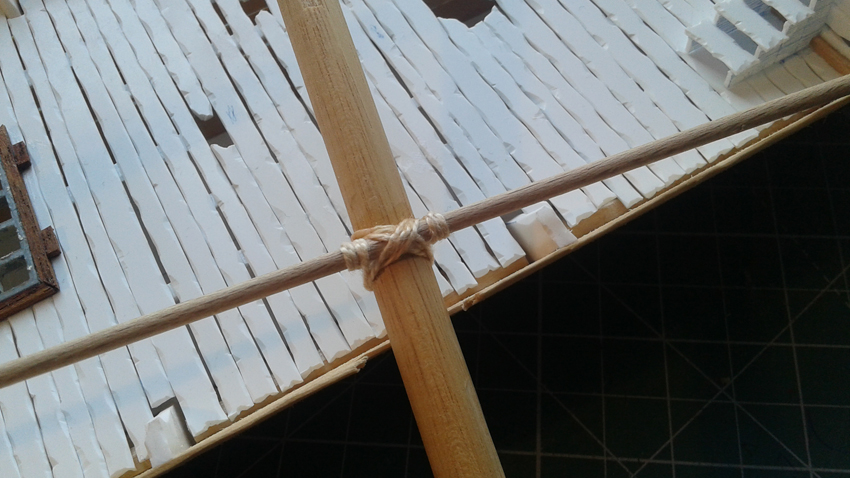
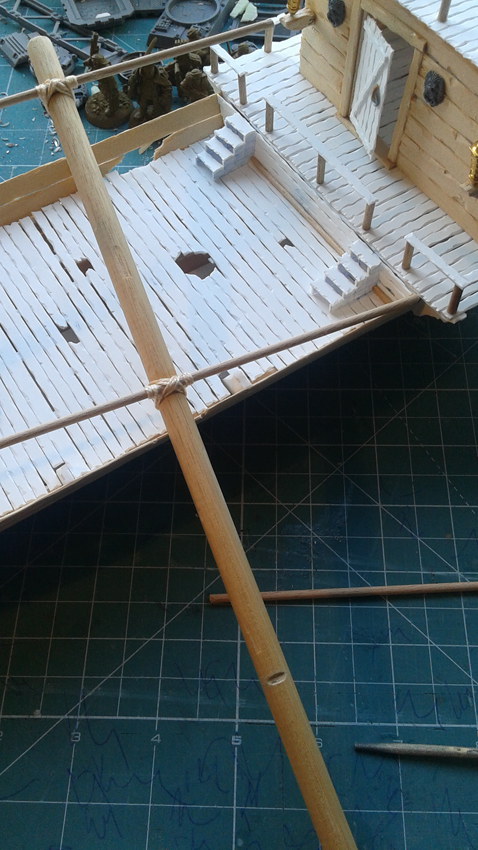
The masts needed some more work. Some smaller wooden rods needed to be fixed in place where I could eventually attache the sails. In order to get them properly fixed I used a small file to make the smaller partly rod fit into the mast. I then glued it and waited for it to dry. Next I tied some string around it and used superglue to stick the end of it together so there would not be any ugly knots to keep it together.
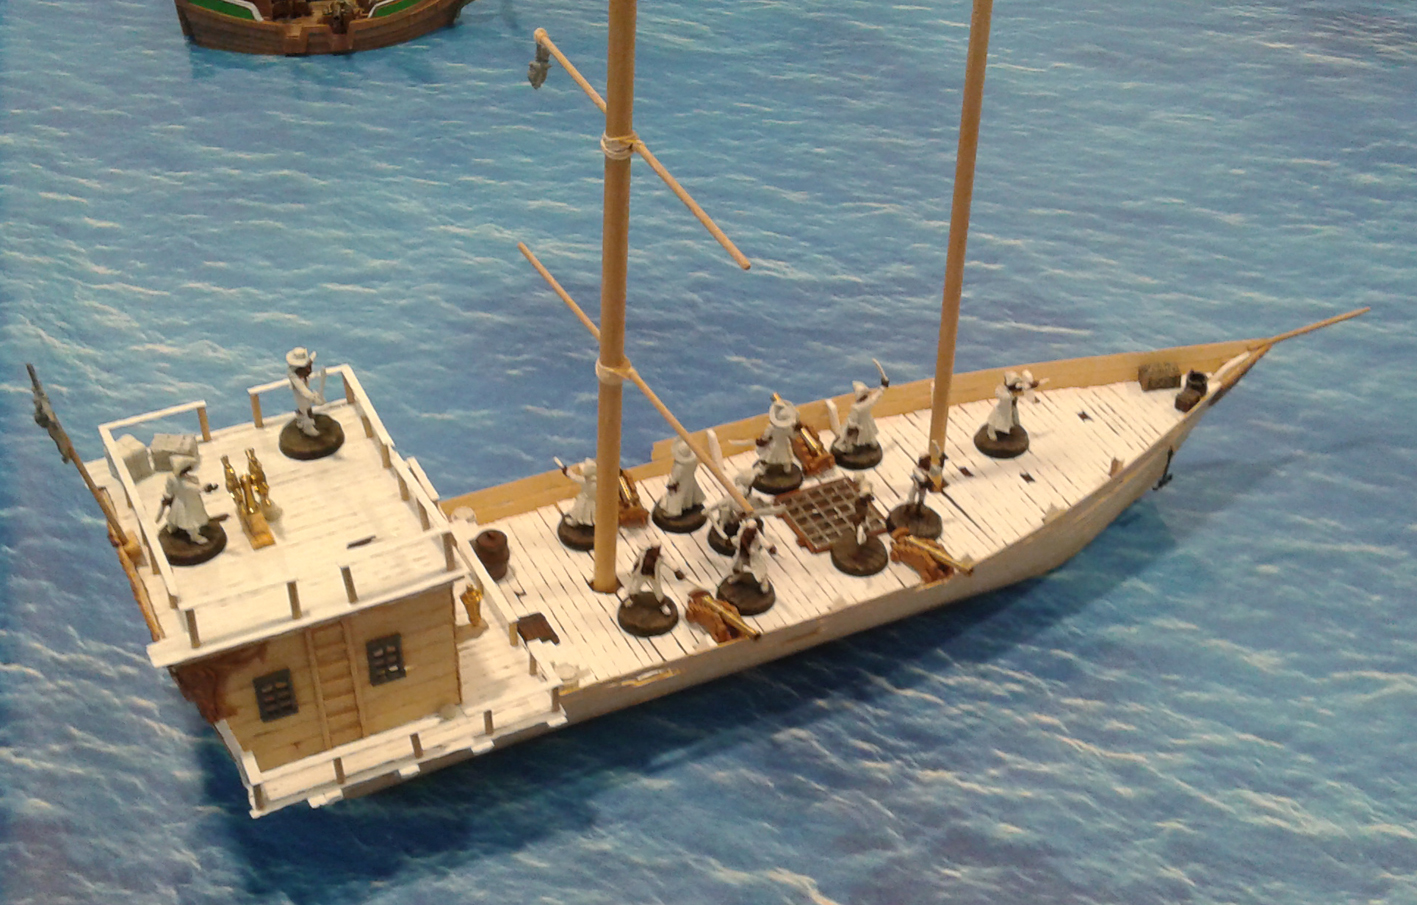
Well, as I said at the beginning, the ship is far from finished. I still needs a lot of more work. The masts must be completed, sails and rigging attached. The brig with the zombies needs some more work and then there is the inside of the cabin. I plan to make a table with maps and such on it. I also have some more ideas for more detailing. But I started this whole project because of an invitation for a game… My ship not finished, my crew unpainted, but in high spirit I set out to the gaming club. I even dressed up for the evening (as a pirate in case you are wondering) just for fun. And guess what; my ship was sunk within the hour. But what fun we had… harrrrr!

Geweldig, Patrick!
Pingback: Treasure Island | The Desert Scorpions